|
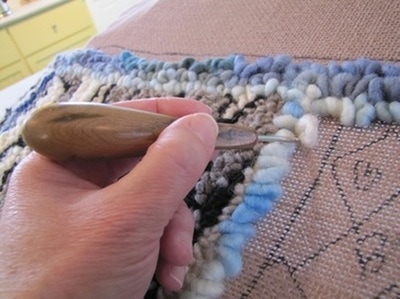
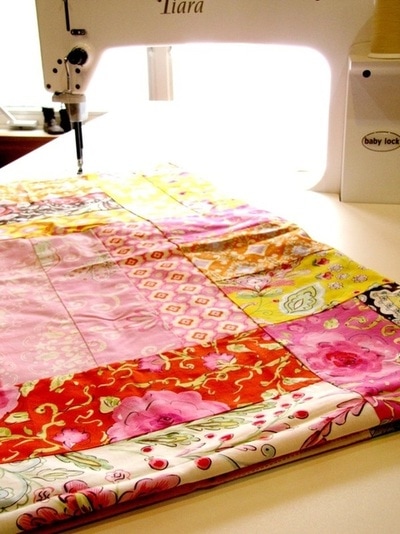
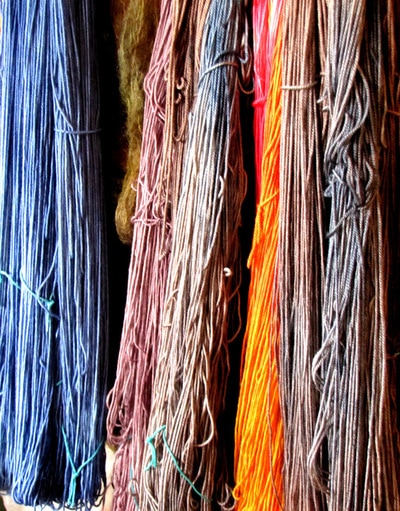
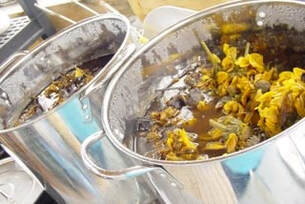
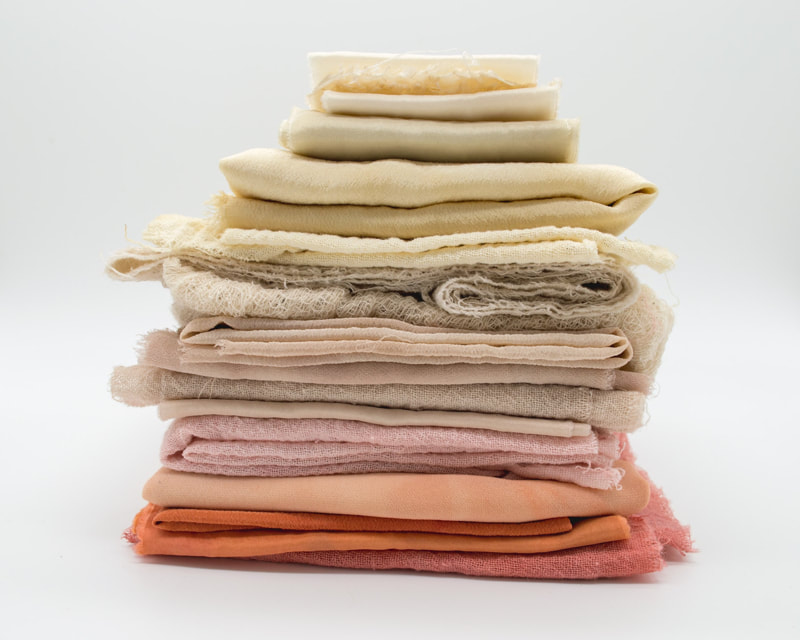
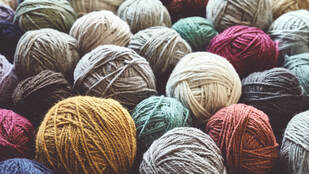
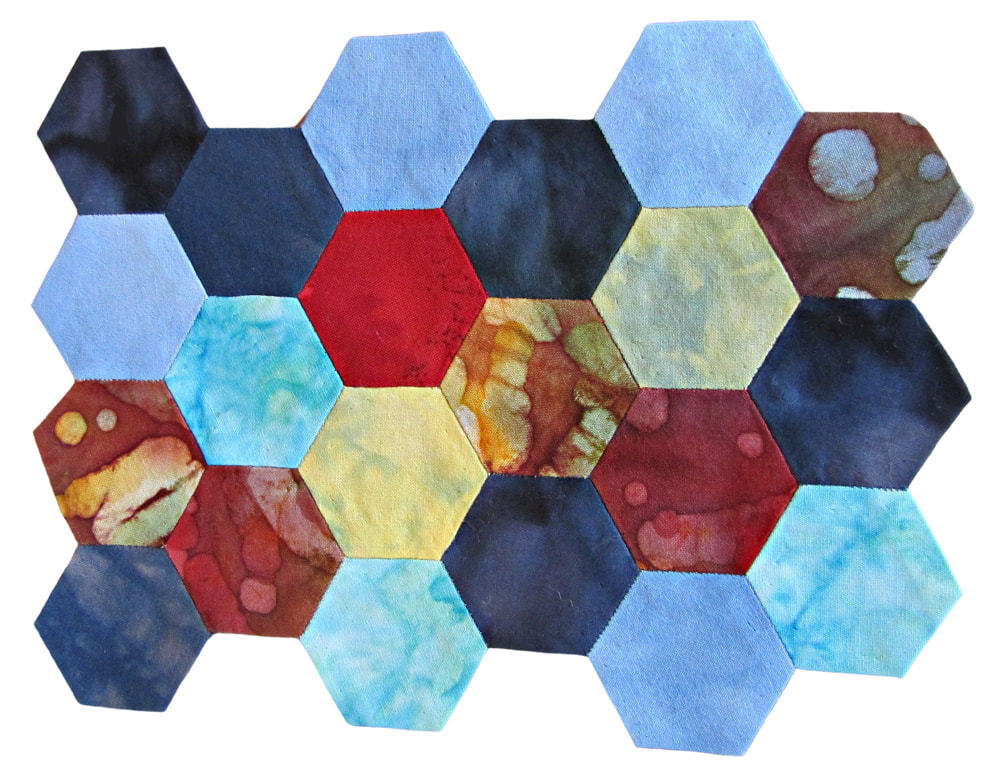
Here's a truly delicious colour exercise that you might just return to again and again. We're going to build a colour palette based on an image. You'll be amazed at how effective (and enjoyable) this little bit of play can be. Ready? Here we go ... 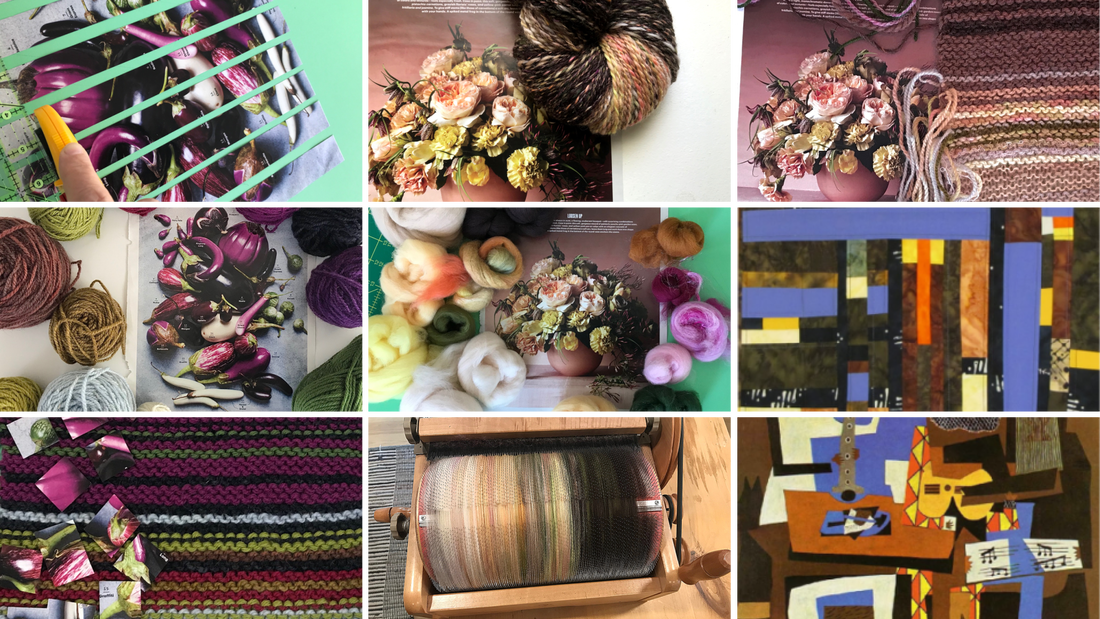 STEP 1 Choose an image that you find interesting. Don't over think it! 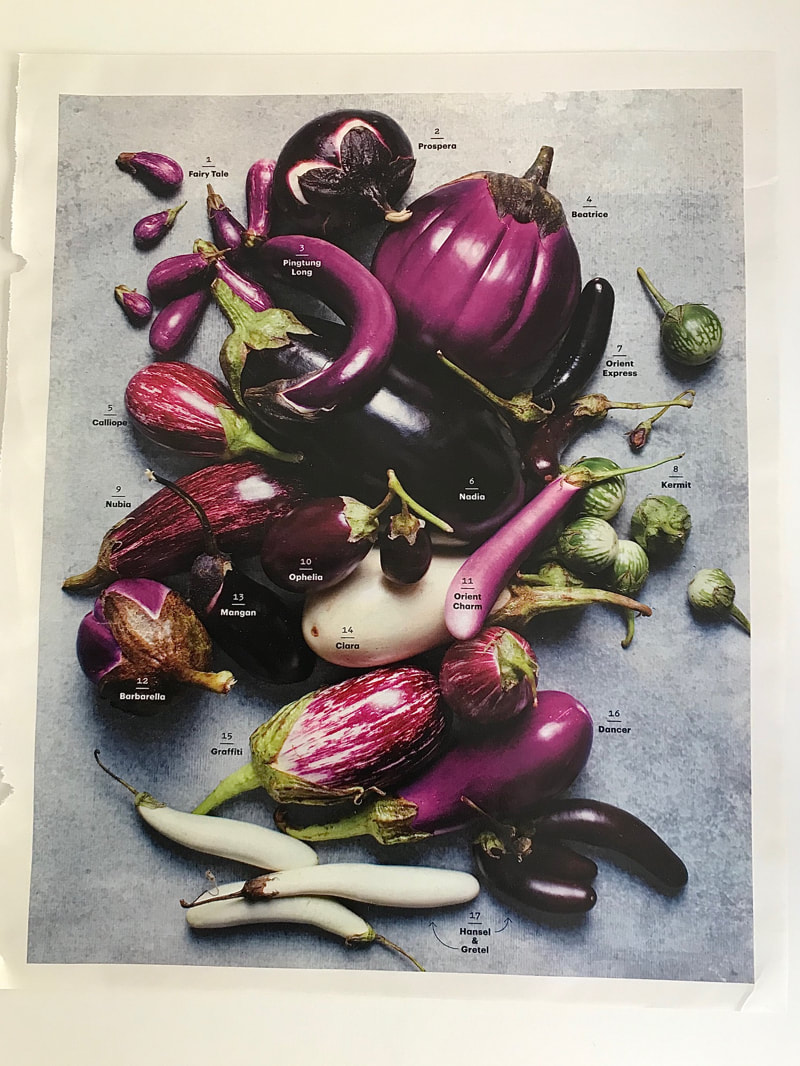 STEP 2 Assign materials to represent each of the colours in your image. You can work this exercise in any medium. Match your image with yarn, fabric, paint etc.. For this demo I'll do some knitting but further on I've created hand spun yarn and a quilt using the same method. This is a terrific palette builder for weavers as well. 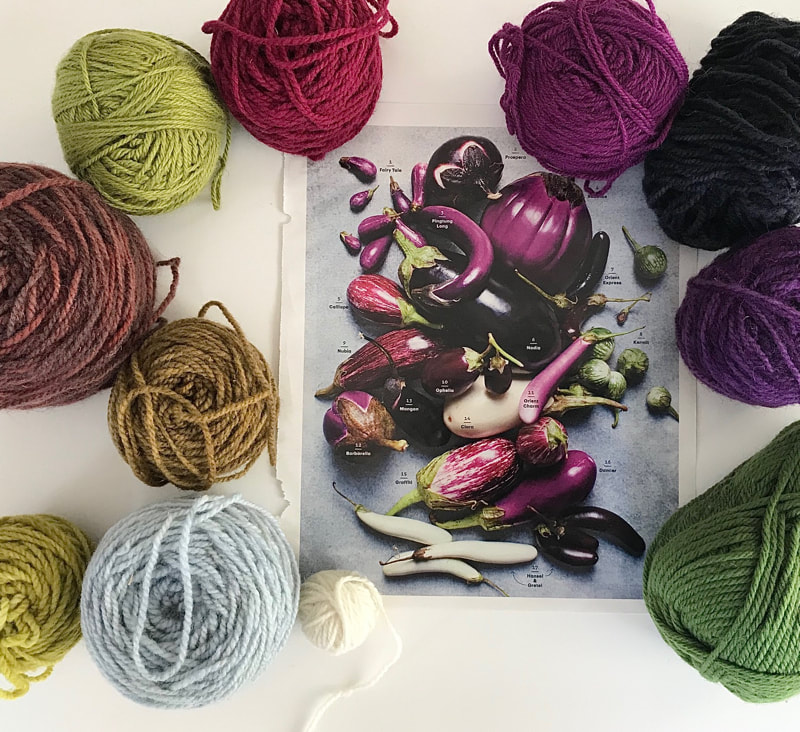 STEP 3 Set your materials aside for a moment and get out your scissors or rotary cutter. We're going to divide the image into 1 inch strips. 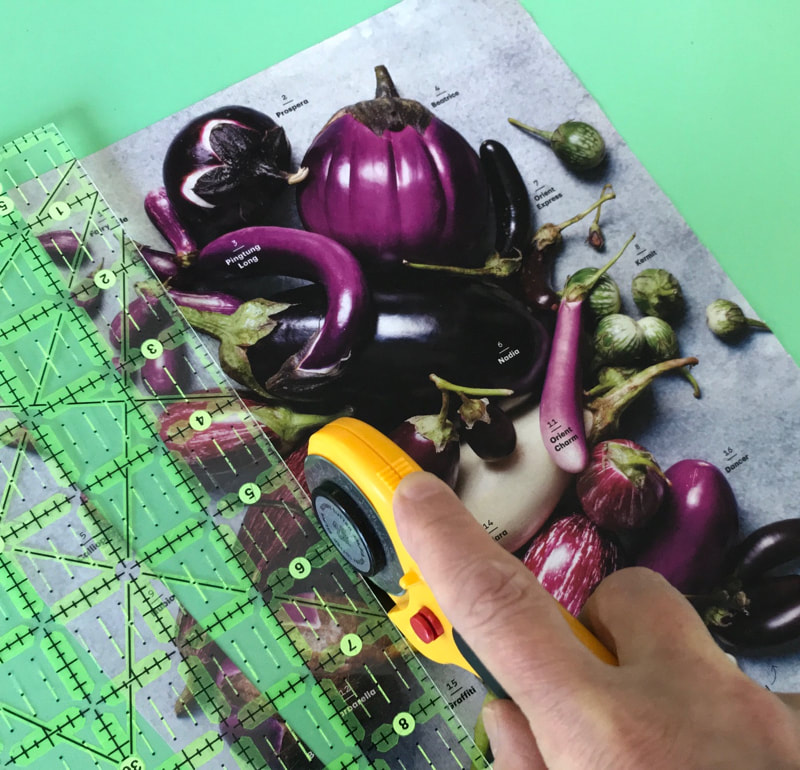 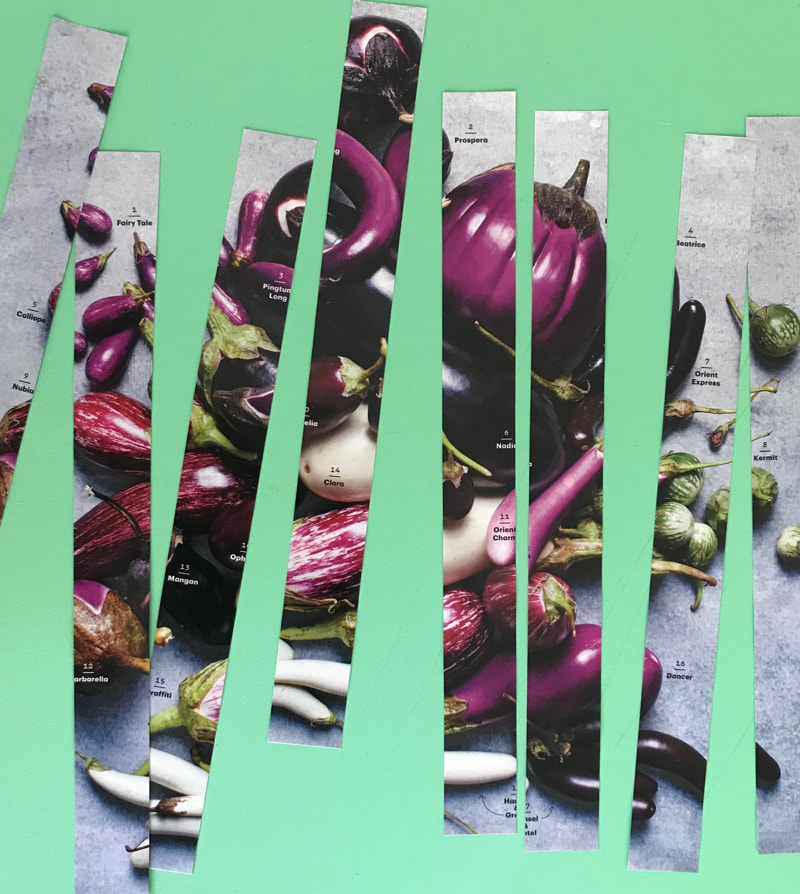 STEP 4 Now cut the long strips that you've made into 1" cubes. 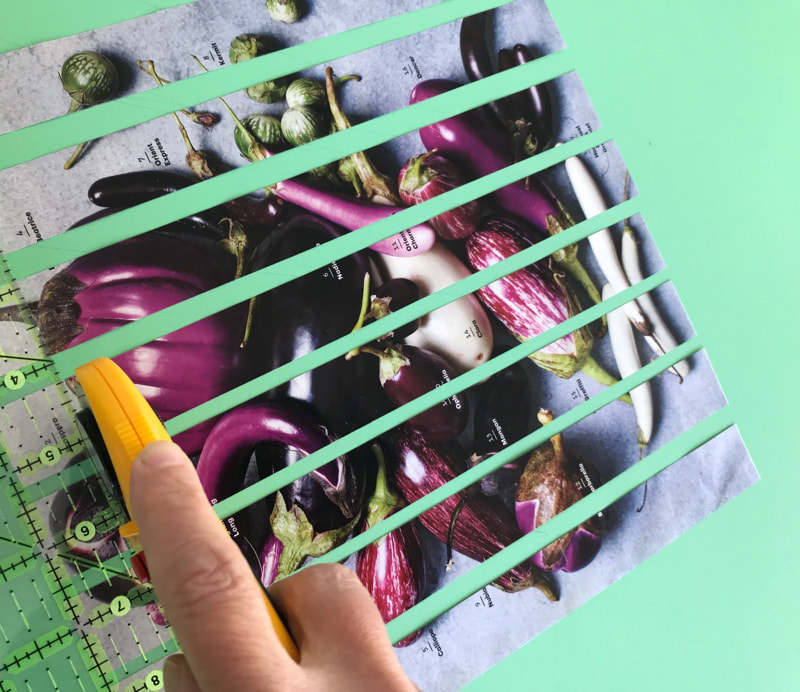 STEP 5 Determine how many squares are represented by a given colour. Squares with multiple colours can be counted in halves or quarters. Using this count assign a percentage to each. You now have a working palette complete with the proportions of each colour to be used. 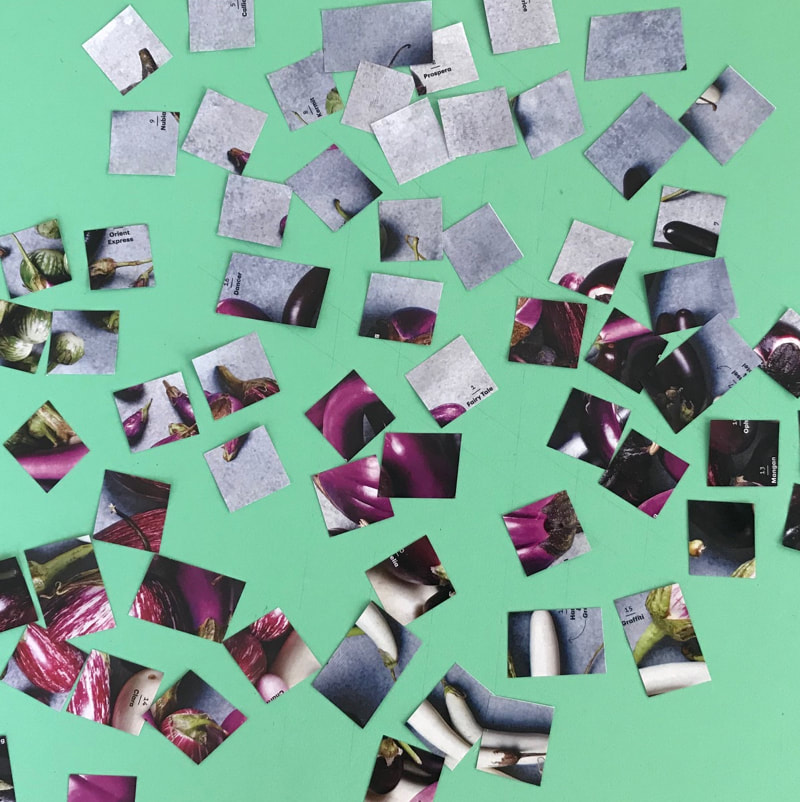 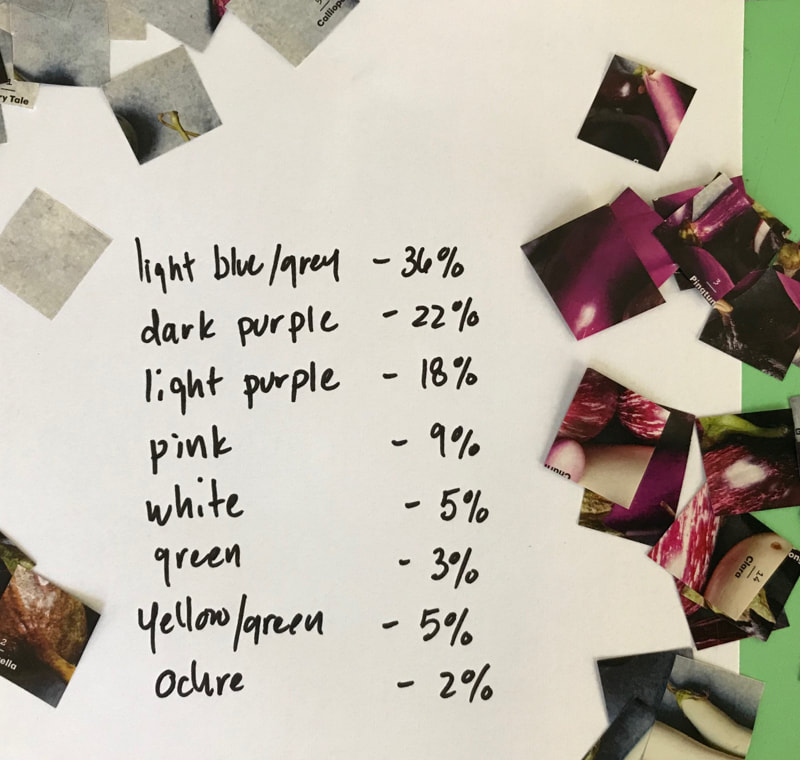 STEP 6 Implement your new palette using the proportions that you've calculated. This is the exciting part! Go crazy! Have fun. Knitting a proportional swatch is easy. In this case I knit 100 rows. Thirty six rows (36%) of light blue/grey were mixed with 22 rows of dark purple, 18 rows of light purple etc.. Keep scrolling for quilted and hand spun samples. 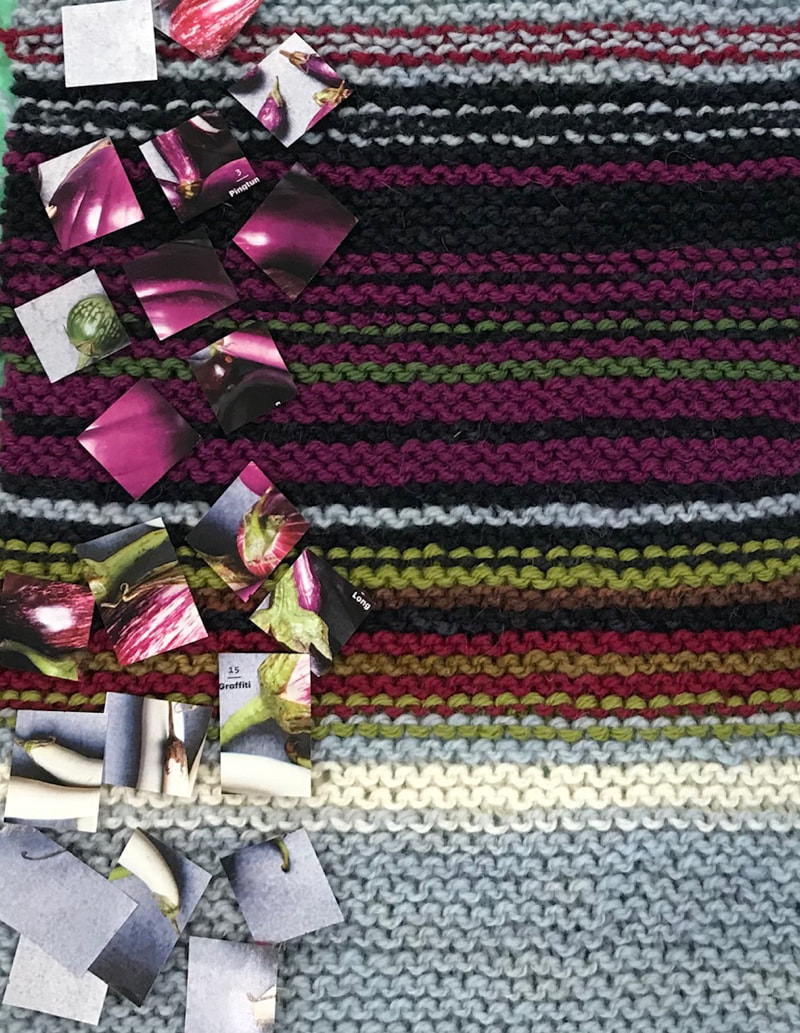 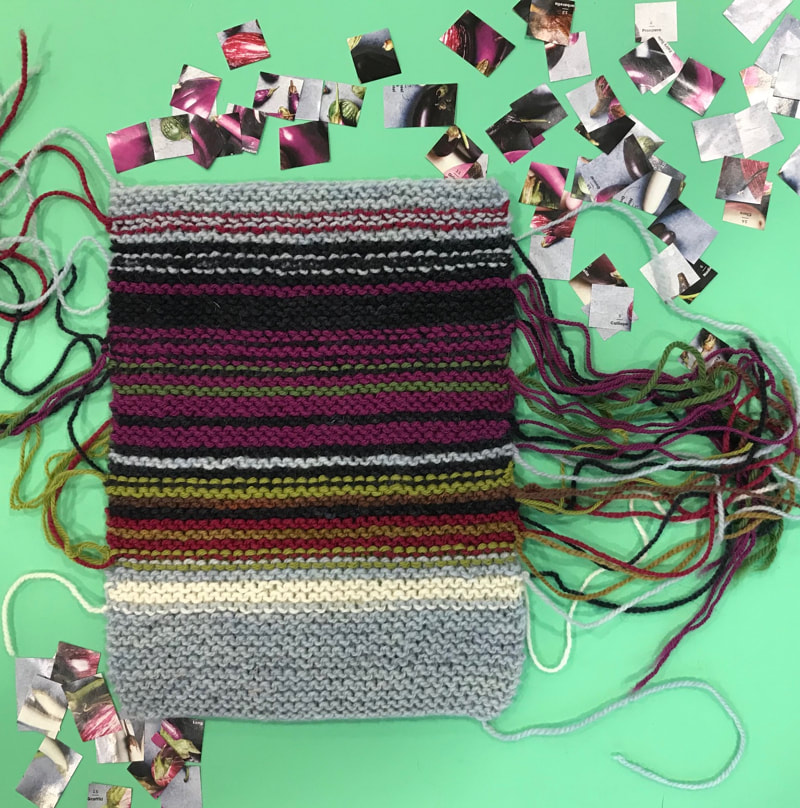 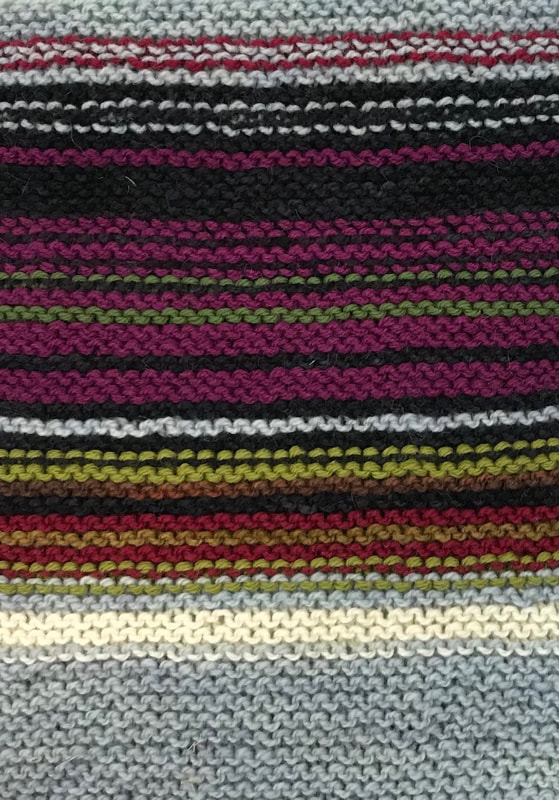 TIP Use a clear grid to count off colour blocks if you'd like to preserve the source image. 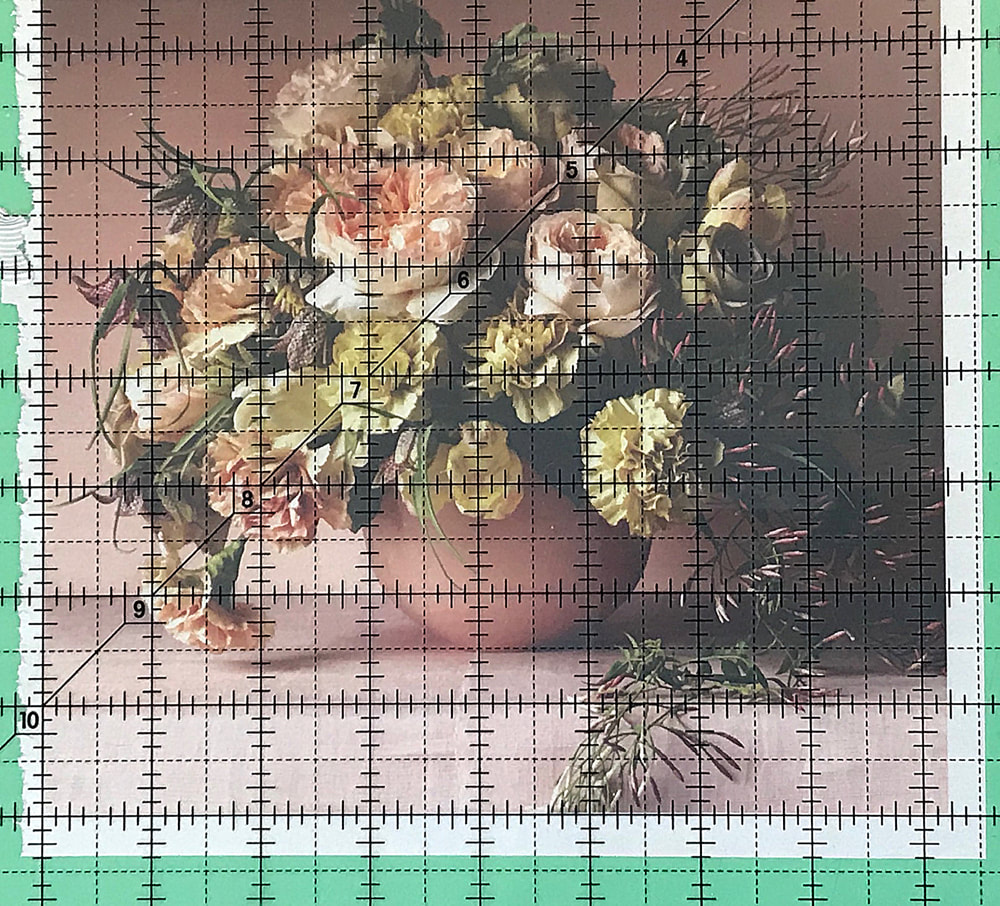 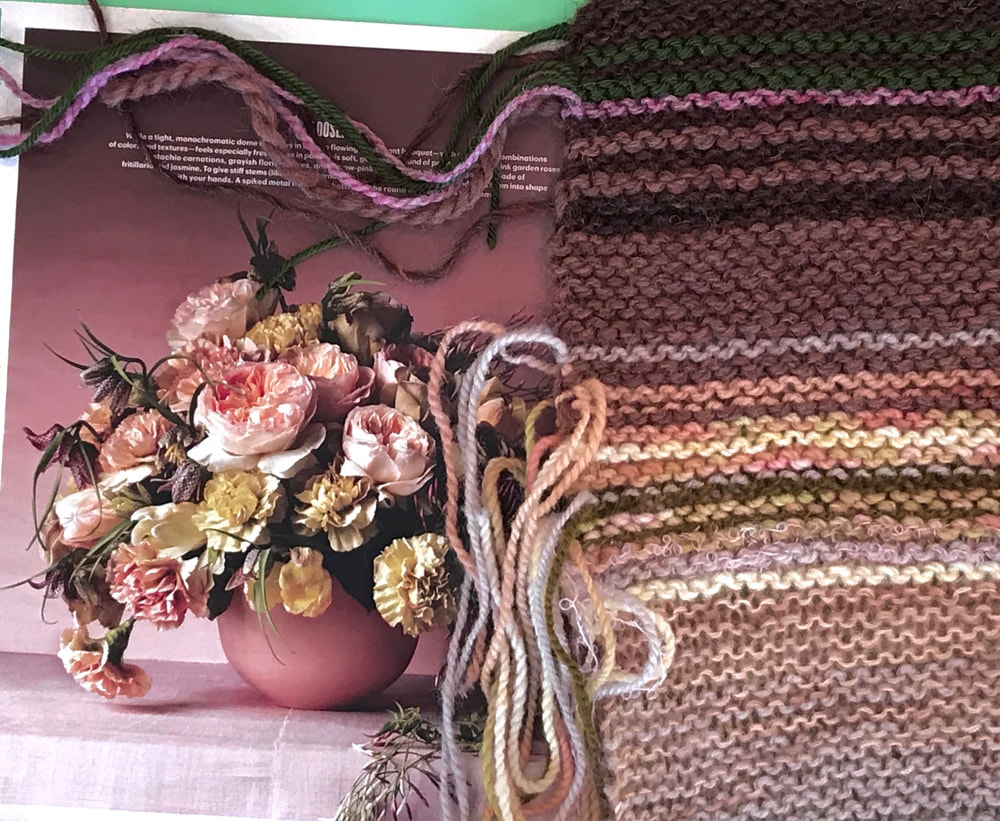 THE THREE MUSICIANS UNBALANCED For this next experiment I decided to have a bit of fun playing on the work of Picasso. The Three Musicians is a painting which delights me in so many ways. Among other things is it's exciting use of warm and cool colours. Using the same cut and count method as above, I attempted to represent colours proportionally. The quilt was made in a very free-form style. It was fun to put together, all the while learning about the painting itself. 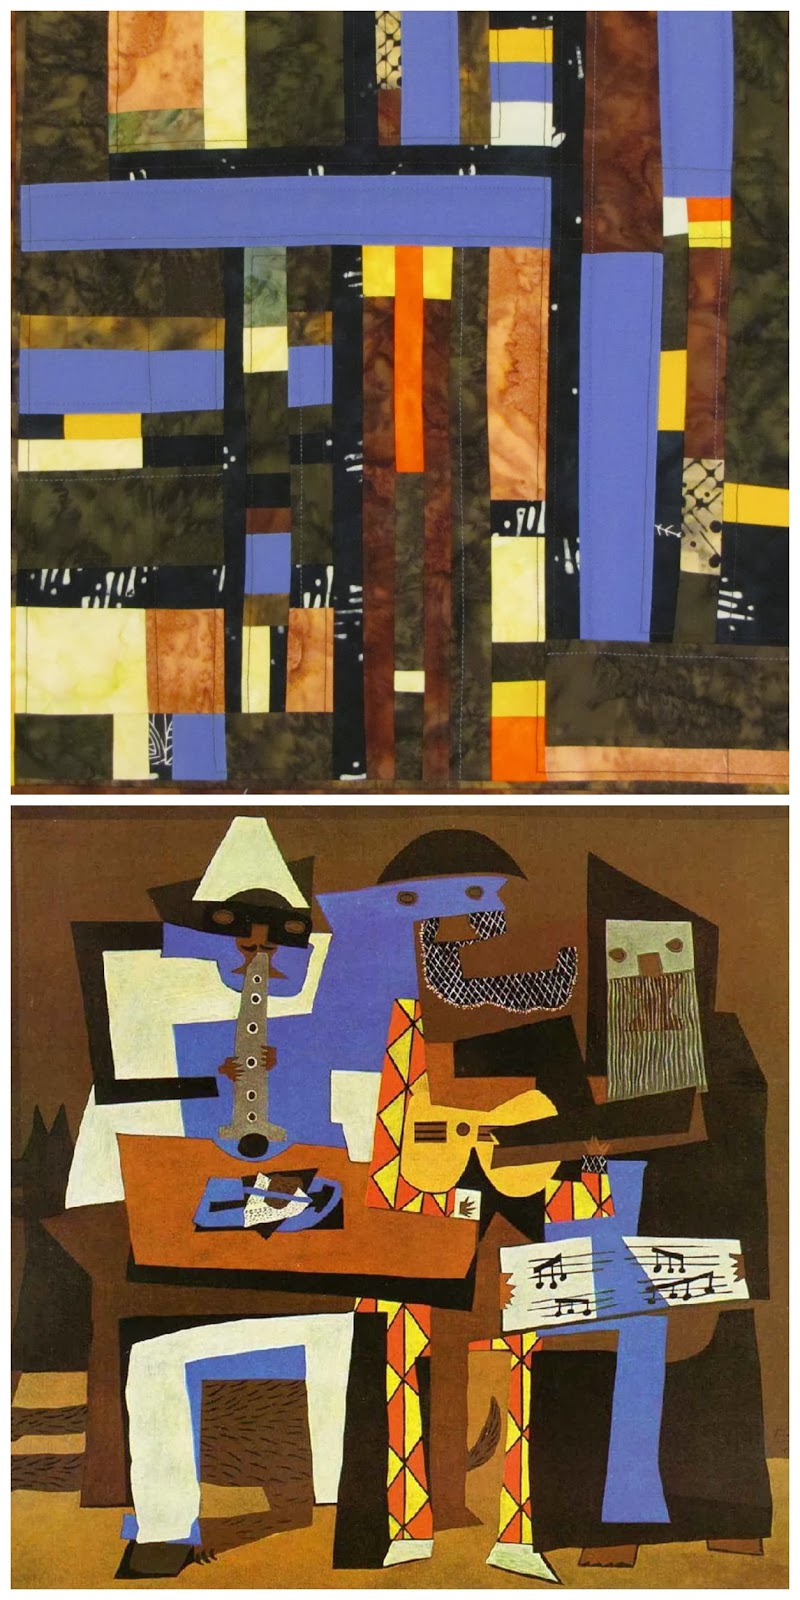 SPINNERS Last but not least. This one's for you.  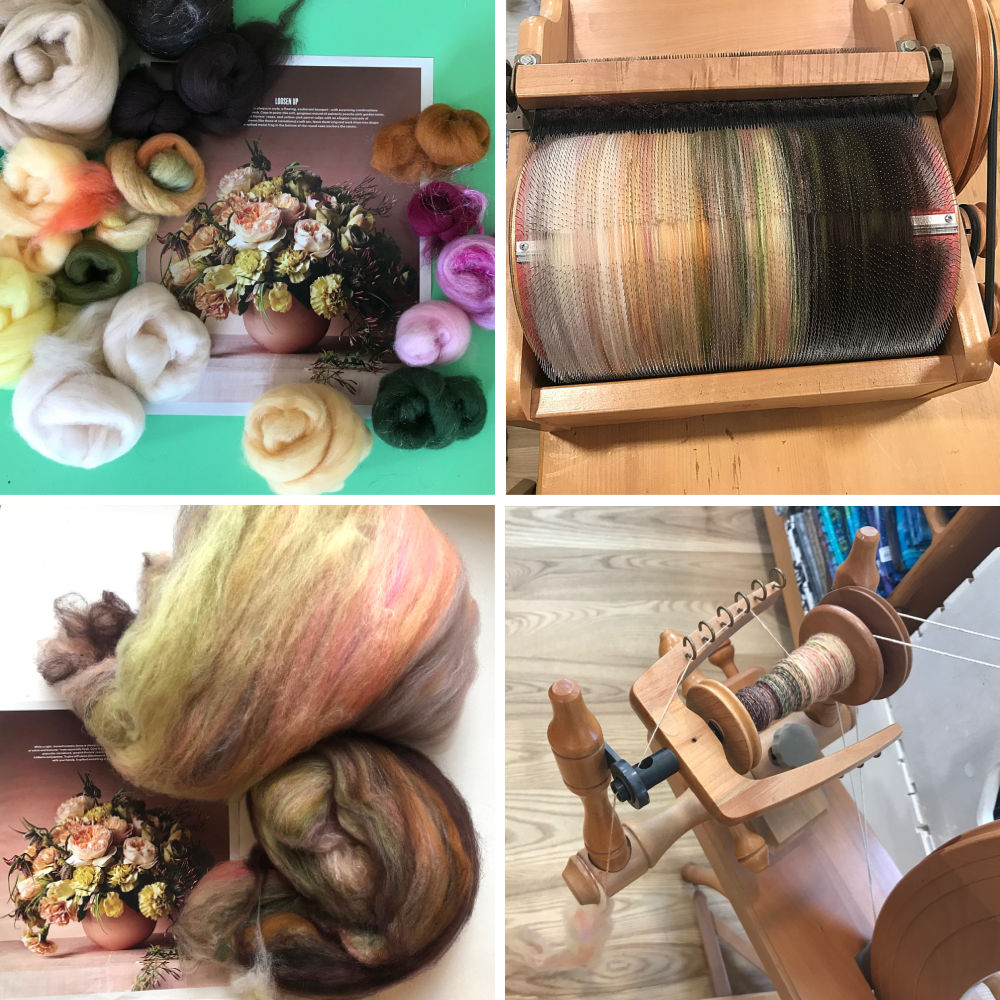 Thanks for reading. For more inspiring links, project ideas, and thoughts on letting your creative voice shout out loud, Click here to Subscribe
5 Comments
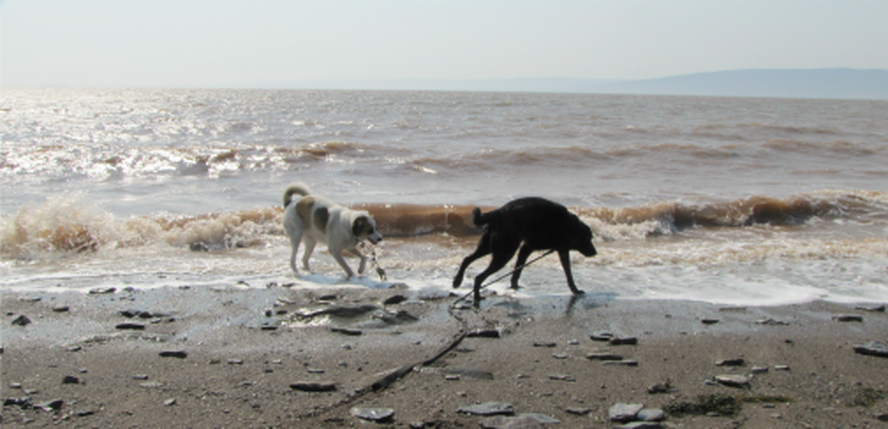
Moving has been a daunting experience, It’s been overwhelming, exciting, exhausting, and joyful all at once. Most of all the move to Nova Scotia has been grounding. This rugged, sea sprayed land is my apple-a-day. What a breathtaking place this is. Where I live now. 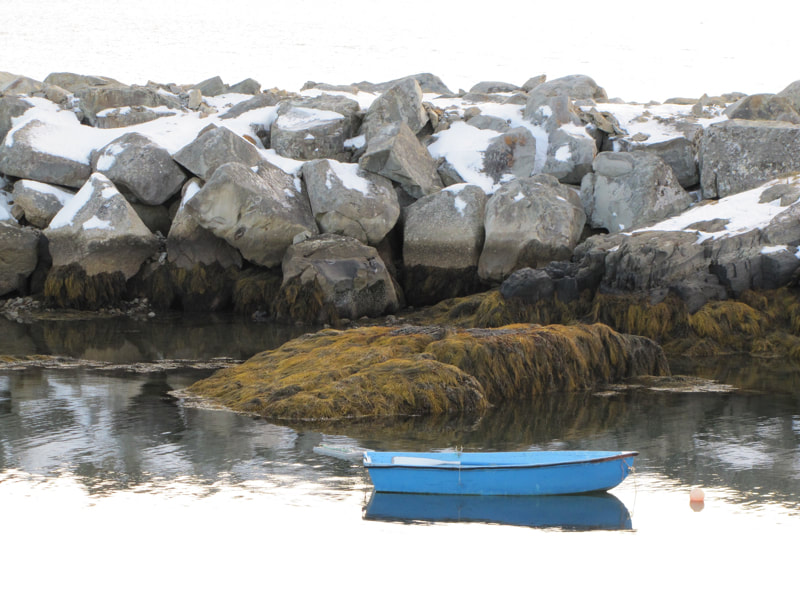 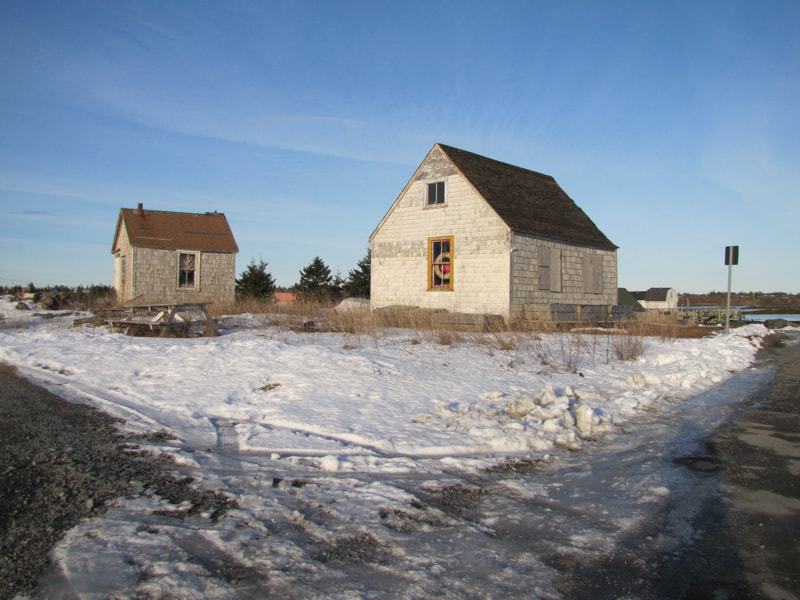 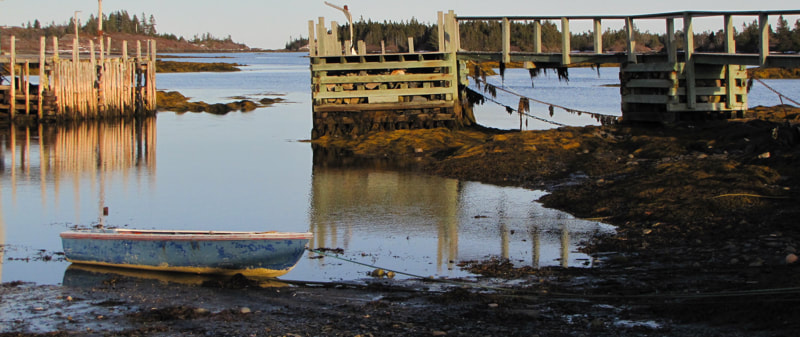 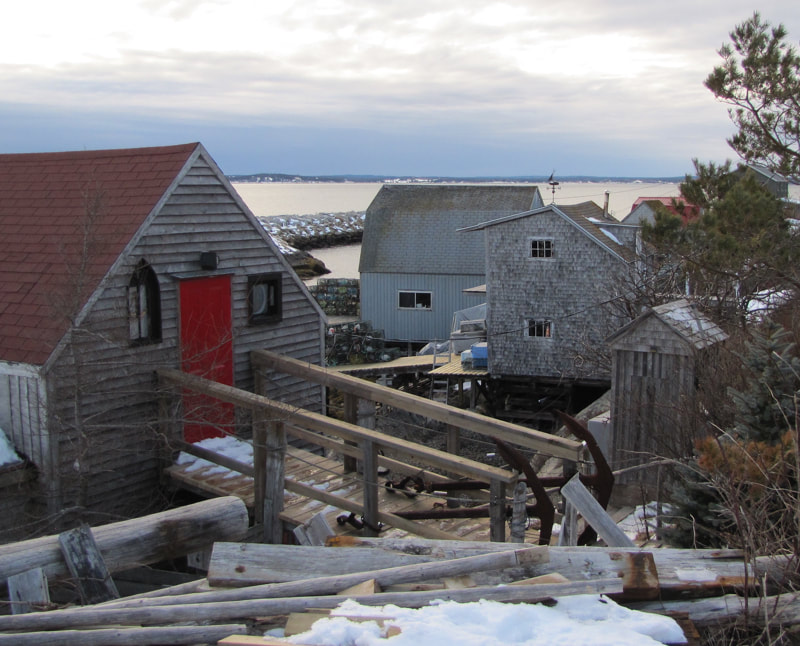  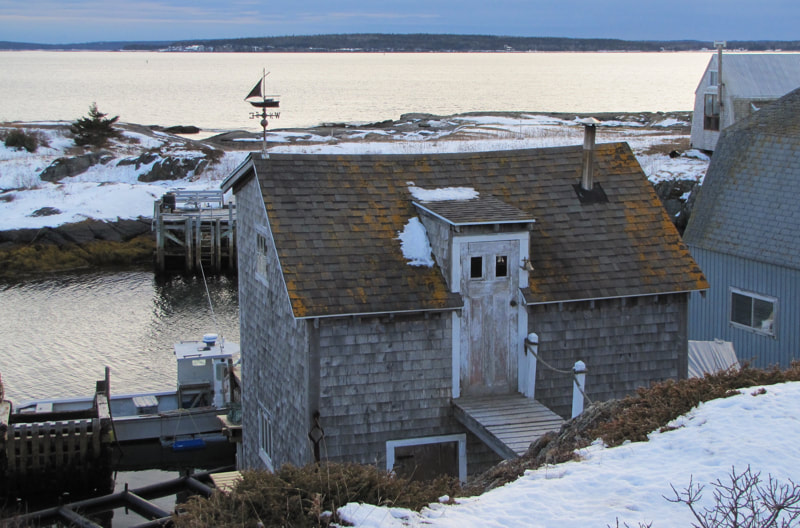 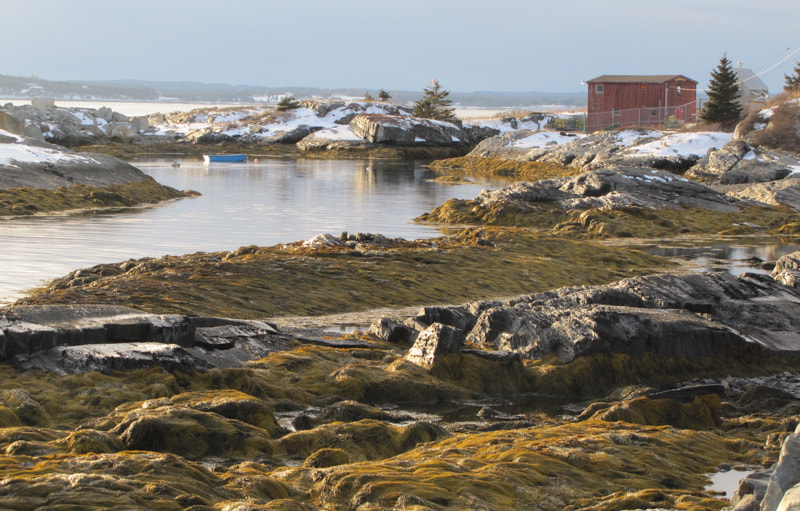 What if today was your graduation day? All of your past days have been the elementary school, middle school, university of your life. Today's the day that you gather all the bits that have come easily and everything for which you've struggled. Roll them up, give yourself a toast, and prepare to launch. You've earned this progression. From self doubt to verification. You were meant to work and to wait - for today. And now you know that you can try anything. 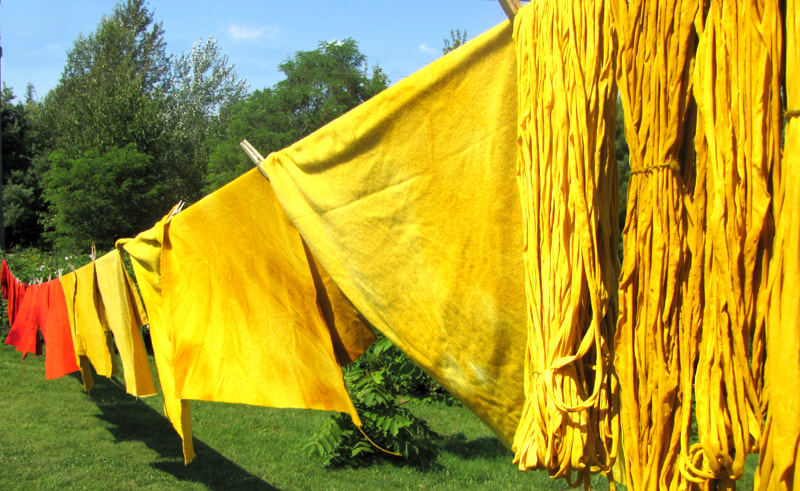 It's a different sort of summer for me. I'm "between shops" for a few months but still finding loads to do with my time. Walks with the dogs are high on the priority list, my project planner is getting a workout, and long-suffering WIPs are being revisited. Mostly though, I've been dreaming about a fresh new shop. About creating something new. Its a good thing. To feel as though you're still up for an adventure. To become reacquainted with the work that most excites you. Your perfect fit.
... our physical retail shop, London-Wul fibre arts has closed for the summer as we prepare to launch a whole new fibre art experience. Our online shop is open as always.
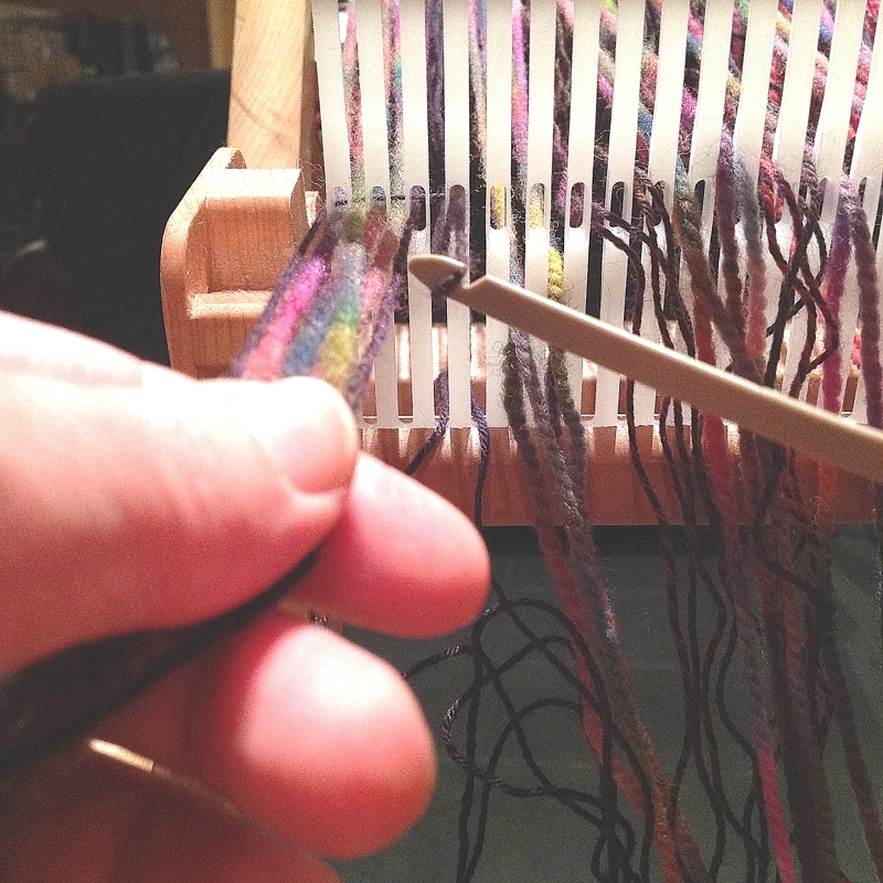
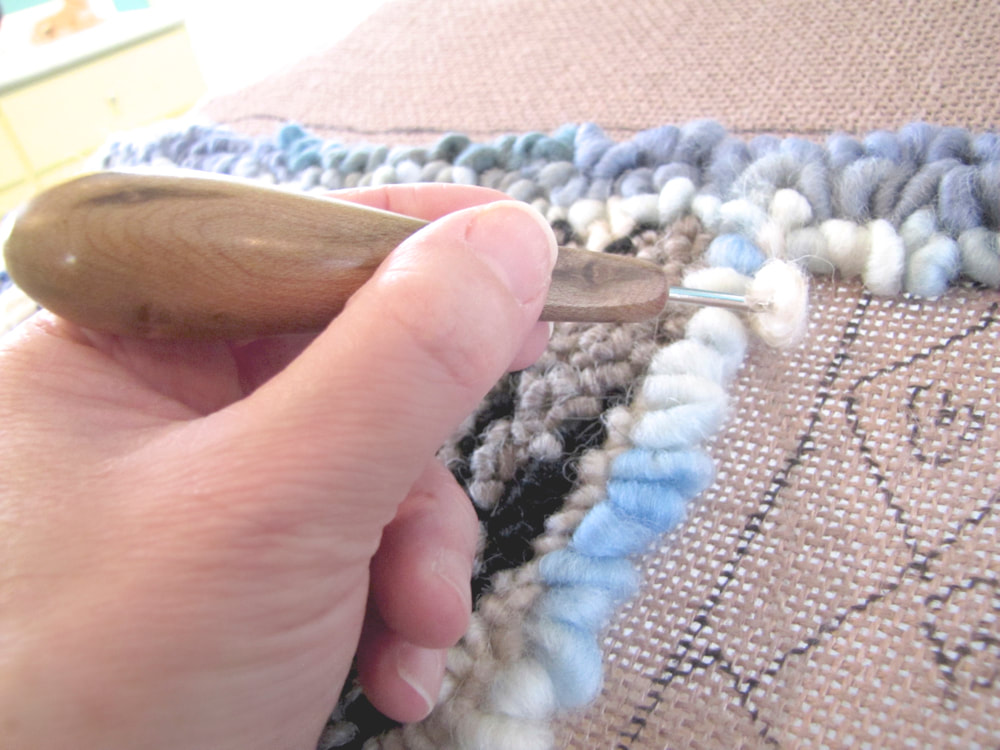
It can take you away. Have you lost in your thoughts. It's quieting. It's affirming. Your hands, your eyes, your body, your mind, have worked in harmony. You did it! It's a simple act. It doesn't need to be planned nor perfect. It can lead to new and wonderful ideas.  ... projects coming and going, being conjured, crafted and in this case completed! Here are two lace projects that I can highly recommend. The first pattern written by Lilia Komosa can be found HERE. Below is another lovely pattern, also well thought out and well worth the effort. It was written by Judy Marples and can be found HERE. Give them a try you'll be glad that you did. 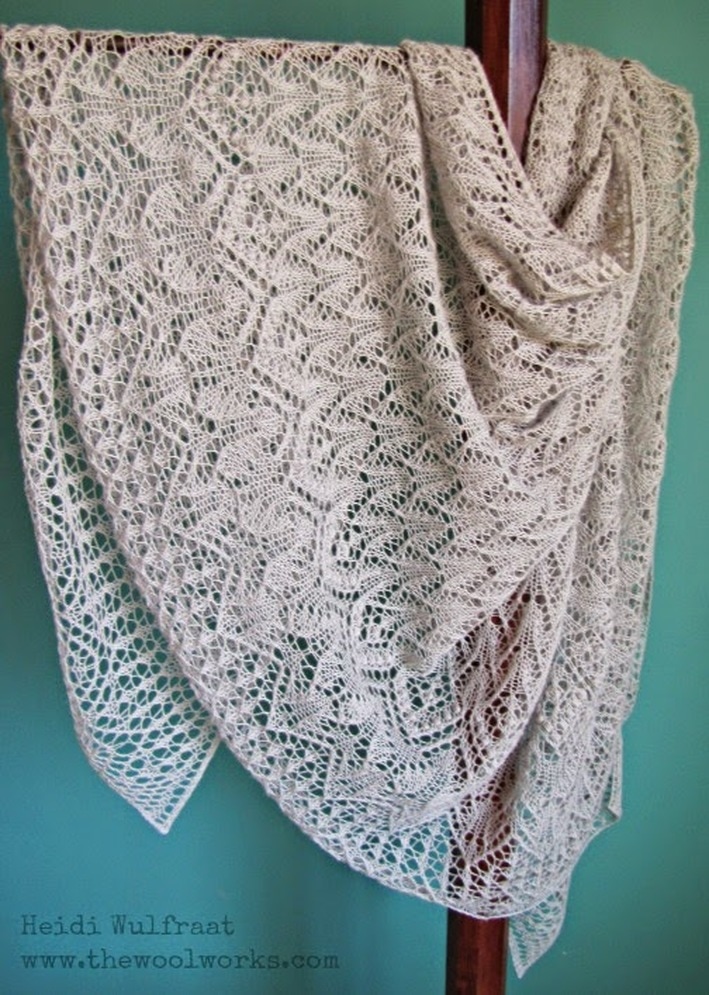 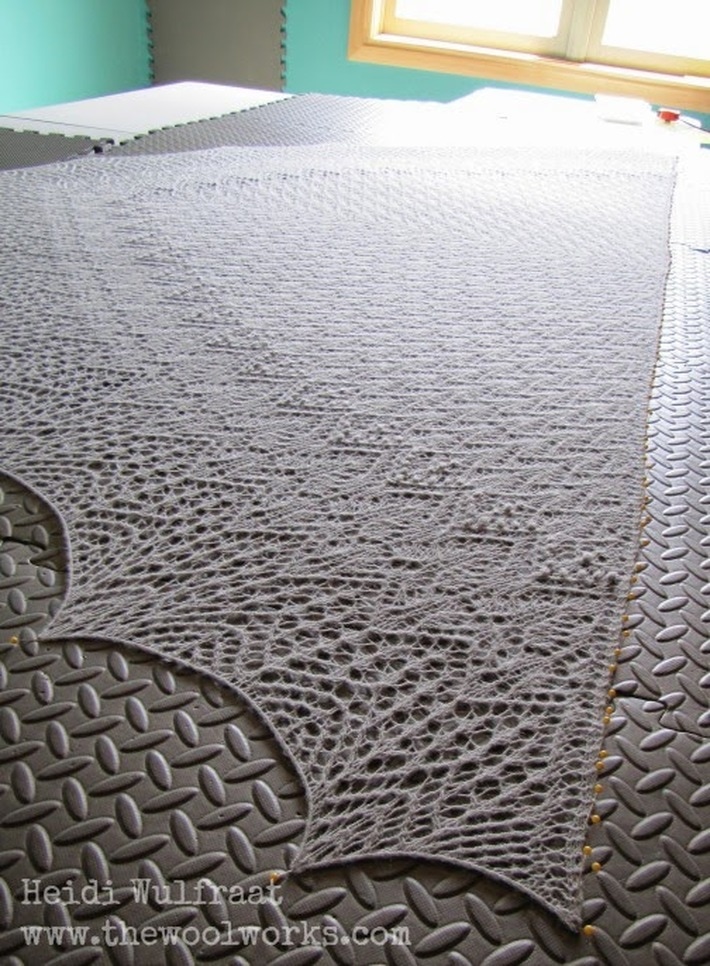 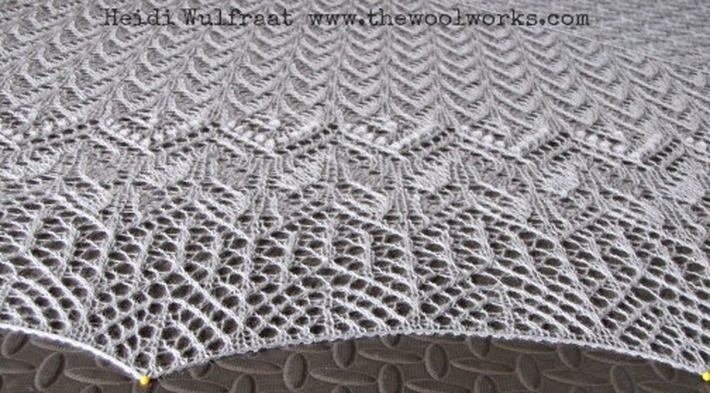 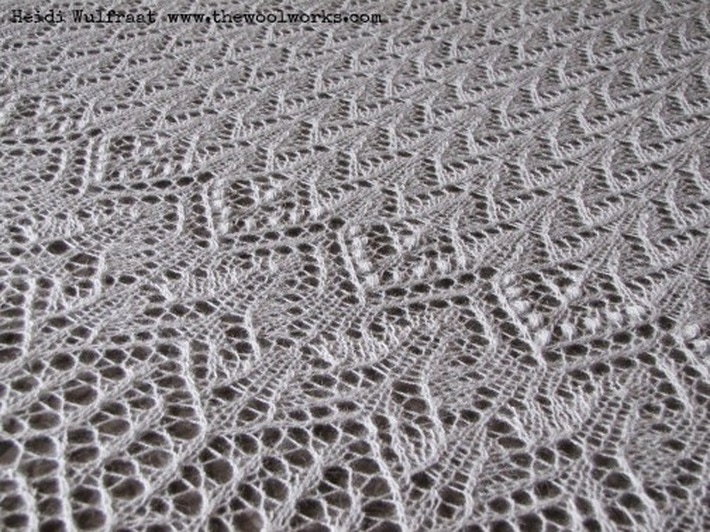 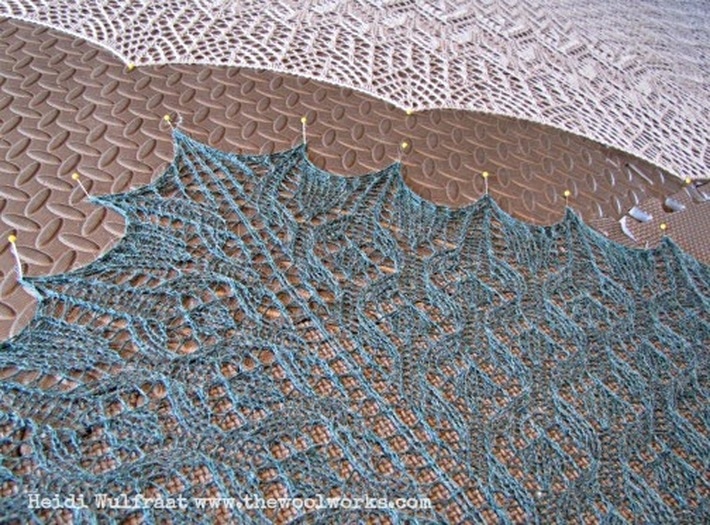 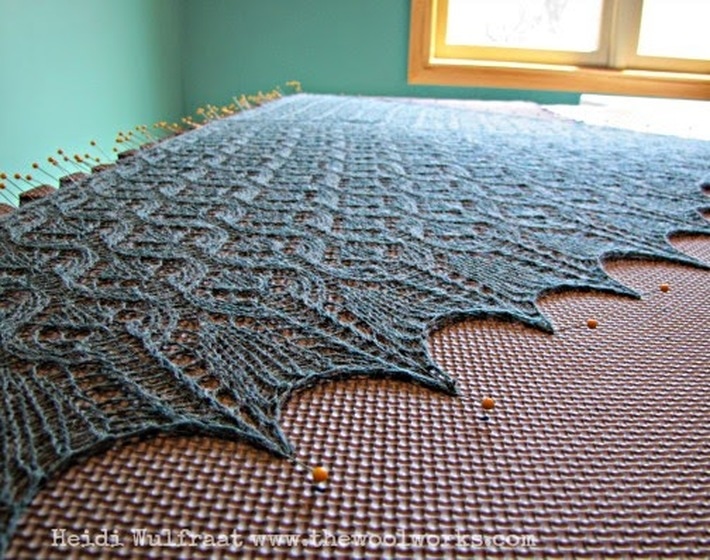 ...personal connection is key. Work on subject matter that is near to your heart. Express a personal belief. Use materials that are meaningful to you. These were my thoughts when Judy Taylor of Little House Rugs asked me to speak about the process of rug hooking: 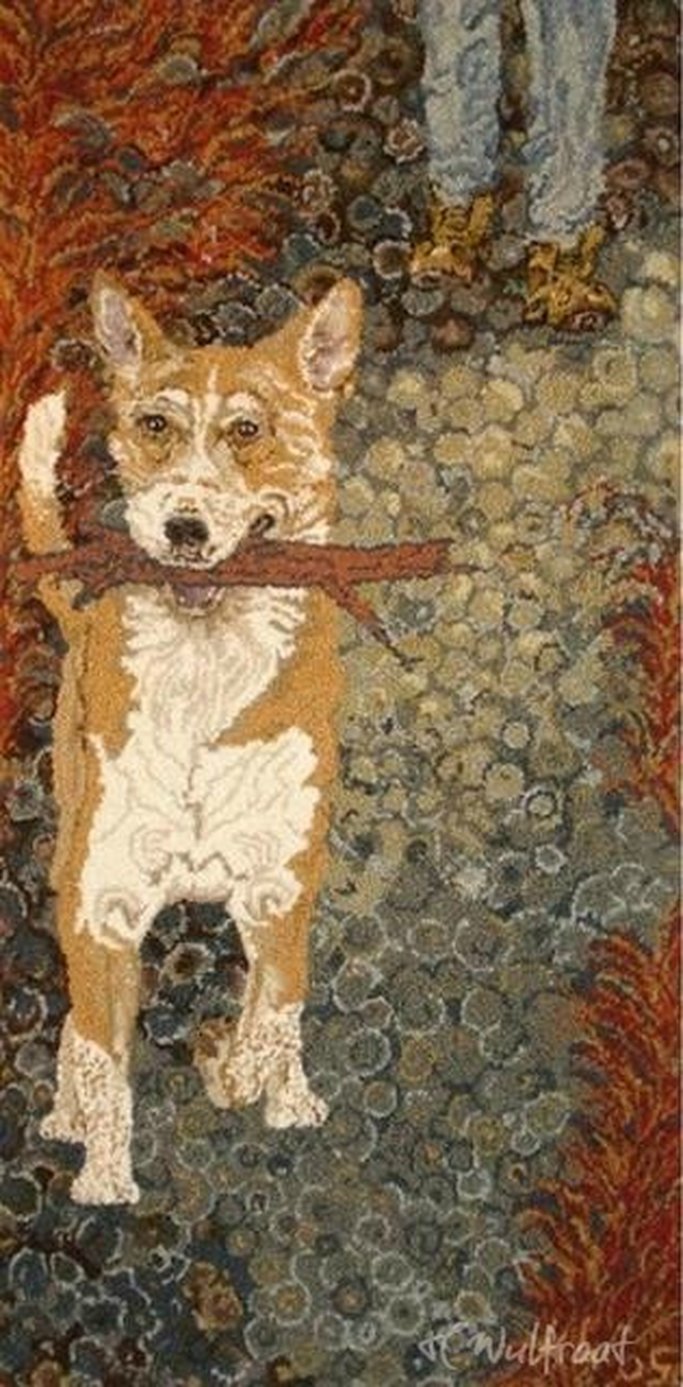 "Love on the Run was the first rug I hooked. While visiting the state of New Hampshire I became enchanted with rug hooking as a form of story telling and decided that I would like to give it a try. My dog named Farmer seemed a natural choice of subject as animals have always been central for me. At the time of hooking this piece I had neither any rug hooking classes under my belt, nor any particular exposure to the technical aspects of rug hooking. The unintentional result was that I allowed myself to focus only on Farmer, her joyfulness and companionship. What I learned was that producing a piece of work that is personal and heartfelt will always outweigh “the rules”. If you’re worried about your rug hooking technique, set your reservations aside, put a piece of yourself on the canvas and all else will become peripheral. Does this mean that sloppy work is OK? Not at all, I believe that when you are creating an image that is truly unique, in your own voice, and in your own style, you will be so connected to and respectful of your subject matter that you will want to present it with the best possible technique. Good craftsmanship will come with your level of interest. Designing Love on the Run involved my being surrounded with photos of Farmer. I drew her figure directly onto the canvas using a heavy marker. If you find drawing free-hand a little daunting there are several methods of transferring an outline from photo to canvas. I would urge you to use photos that you have taken yourself so that, again, you will have a personal connection. Be fearless in marking your canvas. You have nothing to lose! Your marks will disappear as you hook. I usually draw my pattern using a green sharpie marker, make corrections with a red sharpie and finally make my final decisions using a black marker. There is lots of leeway for rethinking things and making changes throughout the entire process. I'm a hand spinner at heart. It is natural for me to reach for yarn when hooking. In fact, I hook with yarns of all weights and textures and with unspun fibres as well. I use premium linen backing which will accommodate tight packing of very fine yarns and will open nicely for my bulky hand spun singles. I choose my materials according to colour and when the colour that I'm hoping for is not within reach I head to the dye pots! I am currently hooking in an abstracted format, again from a very personal perspective. This series of fractured images embrace my less than stellar eyesight and speaks of an alternative way of seeing things. My way of seeing things! Along the way I decided that this work should be hooked in hand spun yarn. I came to realize that by spinning and dyeing for these rugs, the conception of each image became very clear to me. After this additional time spent in thought and preparation I found the hooking itself to be very straight forward and well planned. Alternatively, one might spend additional preparation time working in a sketchbook, in collage, or on a photo expedition. For me, personal connection is the key. Work on subject matter that is near to your heart. Express a personal belief. Use materials that are meaningful to you; yarn that you have recovered from your child’s first sweater, flannel taken from your husband’s favourite work shirt that has finally been retired, hand spun and spun yarn that you have made yourself or that has been gifted to you by a dear friend. These are the ingredients that will set you free to hook in your own style with exciting and satisfying results. For the past 20 years I have managed a small flock of sheep. Our farm has a no-kill, no-sell policy so these girls have been around for a good period of time, providing me with fleece all the while. I am connected to these animals. I know all of their names. I am deeply connected to the fleece that I wash and card, the yarn that I spin and then hook. Connection is a powerful thing. It allows you to forge ahead with less hesitation. It just feels right. What are your connections? Your stories are unique. They will empower you and inform your work. Be yourself and hook with abandon.   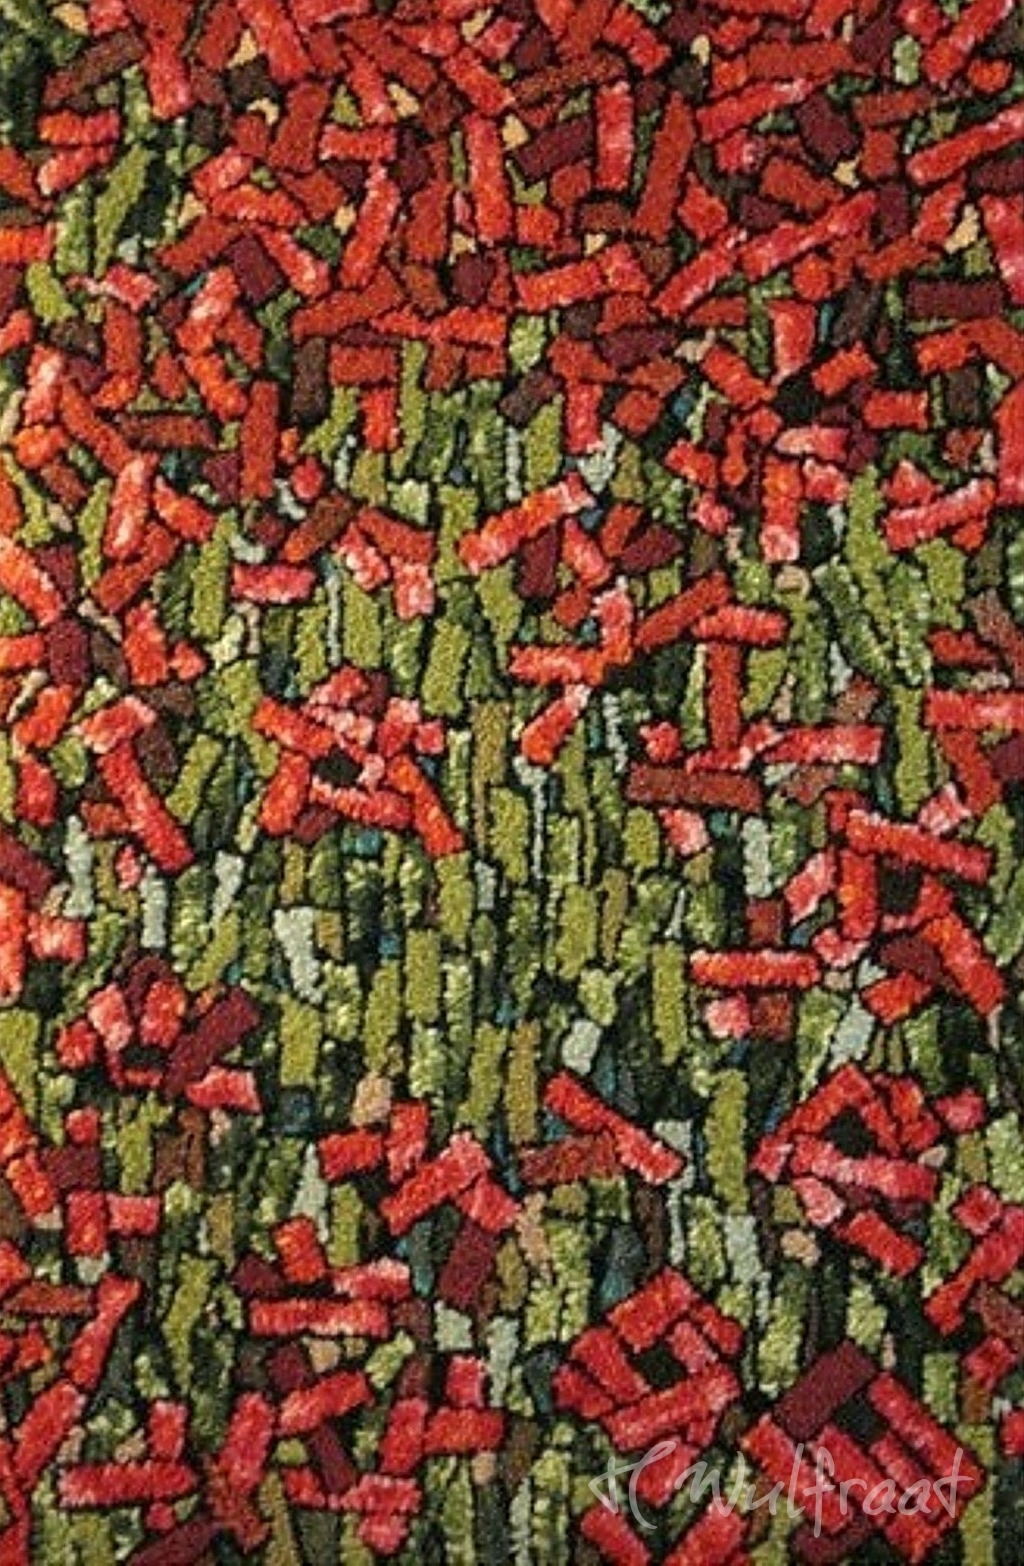 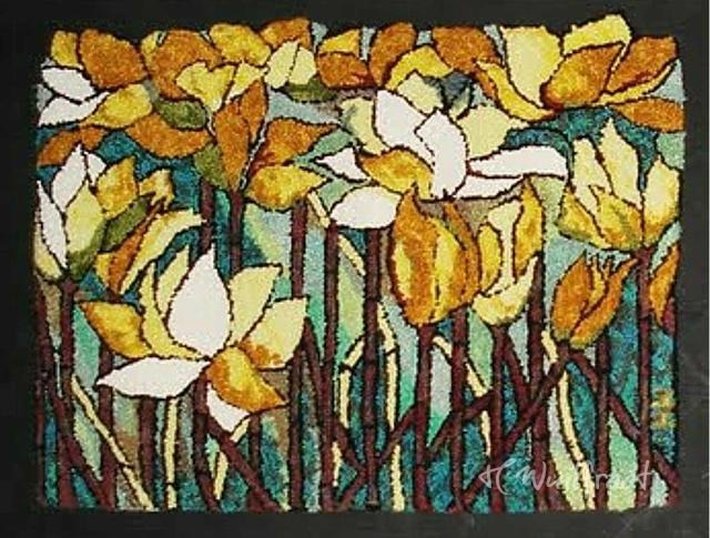 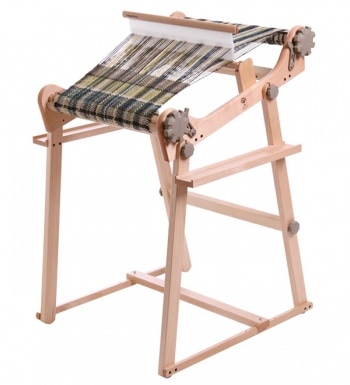 We continue to received a wealth of really great questions regarding Ashford Rigid Heddle and Knitters looms. Today's post highlights a number of FAQ's regarding the purchase of a new loom.
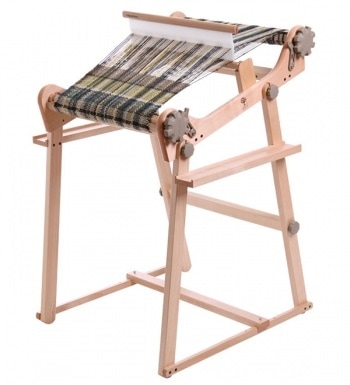
My personal answers are attached. They reflect my own experience as a Rigid Heddle mega-fan and an Ashford retailer over the past 20 years. The opinions of others may vary. Where do I start in choosing a loom size? In terms of choosing a loom width, the smallest looms 10"-12” are perfect for scarves, small accessories and sampling, 16” will also provide enough width for tableware. A 20” loom is wide enough for most shawls, 24” provides the cloth width required for most sewing patterns 32” will, of course do all of this as well as small blankets and floor mats. Rigid or folding (knitters loom)? In my opinion the rigid looms are a little sturdier. The folding looms are excellent and super-portable but of course there is a (small) compromise in that they have a little give or movement as you work. This does not affect your weaving project and doesn’t bother me at all when I use these looms though I think perhaps weavers who have lots of experience on large looms may find this a little distracting. In terms of space requirement the rigid looms will store under a bed or hanging on bicycle hooks although they are not quite as space efficient as knitters looms. All of the stands (for rigid and folding looms) can be taken apart simply by turning a set of knobs. They do not require a tool set after the initial assembly. Trying to decide between a 28” knitters loom and a 32” rigid heddle loom The only difference between these two is their size and folding capability. In terms of function they are equal. The stand set-up for the rigid Heddle vs Knitters loom is more substantial but not as travel friendly. Is a 32” rigid heddle too large for me? Our most popular sizes sold are the 20-24” models as both lend a good width for shawls. If you are feeling uncomfortable about not having the extra length, the 32” is not significantly more expensive. In terms of working on a 32” it is as simple to operate as the smaller models. The only thing that I would mention to you is that the 32” rigid heddle is a bit too large to work on without a frame. The idea is that smaller looms, say 16” or less can be worked against a table supported in your lap. At 20” some people prefer to use a stand and others weave without one. I would definitely suggest that looms 24” and up require a stand. Which additional reeds do you recommend? The heddle that comes with all Ashford rigid heddle and knitters looms is a 7.5 dpi, suitable for a standard worsted weight yarn (such as Briggs and Little). For lace weight shawls you may want a 15dpi heddle. A common cloth weight for dish towels etc used are 10 and 12.5 dpi heddles (sett with either a single or double strand). A super-bulky textured scarf will use a 5dpi heddle. What is a vari-dent reed? A vari-dent reed offers the ability to accommodate different sized yarns in small segments across the width of your reed. This allows you to dress the loom with a custom warp, meaning endless possibilities for cloth of your own design! Would a Rigid heddle loom make a good gift for my daughter? I absolutely love rigid heddle looms. I use them in the shop and have one at home as well. I think it’s a fantastic gift for anyone who like to work with fibre!  Attention please. My inner voice tells me I could use some.
Because aren't we all a little overrun by distraction? There are fires to put out I seem to have a steady run of fires to put out which doesn't exactly coddle my creativity. Maybe I need to step back and get a better perspective. Maybe the fires are actually just little puffs of smoke. My mother always tells me, just think of Scarlett O'Hara, "tomorrow is another day". Perspective. Then there's the computer I'm trying to manage my time more effectively, picking and choosing only the inter-places that I love. The best time of day My rug hooking friend Val says that she gets her best creative work done in the morning. Good point. We all have our sweet spot during the day and mine will be reserved for creative thoughts and endeavours rather than passive time-spending. I might have to snap an elastic around my wrist as a reminder for this one but nevertheless I'm committed. Taking time Note to self. I should also remember that not everything needs to be accomplished at warp speed. The thing that I like most about eating a grapefruit is that it takes time. I take great pains peeling away to the fruit so that I can fully enjoy it's colour, texture, scent and taste. I need more grapefruit in my life.  Today I'm wondering, do you finish all of the projects that you've started?
How do you deal with projects that you've put aside for a long period of time? How do you tackle your wool room, stash, and long-lost projects? In the group "You Can Do it" (Rug Hooking Daily) one of our members posted a goal to "muck out" of my wool room....deciding which projects to complete and which to let go! There are so many! Pretty brave really, committing to cut ties with some of the rugs that she no longer feels passionate about. The conversation pertains to projects that have been put by the wayside but really it speaks about so much more. Not only are those WIPs taking up space on your shelf, they may be taking up valuable (and creative) mind space as well. Do you find yourself going through that mental "unfinished" checklist from time to time? Do your works in progress make you feel energized or overwhelmed? Here are three things that I've found useful in keeping my space creative. 1. Make a list. The first time that I actually listed all of my personal WIPs I was more than a little surprised. (Bonus: in order to do so I had to unearth them which added the benefit of an overall tidy-up and re-grouping) I was left with the THE LIST from which I was able to decide which projects I was willing to let go. 2. Reclaim and repurpose. Not wanting to part with carefully selected and much loved materials I'm happy to take the time to dismantle a project. Natural fibres will bounce back to their original splendour after a delicate wash. I will always choose to repurpose materials to further a project that I'm passionate about rather than have them locked-up in a project that no longer holds my interest. 3. Keep it to a dull roar. I don't know about you but when I'm super jazzed about a project it shouts at me for attention! Having too many open ended projects doesn't work for me because some of them simply won't be heard. I have a sweet spot in terms of the number of projects that I can successfully work on at any given time and I try to stay within this framework.
Wow. It’s December. Have I been sleeping?
If you're like me every day after the time change in November seems to move at warp speed. I wake up dazed by the disruption, et voila, the year has come to an end. December is a strange month regardless. It delivers a mish-mash of excitement and exasperation. We've got a few weeks left to check off wish lists and to-do lists, to meet expectations and make everything magical . Well, maybe if you live in this world ...
This year I think I’m going to try to delight in what is rather than worrying about what could be. I’m going to take a little bit of time to recharge and to be still. I don’t do still very well. Add to list: learn to be still.
It’s been a wonderful year. I’m happy with the way that my energy was spent and I'm excited to be planning for the year ahead. While it's good to be focused my hope is to be able to recognize a new creative adventure should one cross my path. Who knows what to expect? Life's a work in progress and that in itself is exciting. Happy Holidays and keep making, my friends. 
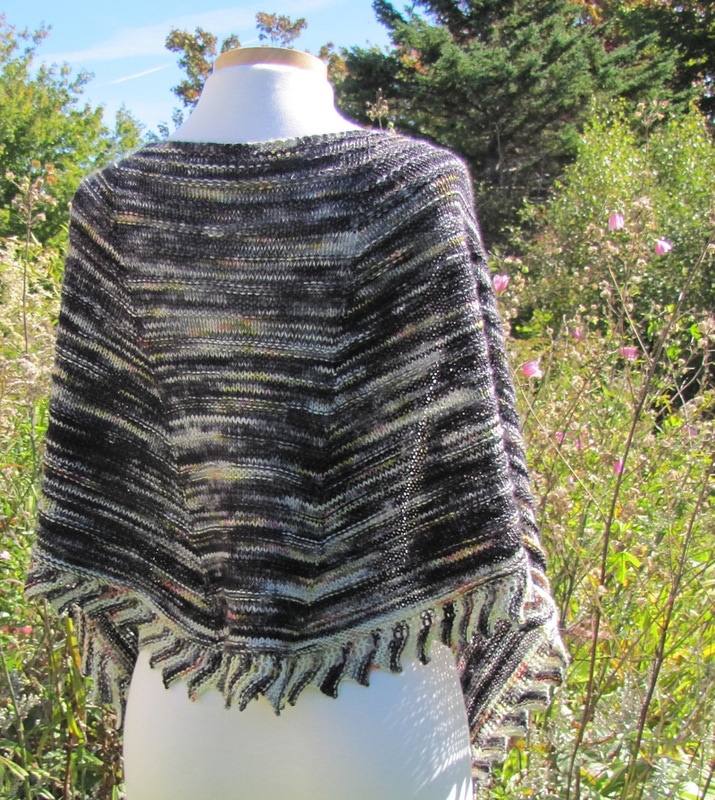
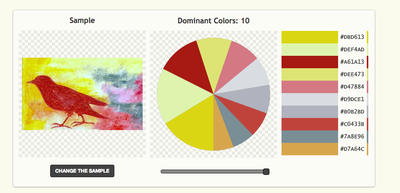
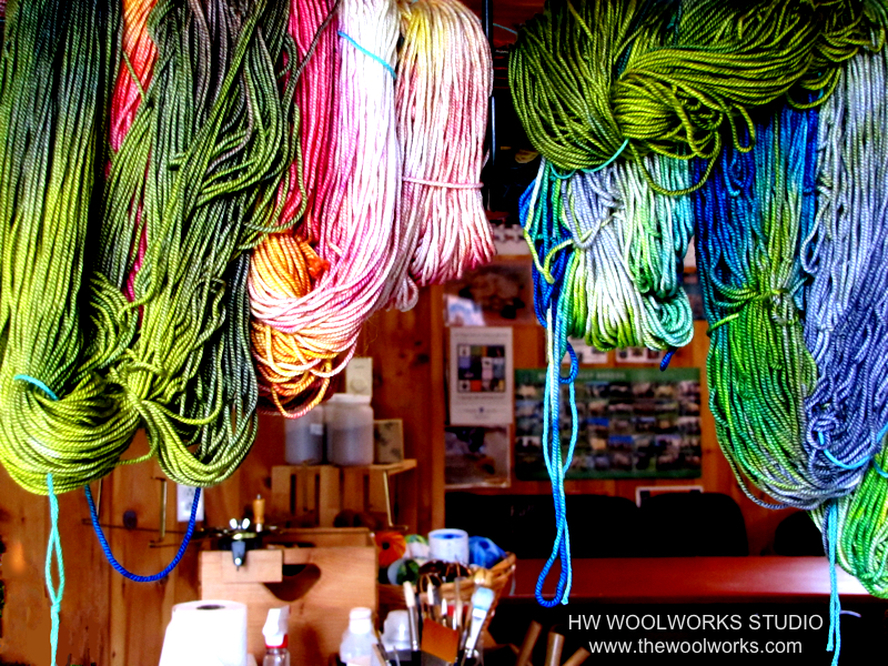
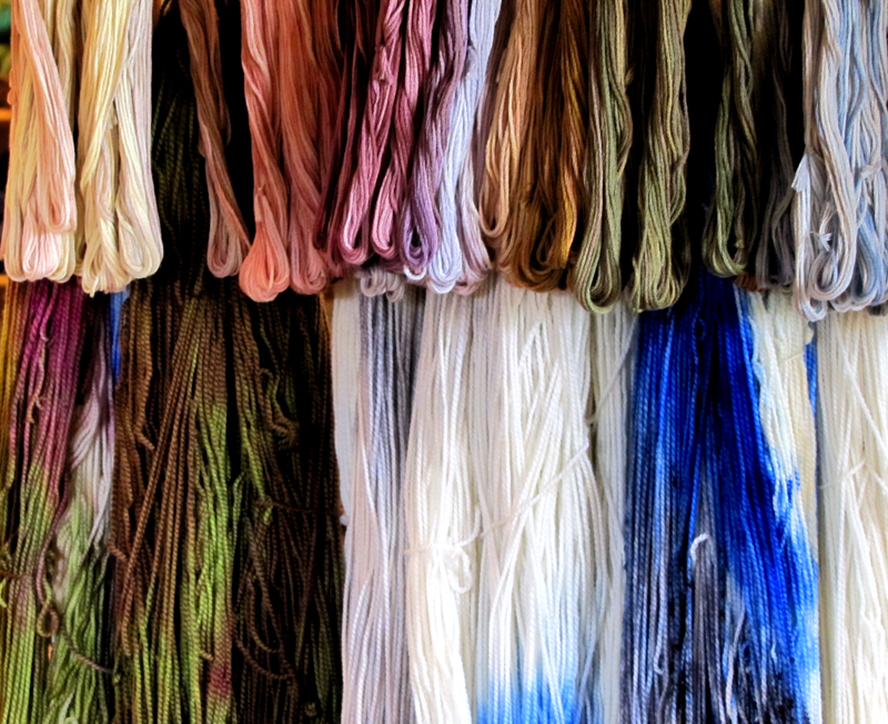
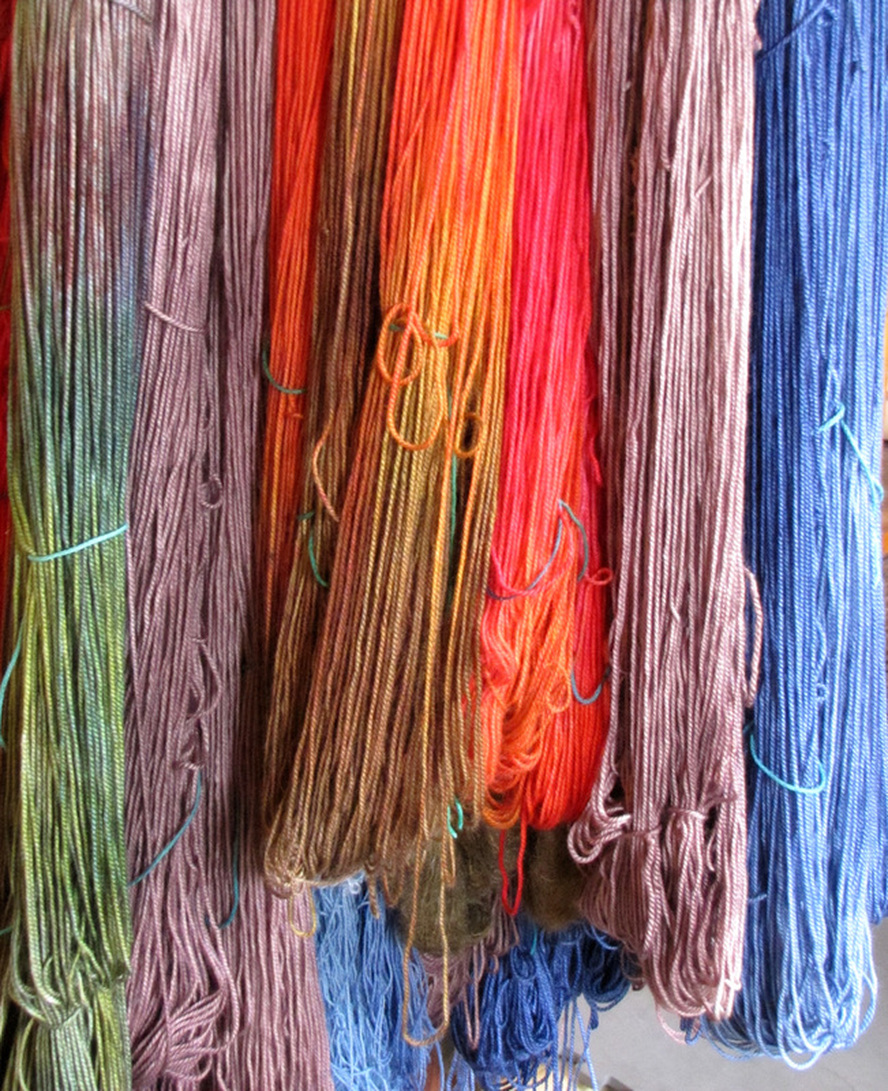
Wrapmee is the new thing around here. Well truthfully, there are other new things but Wrapmee has been an almost unexpected delight. Some of my favourite knitting projects have been the most simple so I set out to design a super-simple wrap/shawl/scarf that my beginner knitting students could easily tackle. 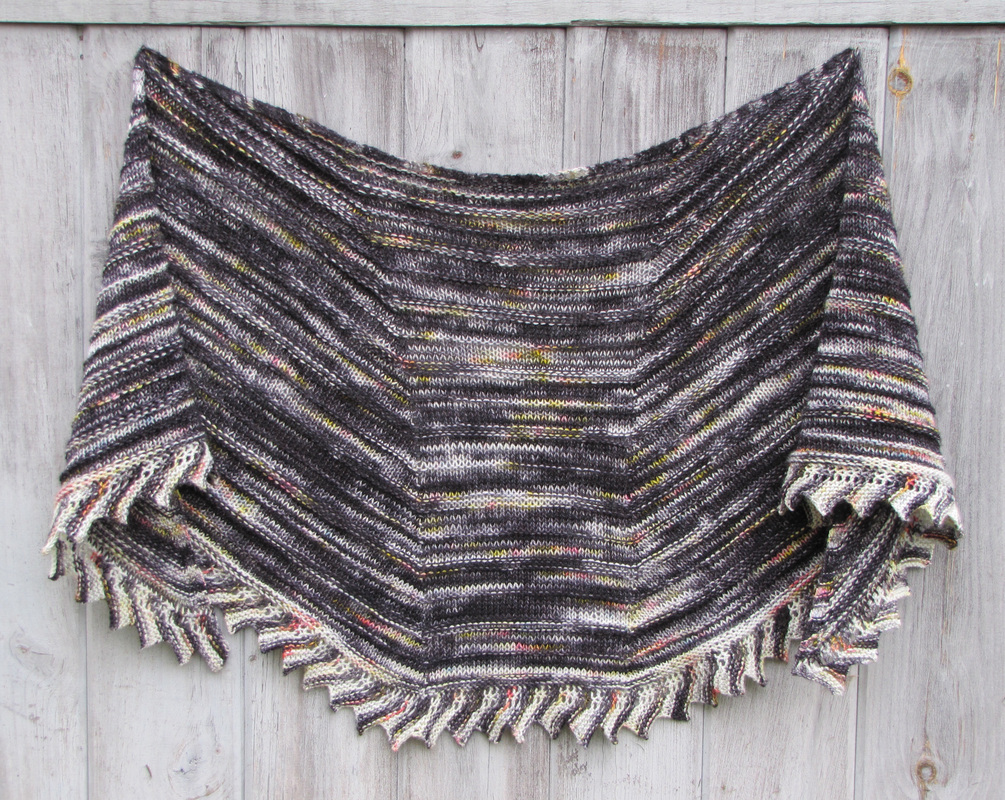 Wrapmee features a textured fabric with a traditional lace bind-off that provides just enough detail to keep things interesting. It's a perfect knit for variegated, speckled, solid and semi-solid yarns. What I love most about this quick little knit is it's size. With an ample wingspan and not-so-deep body this piece wears soo easily as either a shawl or scarf. My new favourite accessory, there will be more of Wrapmee in my future. 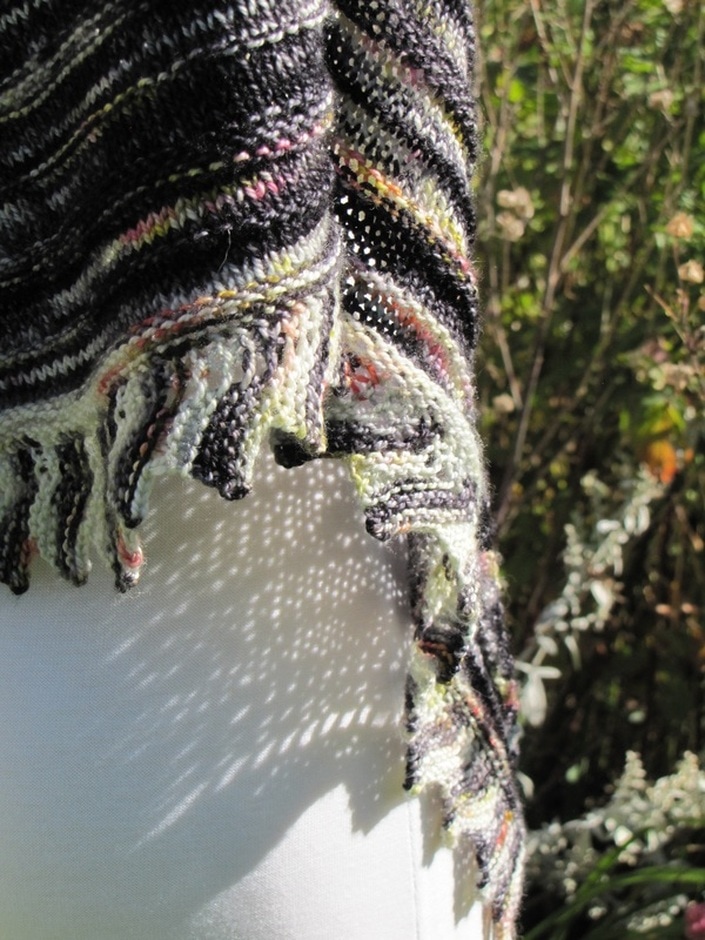 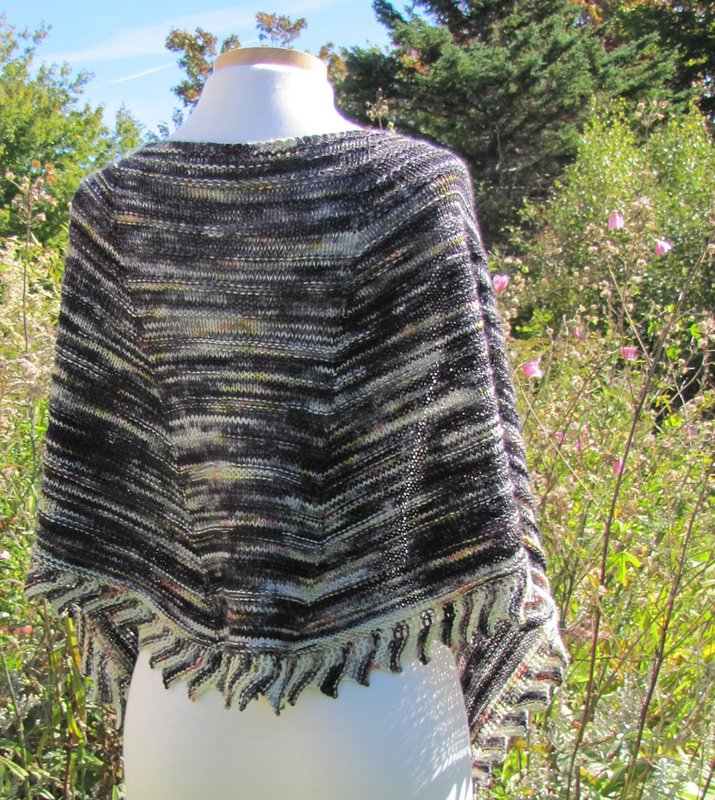 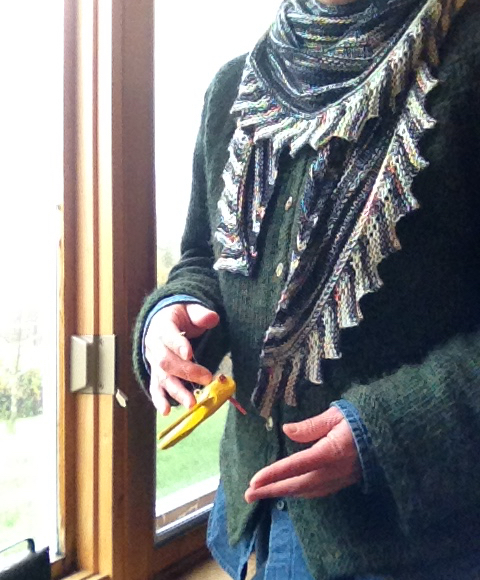 This place. Where I live. I don't want to miss a thing.  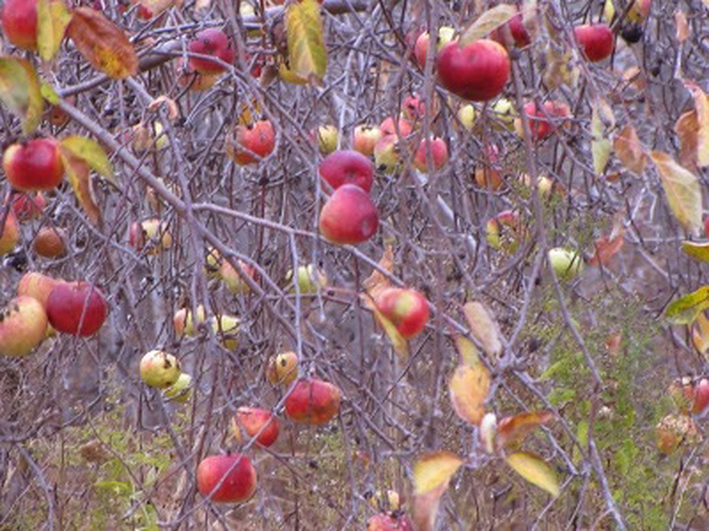  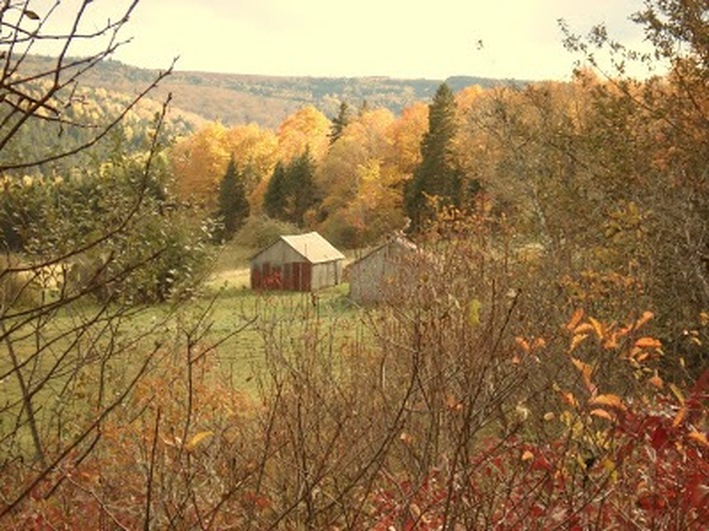      Colour is fun right? It's one of the joyful reasons that we do what we do. So why do we often feel thwarted when it comes to choosing colours for our work?. Well, because our projects matter of course. Our next rug hooking, weaving, knitting, felting or quilting work will take a huge amount of our time, heaps of energy and a little something from our pocketbook as well. We take pause to think about how we will go about making things because we care. Because handwork matters. So if you find yourself at odds when it comes to employing colour in your next project here are some resources, games and exercises that may support you along the way. 1. COLOR ME CURIOUS is the perfect stop to get your colour-choosing juices flowing. Browse hundreds of user-generated colour palettes in monochromatic, complementary, analogous, warm, cool and neutral categories. Bookmark, pin and share your favourite colour combinations for future reference.  2. ADOBE COLOR CC takes things a step further with it's interactive colour wheel. Select a colour or colour family, drag to adjust tints and tones. COLOR CC will readily produce various palettes based on basic colour principals using your preferences. Find how your colour choice relates to others in monochromatic, analogous, triad, complimentary, compound and shade groupings.  3. Things get really interesting at PALETTE GENERATOR where you're invited to upload an image from which a palette of 2-10 colours will be produced. Use your favourite photo to create a colour palette for unrelated works or use the generator to provide a visual breakdown of a photo that you'd like to reproduce. 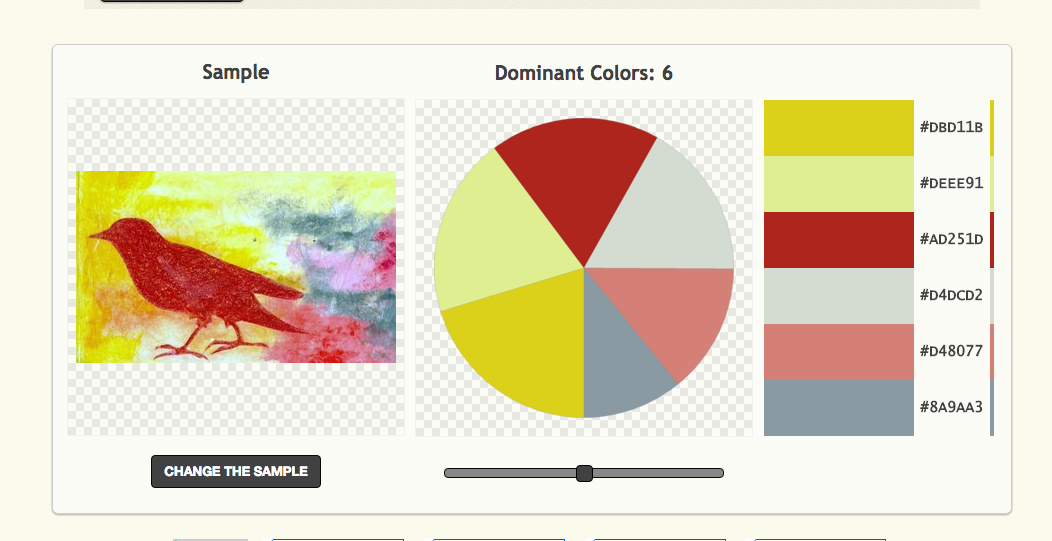  Have you used an online palette generator to explore colourways for your work?
Or maybe to paint a bedroom? I'd love to know.  Here's a repost (with a little added detail) for all of my Rigid Heddle friends. The perfect best friend (or baby) blanket. For those of you who visit the shop (or my facebook page,or instagram, or twitter .... :) you may recognize wee little Dorothy. woven on: 32" Ashford Rigid Heddle loom finished Size: 29" x 40" reed size: 5 dpi warp yarn : 1 skein (100g) sturdy worsted weight yarn, ... I used Briggs and Little Heritage Wool, natural 1 skein (125g) super bulky, textured yarn, ... I used Heidi's by Hand bulky Mohair locks, natural which measures 4 wpi (wraps per inch). weft yarn: 200g super bulky textured yarn, ... I used Heidi's by hand Super bulky handspun, natural which measures 3 wpi (wraps per inch) warp length: dress the loom with 75" warp length warp width: dress the loom using a full 32" width pattern: make up using a simple, single heddle, plain weave finishing: cut fringes at 2" length (or longer if desired) *For (human) babies consider finishing all four edges with a satin or crushed cotton binding rather than leaving a fringe. .... give to one of your best friends to cuddle up in.  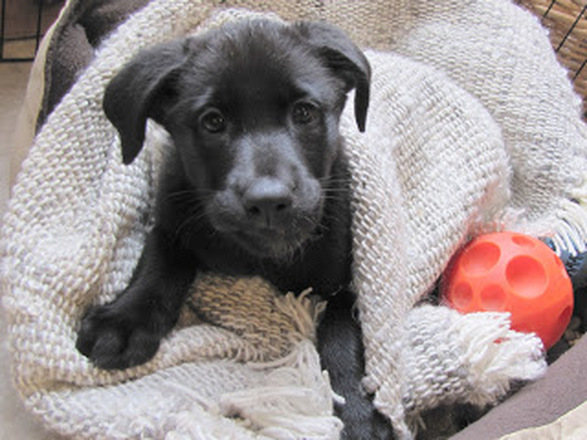   Perhaps the thing that I'm most honestly able to speak about is following your instinct, being true to your heart and breaking the rules from time to time. For better and for worse this abandon has been my experience. It permeates my art, my animal care practices, my business, my life.
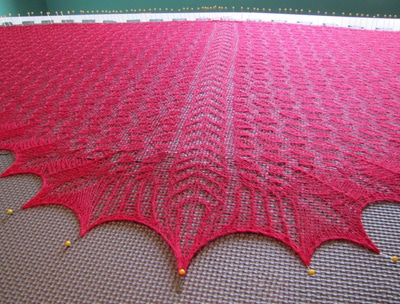
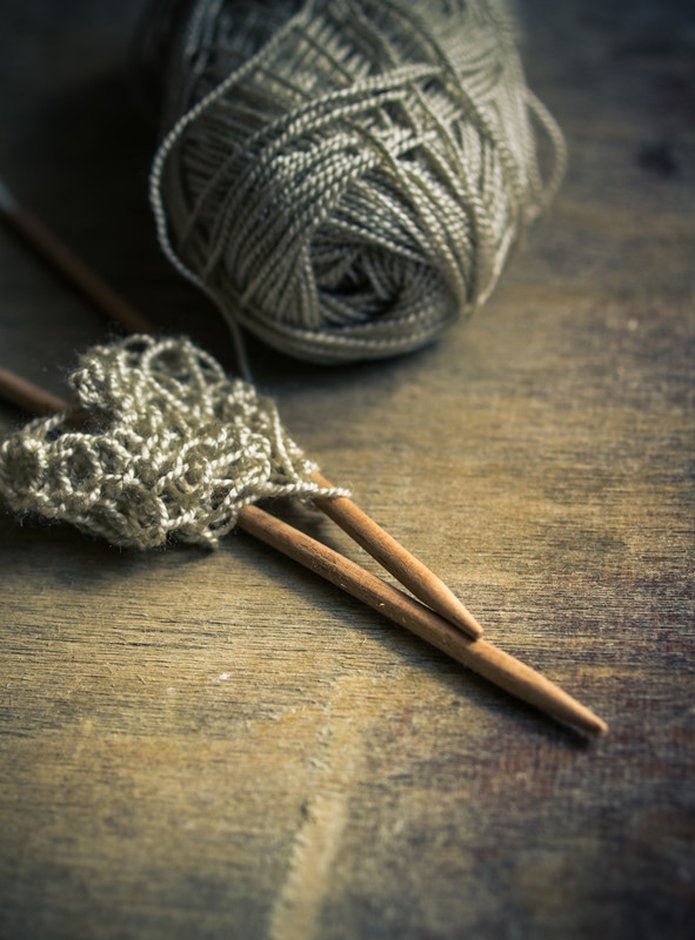
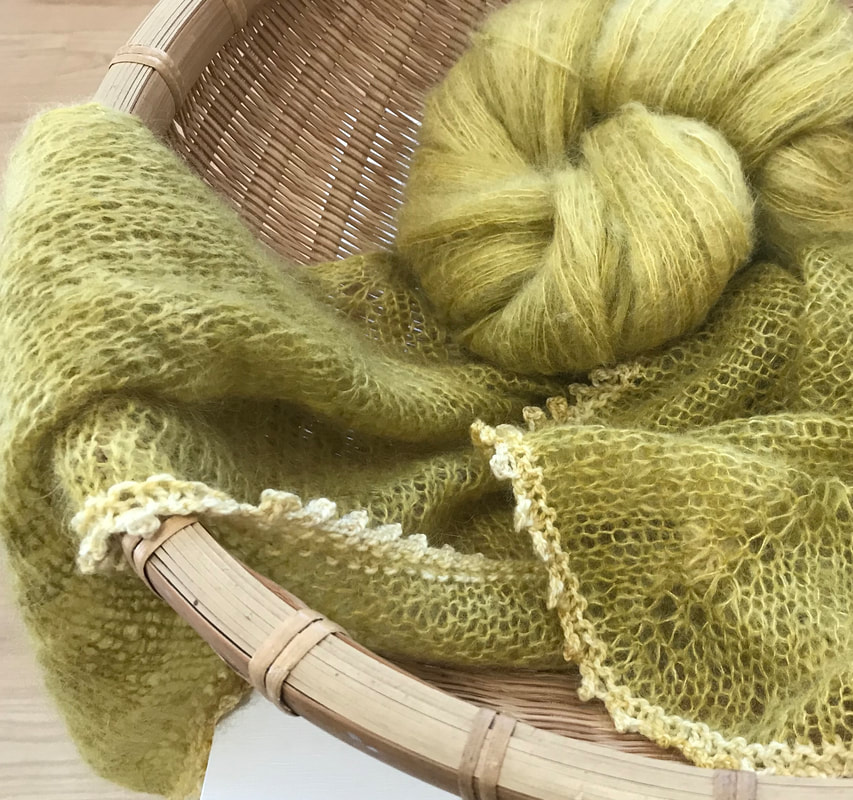
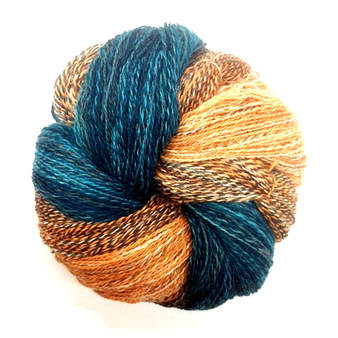
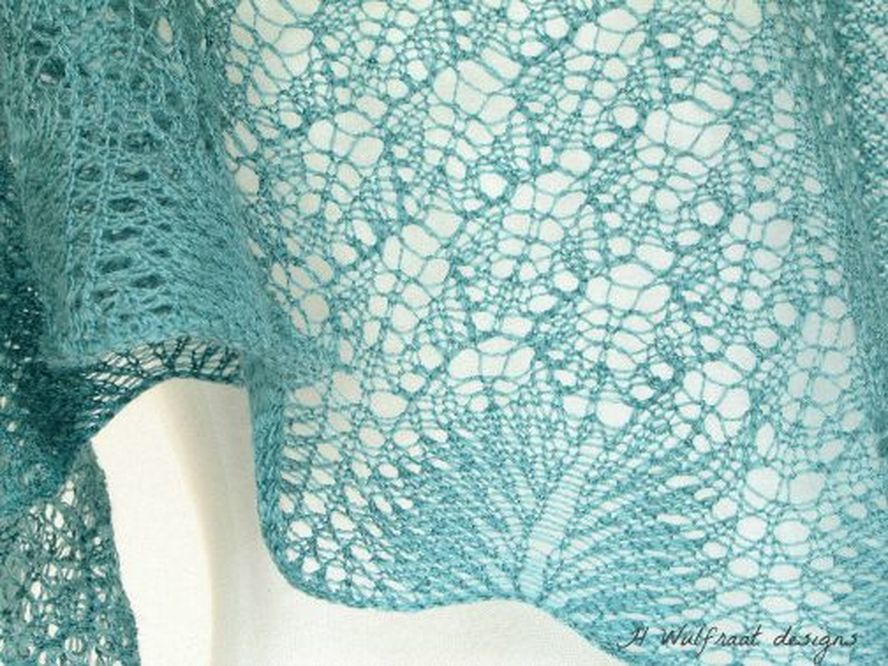
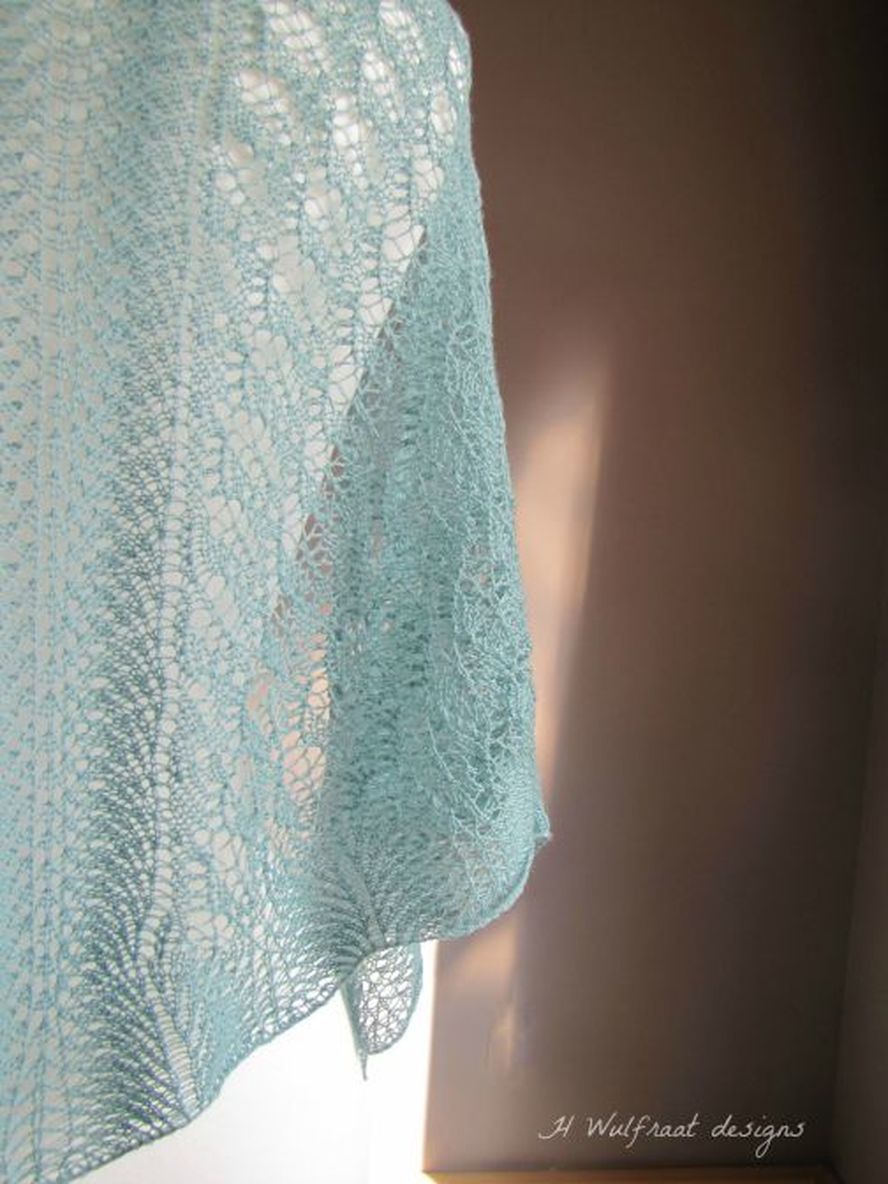
Taking the Leap: (archived: 2006, Heidi Wulfraat) ... looking back 10 years. My background is in animal science, moreover in animal care. I came to the profession with the sincerity and devotion that youth has to offer. I quickly learned that passion and protocol are not necessarily a good marriage and on occasion, many occasions if the truth be known, I opted to follow my passion and break the rules. The resulting conflict between a heartfelt dedication and a rigid corporate framework led me to the creation of London-Wul Fibre Arts, and for that I am thankful. London-Wul is a business that intimately exposes a passion for community, art, animals and land. It's home to my own studio, a hand spinning museum, a gallery featuring Atlantic Canadian fibre artists, a retail fibre arts supply shop and a no-kill fibre farm. In July 2005 London-Wul was named Canada’s Economusee (translated Artisans at work); interpretive centre of Hand spinning. For the year 2005 and in this year 2006 London-Wul has been named Canada’s top emerging business in the tourism industry. London-Wul has welcomed visitors from all corners of the world to see first hand the preservation of a traditional trade. The transition from security to the unknown was not a seamless one. There was hesitation and second guessing to be sure. There were frantic computer breakdowns, late night lambings, accounting woes, and no time for art. I have, however, been very fortunate in my ignorance. In the not knowing of it all I was able to proceed as though this must normal. In the not knowing I began to create London-Wul. And in it's creation people began to respond. London-Wul became its’ own being. It stood on its’ own. It fostered its’ own community. It followed its own path. Each person who embraced it did so from their own vantage. It became my most accomplished work to date as it allowed me to continue to create. It allowed me to view fibre art in the same light, to make art through intuition, trial and error, tradition and abandon, failure and successes. London-Wul has taught me that sometimes less is more and that from play evolves great work. I learned that a plan is only a suggestion as to the outcome. I learned to cherish my hands, to care for them and protect them so that they may pull loop after loop and form stitch after stitch. London-Wul taught me to respect my body for the physical work that it’s capable of. I learned always to trust a Border Collies instinct and that the very best fleece has a name and character attached. I learned that a circle of craftspeople who honor and inspire one another is far greater than the sum of its parts. I learned that the best dye pots do not involve measurement and that Goldenrod is only a weed if you don’t appreciate the rich golden green wool that it affords. I learned that great strength comes from admitting to weakness and you need only to be true to yourself in your art. I learned that that teaching is one of the greatest gifts a person can give. I learned that a person’s best work comes from the heart and is led by intuition. ….and all of this through one simple leap of faith. One leap of faith, be it shifting your entire career path or ordering the intriguingly unknown entrée while at dinner tonight. One leap of faith big or small can lead to the most joyfully unexpected. Live in your work. Love your work and when faced, in your work, with a leap of faith .... don’t hesitate. Remember who you've always been. Remember what you've always loved to do. Do that. One of my favourite no-rinse wool washes is Eucalan. It's available in a lovely selection of natural, lavender, eucalyptus or grapefruit. When I called in my last order I was lost in decision fatigue and simply asked for 2 crates of unscented. After my first blocking session, however, I realized that my knitting just wasn't living up to it's full potential in this all natural wet-wool-scented state. My first thought was to add an essential oil DIY style and presto, custom wool wash! Best of all, because I'm not a huge fan of strong smelling soaps and cleaners, this would allow me to control the amount of scent added. So I've ordered my oils from Sandra at the Simple is Pretty Shop. Some for the studio and some gifts as well. You can learn more about Sandra's take on handmade, earth friendly living along with her essential oil and aromatherapy offerings at Simple is Pretty.com. Go ahead and treat yourself! Add your essential oils to DIY all purpose cleaner, disinfectant, glass cleaner, kitchen scrub, sink scrub, mould and mildew remover, hardwood floor cleaner and more with these recipes by REALSIMPLE.com. Be sure to pamper yourself as well... Check out this amazing lavender mint bath oil recipe by Katie at Wellness Mama. Essential Oil Starter Kit by Simple is Pretty photo courtesy of Simple is Pretty 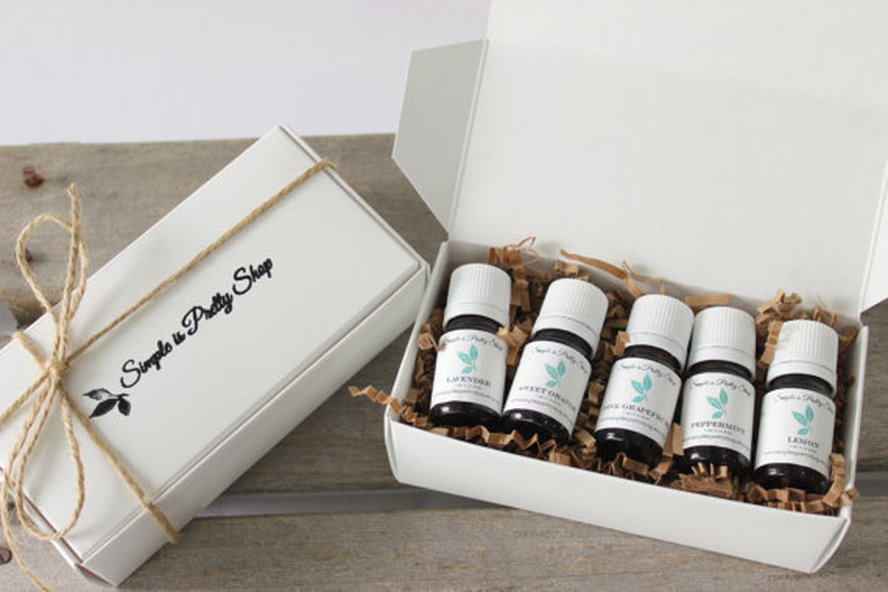 Well y'all know I love a lace knit -all the way from inspiration to the Grand finale. Of course you're never truly finished with lace until it's been blocked and this last step can be daunting (at least it was for me when I started with lace). So here are a few points that demystified lace blocking for me. These steps won't describe the only way to block your lace knitting but they work well in my world and maybe you'll find them helpful as well. For the purpose of this exercise lets consider a lace knit wool shawl. 1. Wet your shawl. In order I a)fill a bucket with warm (almost hot) water b) add about a teaspoon or so of no-rinse wool wash c) gently submerge the knitting d) walk away for 10-20 minutes. 2. Dry your shawl. This is not so much drying as removing excess water. I wrap the knitting in a white (avoid colour transferring to your shawl) terri cloth towel and gently squeeze the bundle once or twice. Easy peasy! 3. Lay your shawl on a blocking mat. Foam mats that click together are perfect for this job. Be sure to give yourself plenty of space as your knitting is going to expand in blocking. The mats that I'm using in the following photos can be purchased at your local hardware store. I've seen people blocking their work on a bed mattress which also works well. 4. Pin along the straight lines of your shawl. I always start by pinning along the straight wing span of the knitting. This tells me if I have set up with enough space to fully extend the shawl. Use the straight grid of your blocking mats or a large quilting ruler as a guide to keep straight edges. I start by pinning every 4 inches or so and then fill in to pin about every 1/2 inch along these edges. *It's really important that you choose good quality pins to work with. I use Clover rust-proof straight pins, and lots of them! 5. Pin shawl Points. Here's where things get really fun. As you stretch your shawl to block the remainder of it's body, extend any points that you'd like to feature in the final project. This is where picots, points and curves make themselves known while the body of your shawl is stretched to reveal all of your beautiful lace work. These techniques work particularly well with wool and wool/silk blends. You may also like to try using blocking wires though I have found them to be somewhat restricting in terms of oversized and curved pieces. What are your favourite blocking tips and tricks? 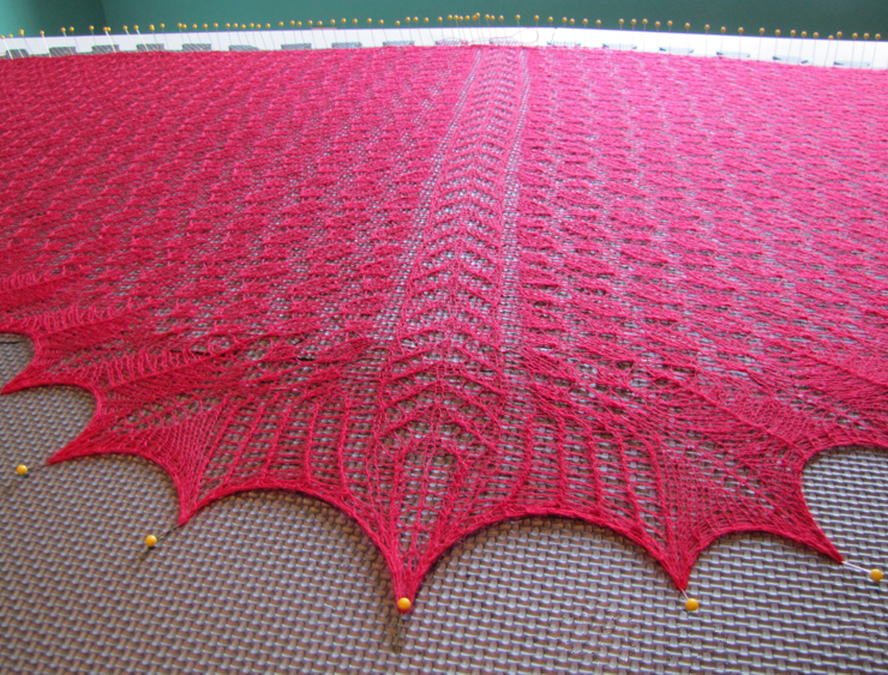 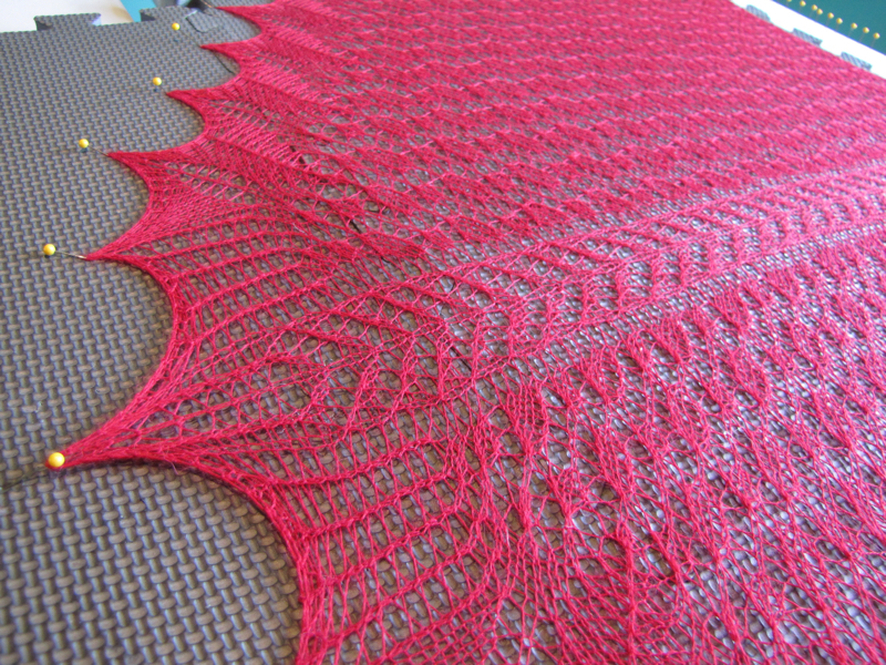 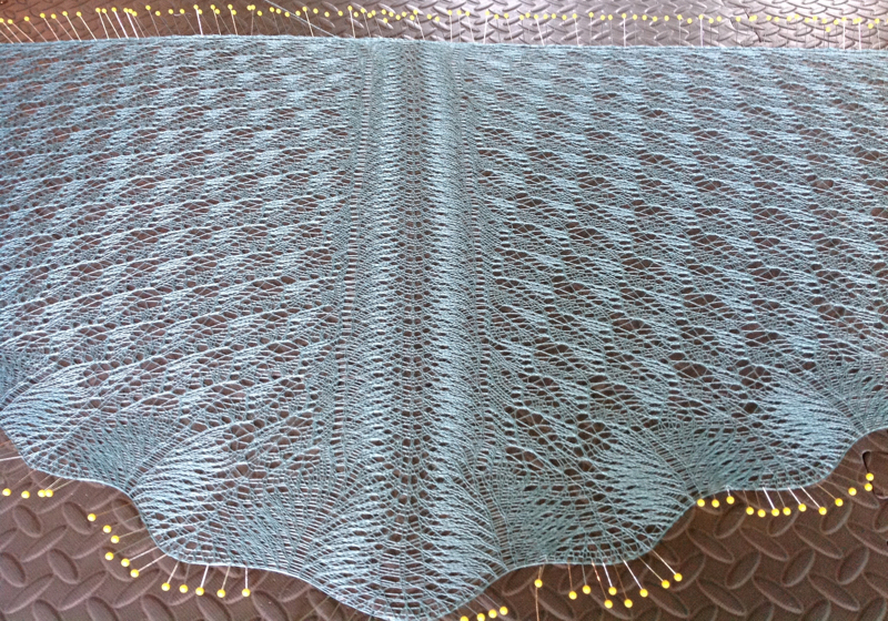 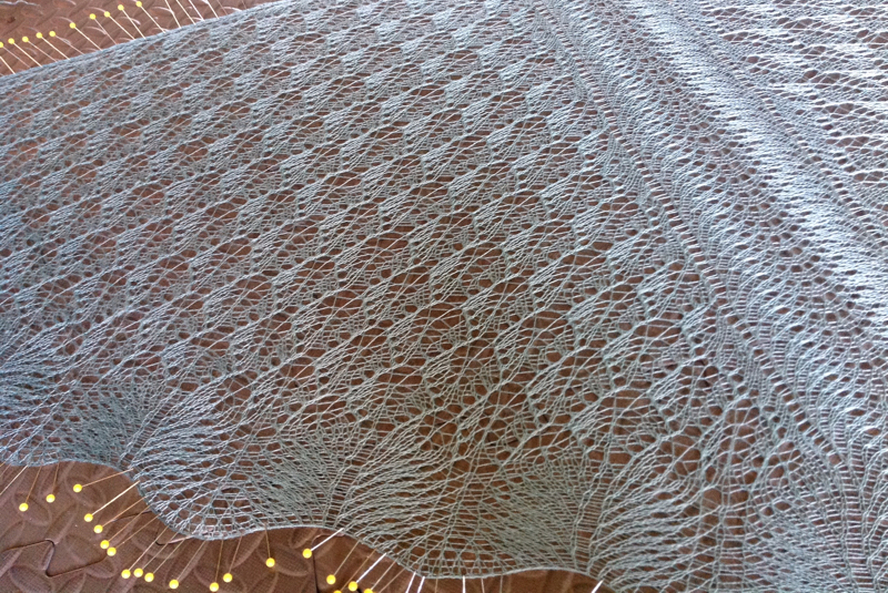 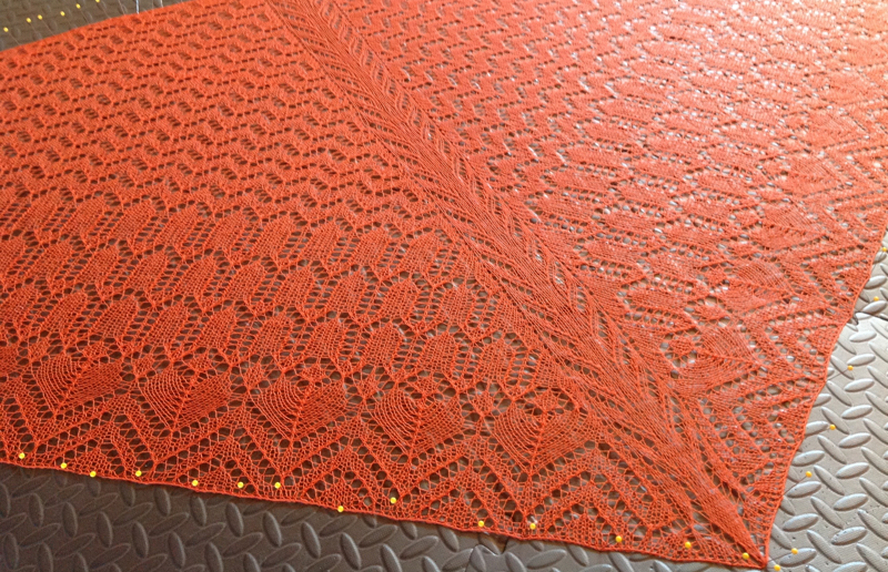 DOVER CASTLE (teal) and FIREBIRD 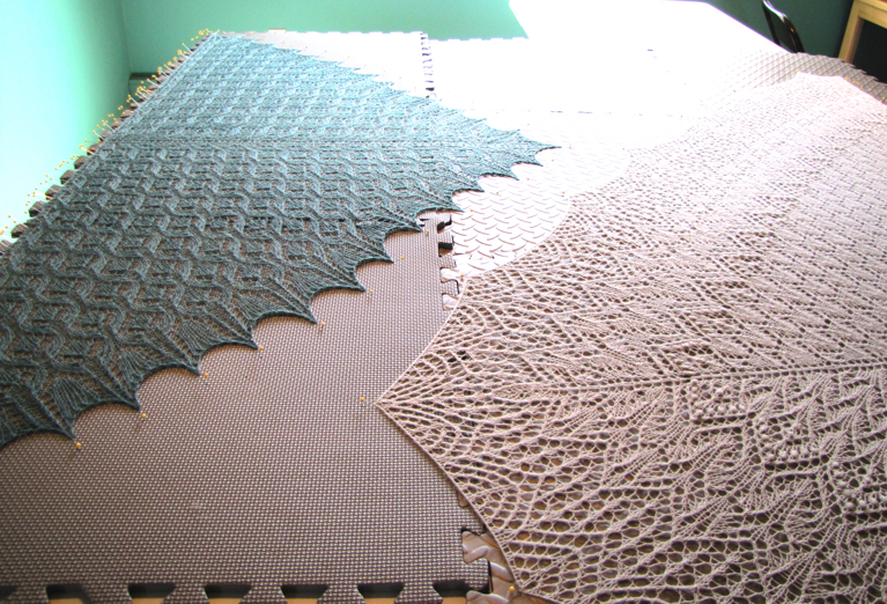 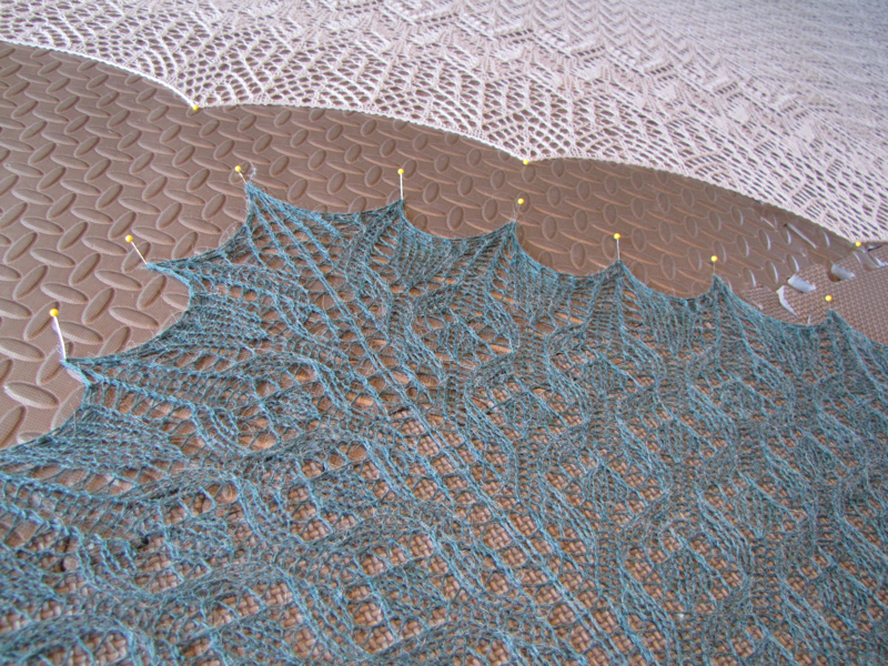 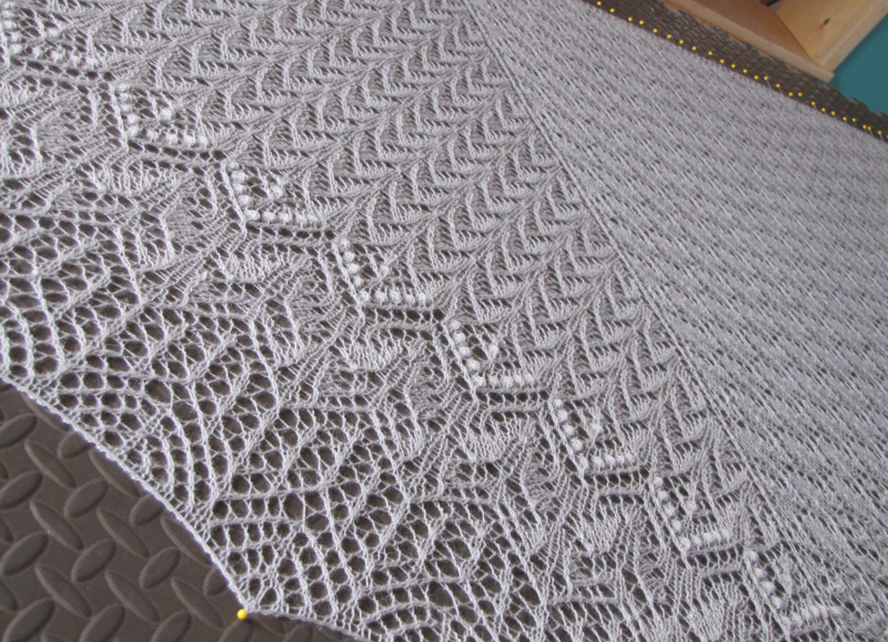 Merino lace weight. I love dyeing, knitting, weaving and wearing it. Just one skein can provide days of pleasure, creativity and satisfaction. Imagine. I think the very best qualities of Merino fibre is most evident in a lace weight yarn. It's short, fine staple results in a soft, lofty fabric that blocks and holds it shape so beautifully. 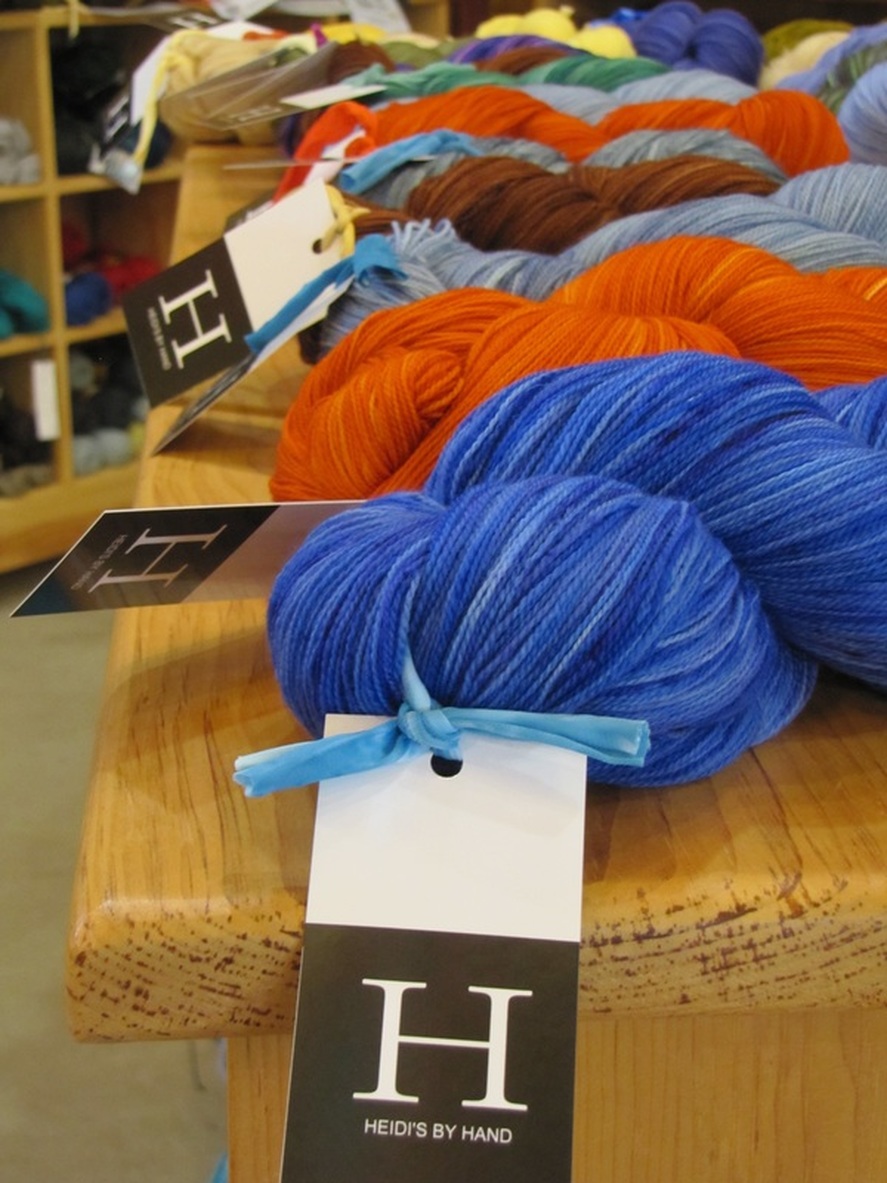 QUICK CLICK: HEIDI'S BY HAND MERINO LACE 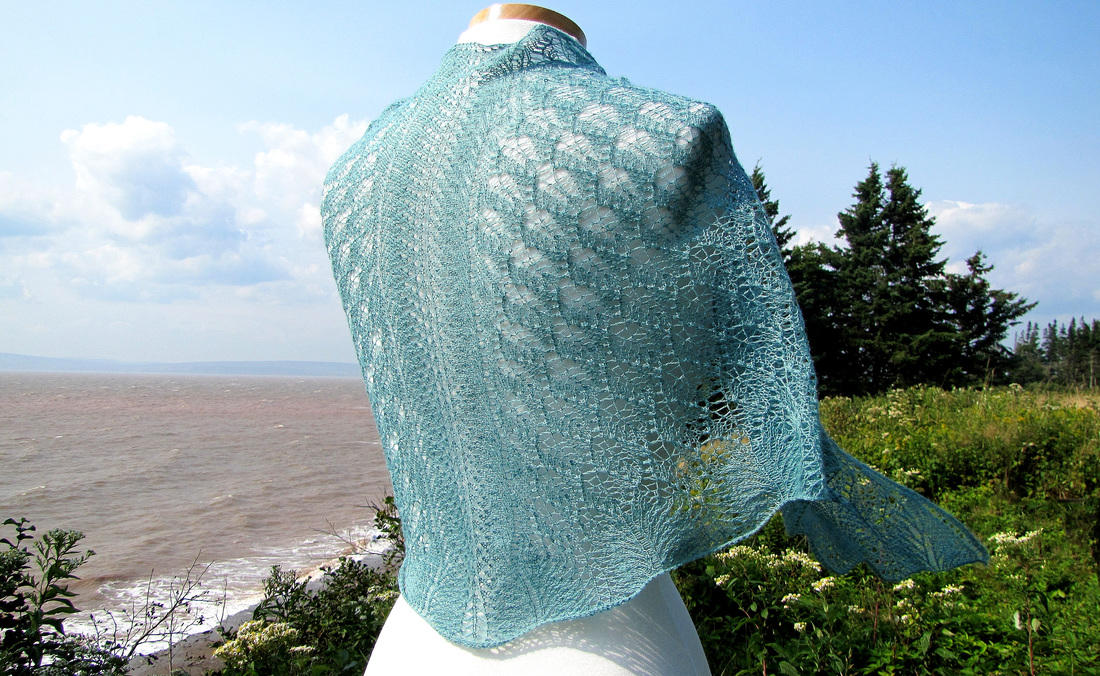 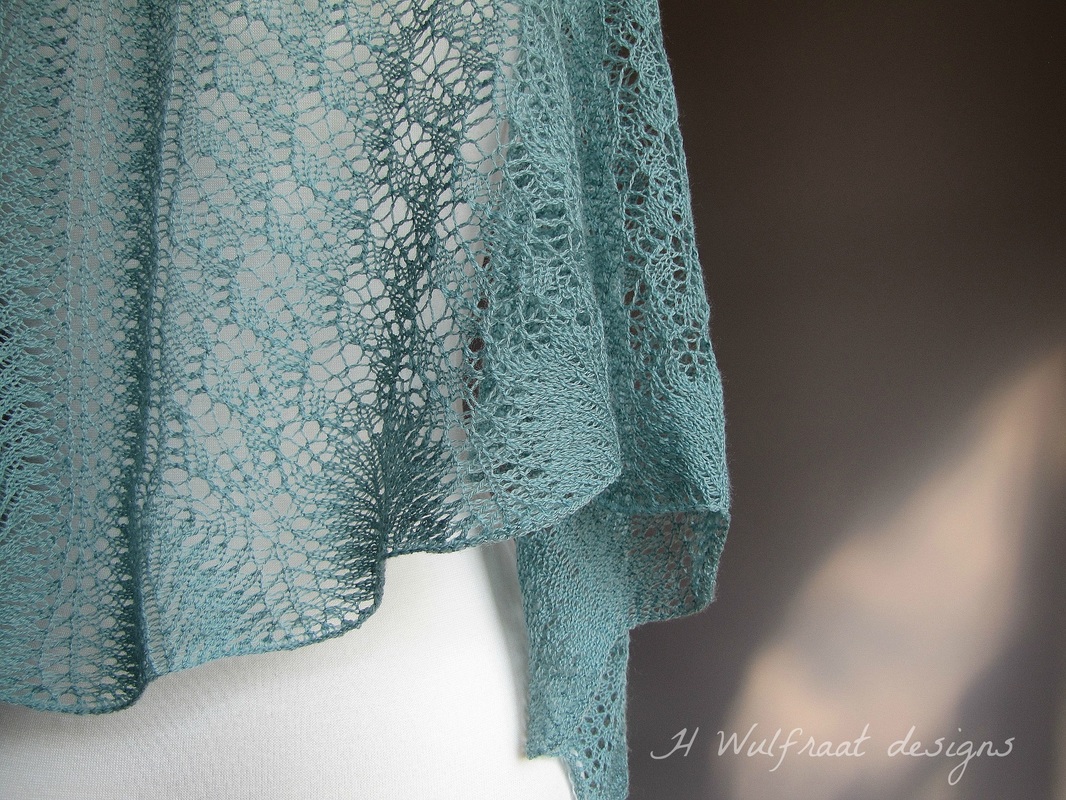 QUICK CLICK: SALT SPRAY HAND KNITTING PATTERN 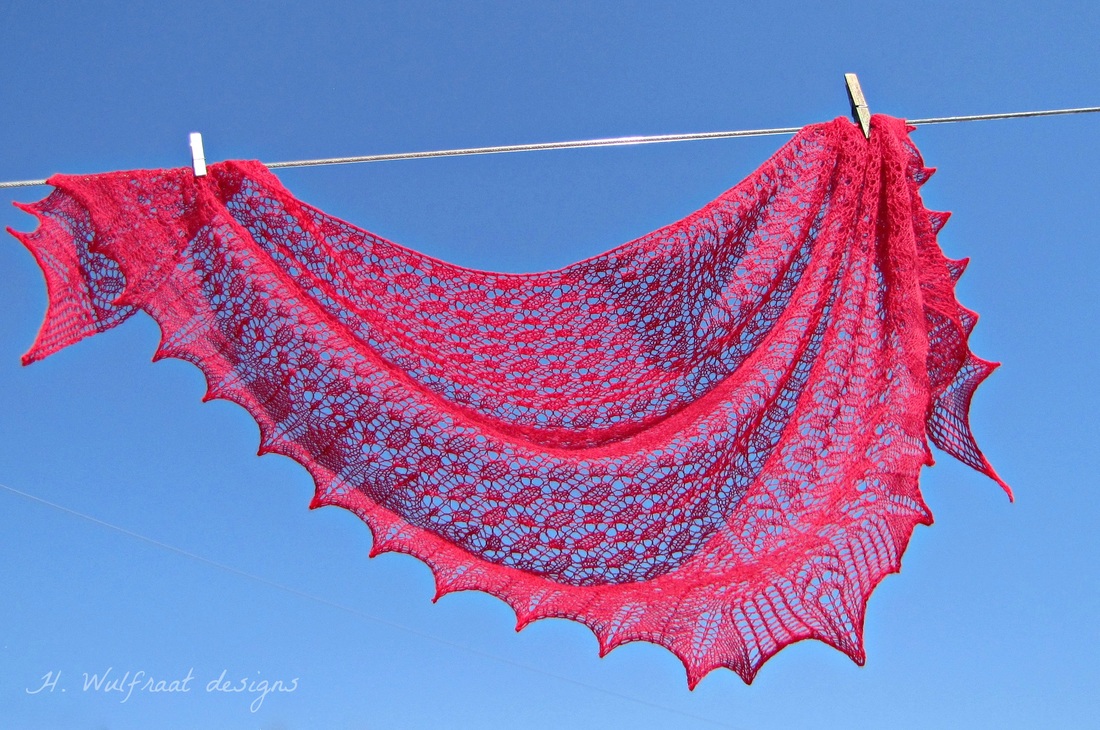 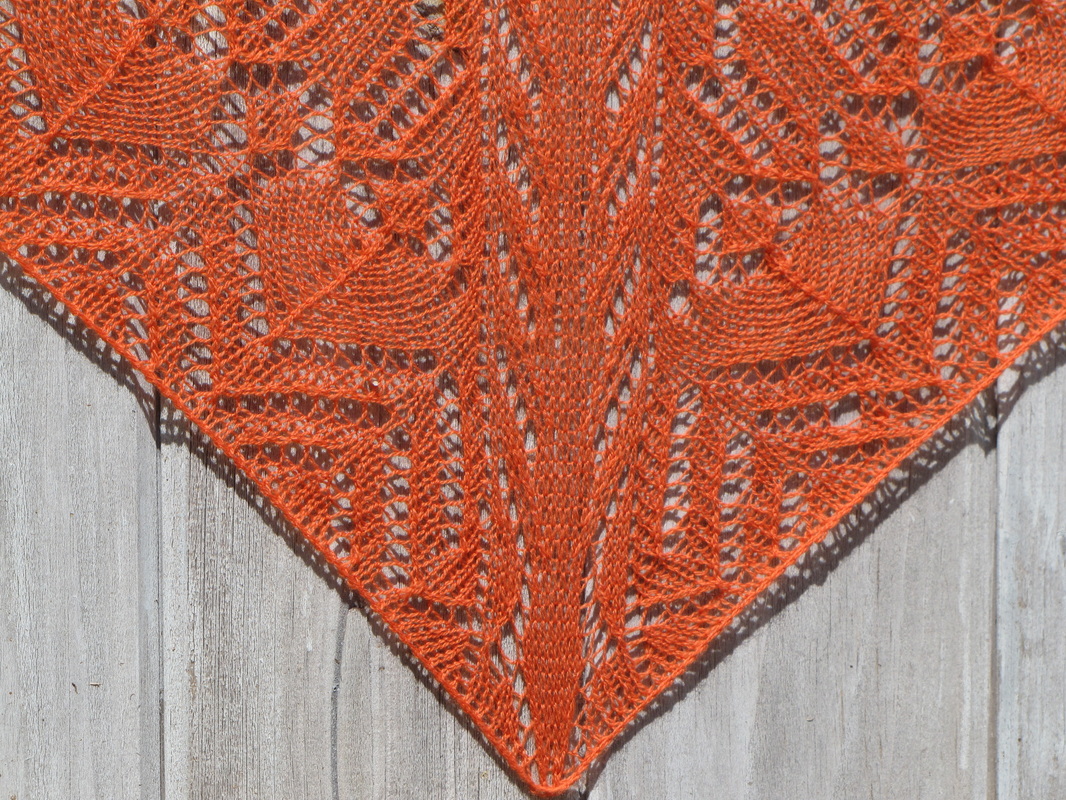 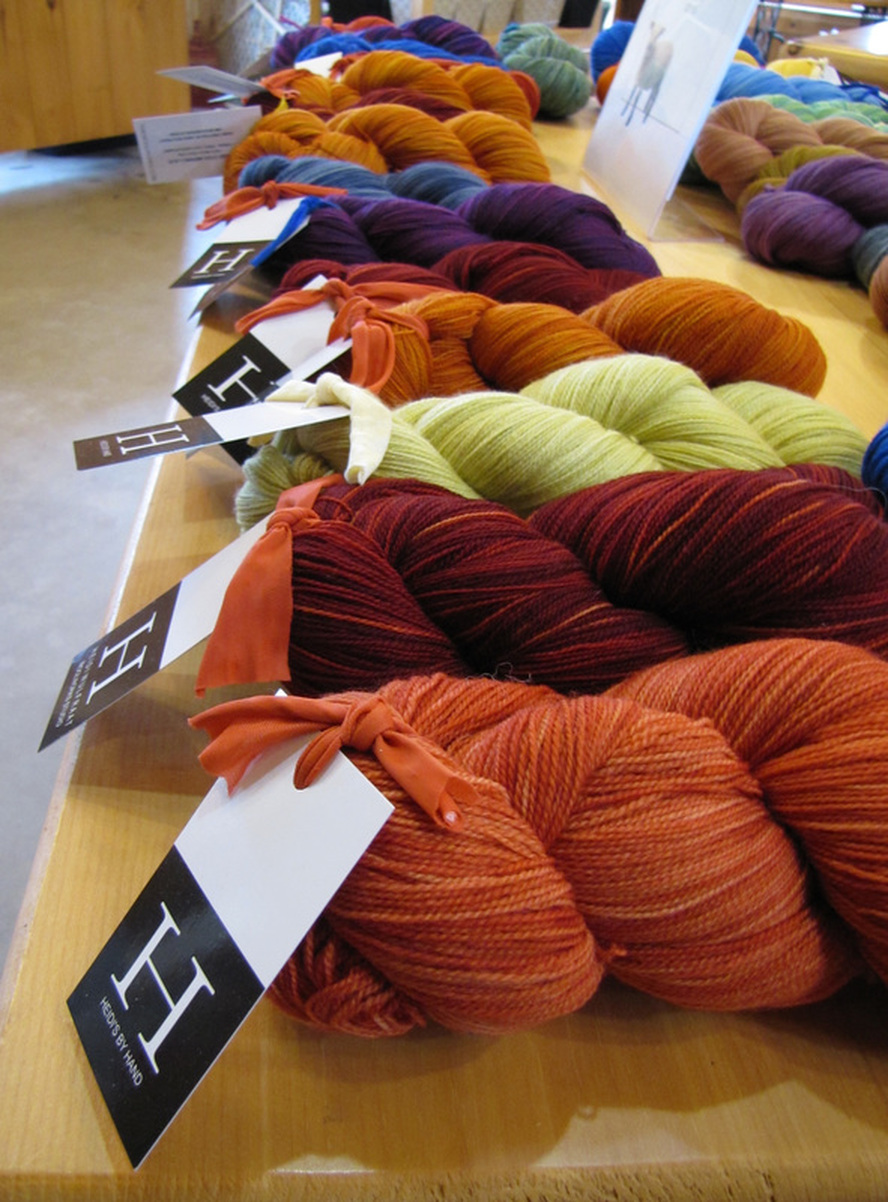 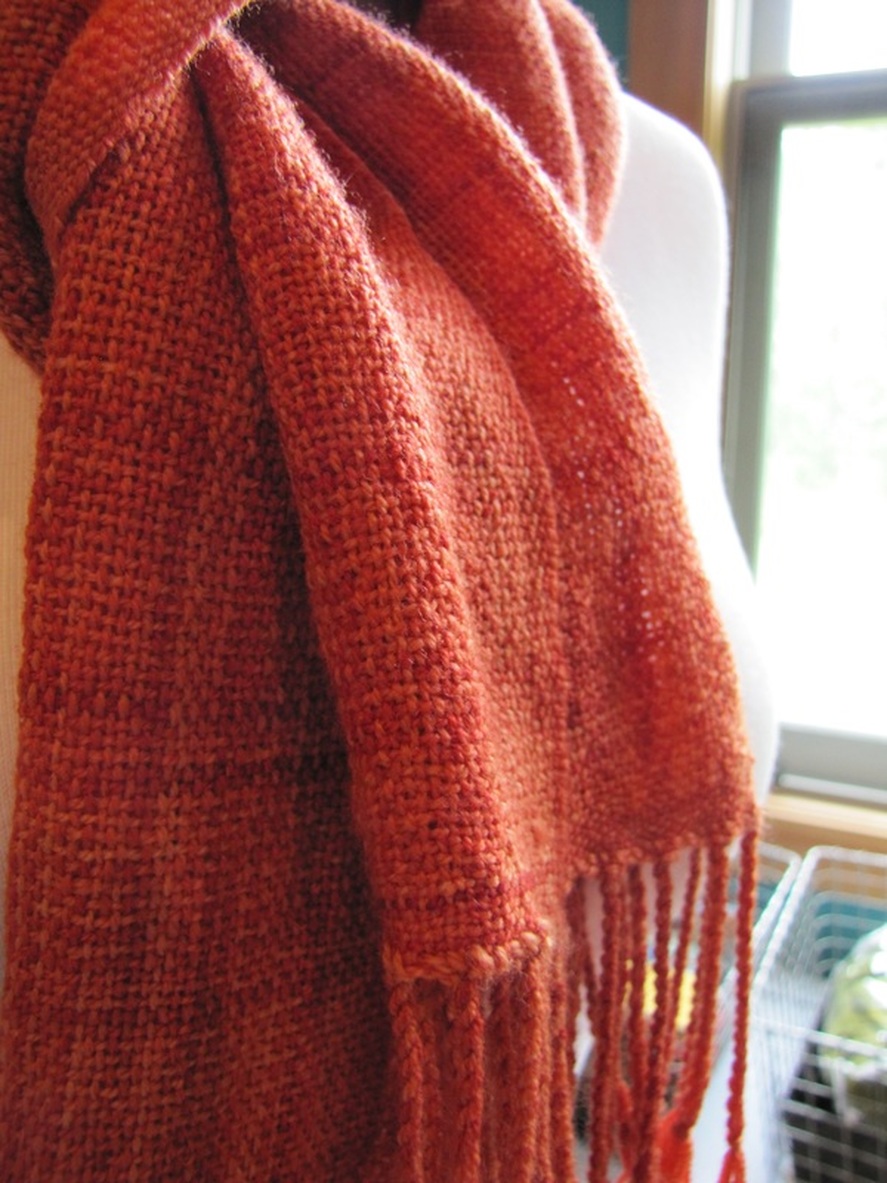 QUICK CLICK: ASHFORD RIGID HEDDLE LOOM: HAND WOVEN
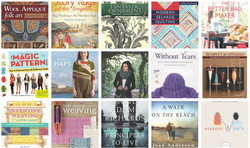
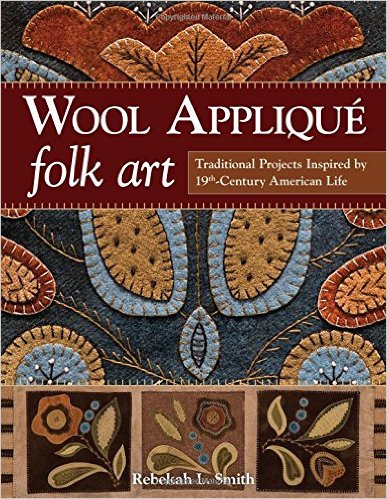
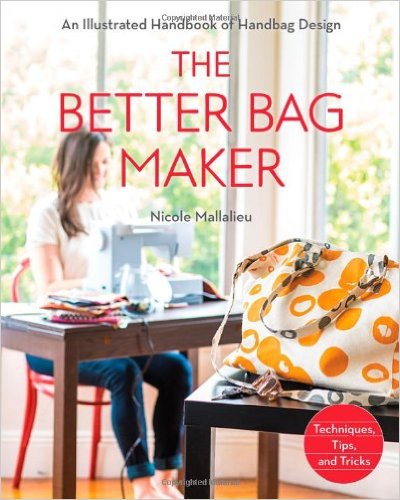
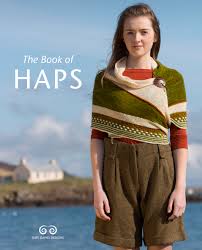
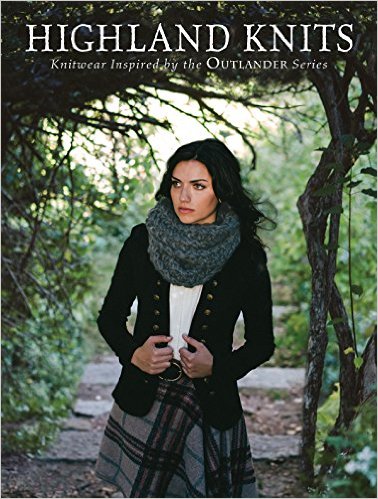
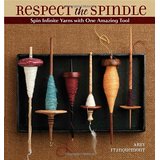
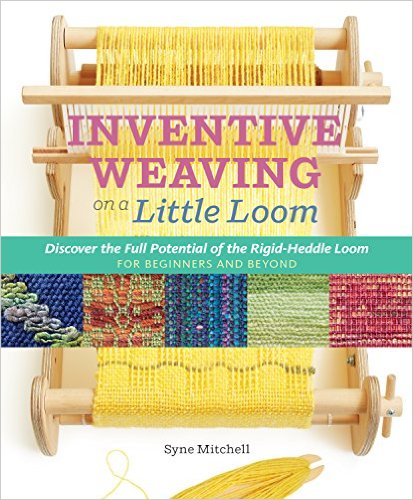
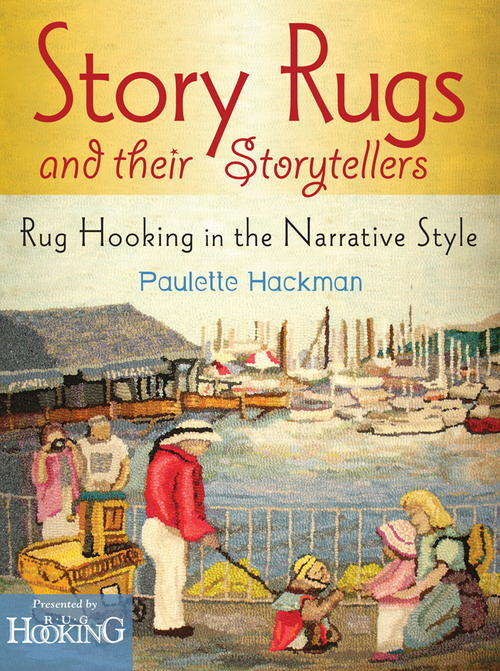
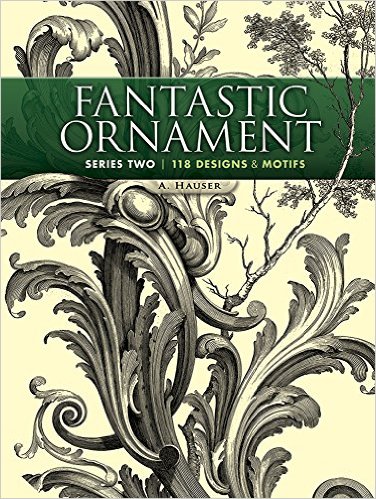
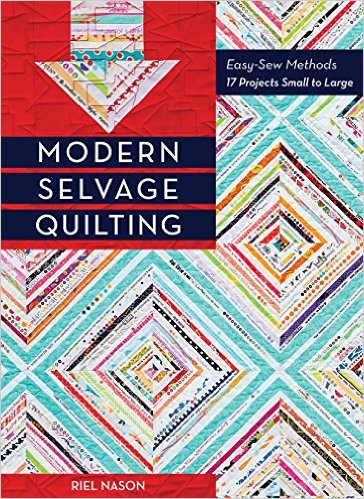
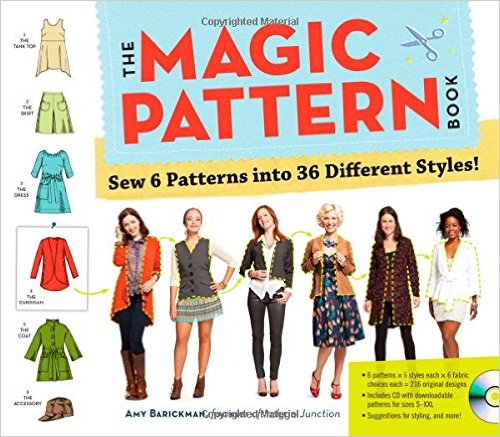
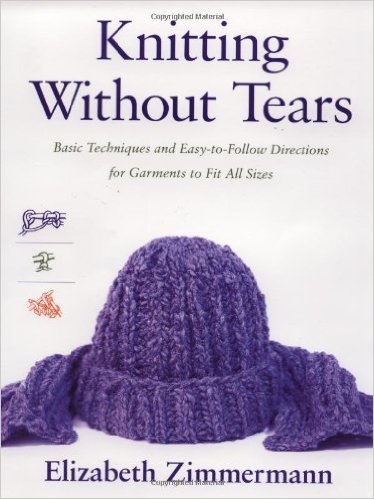
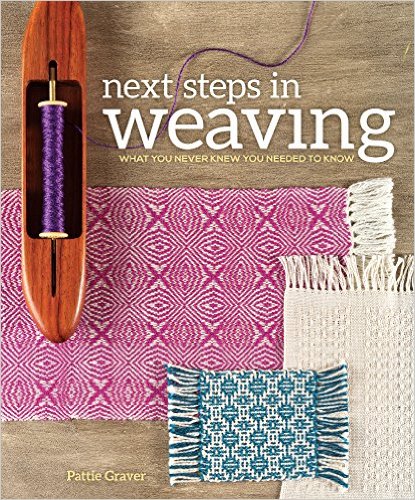
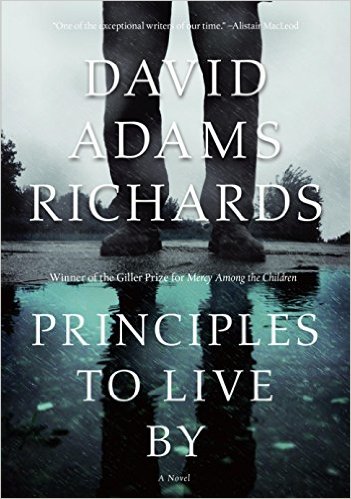
happy times! the ultimate stitcher, maker, dreamer's summer reading guide, 2016, is here...6/1/2016 If your anything like me you love a good reading list. If your a spinner, weaver, stitcher, maker, and reader this list for you! The guide and reviews have been broken down into 5 categories. You'll find great reads for 1. wool appliqué, rug hooking and design 2. stitching 3. knitting 4. spinning and weaving 5. total escape. Happy reading and please be sure to leave a note telling us what's on your list for this summer ! for wool appliqué, rug hooking and design Wool Appliqué Folk Art, Traditional Projects Inspired by 19th-century American Life BY Rebekah L. Smith A feast for the eyes, this book is full of inspiration with some great tips, tricks and techniques along the way. Even if primitive is not your aesthetic I'm guessing that you'll be smitten by Rebekah's clean designs and rich pallet. I particularly loved the segment on wool storage as I am always keen to rearrange and refresh my studio space. If you're interested in digging a little deeper into this title check out Rebekah's 2015 blog post on "the making of ..." . Story Rugs and their Storytellers, Rug Hooking in the Narrative Style BY Paulette Hackman With a March 28, 2016 publishing date this one is hot off the press! I am so looking forward to this, Paulette's examination of rug hooking as a story telling medium. From Rug Hooking Magazine: Story rugs are exciting, personal expressions of joy—they are a visual style of storytelling, as old as cave art, that is gaining popularity among contemporary rug hookers. They tell of celebrations, travels, and adventures and illustrate personal journeys, strongly held beliefs, poignant special memories, and milestones of family heritage. Now there is a book celebrating these popular works of fiber art. • Explore the work of six featured hooking artists. • Marvel at the diversity of styles and subjects by hooking artists from the US, Canada, UK, Australia, and Japan. • Learn techniques to help launch your own project of storytelling-by-hook. Fantastic Ornament, Series Two: 118 Designs and Motifs (Dover Pictorial Archive) BY A. Houser If you're planning on designing your own textile works be sure to have a look at the Dover Publications Collection of Pictorial Archives. These volumes are an invaluable reference resource. Fantastic Ornament, Series Two is a treasure trove that will not disappoint those inclined to embellished design. From the Back Cover: Professional and amateur artists and designers as well as cardmakers and scrapbookers will find this compilation a practical resource of versatile and royalty-free art. This volume is the successor to Dover Publications' Fantastic Ornament, another modern reprint of a rare nineteenth-century publication. See every Dover book in print at DoverPublications.com for stitchingModern Selvage Quilting BY Riel Nason Released on March 21, 2016, is this new title by Riel Nason, New Brunswick's very own Quispamsis Quilter. I've been enjoying Riel's blog the Q and the U for quite some time and am really looking forward to sitting down with this book in hand. Her light hearted approach is always a breath of fresh air and her signature selvage quilting is both joyful and contemporary. Riel has also authored The Town that Drowned , a work of fiction which I absolutely loved! The Better Bag Maker, an Illustrated Handbook of Handbag Design Techniques, Tips and Tricks BY Nicole Mallalieu This is a fantastic read for stitchers who want to take their bag making skills to the next level. The book follows a clean progression in techniques from simple to sophisticated. Nicole takes her craft seriously and outlines the fine details that will bring your skills to a level of excellence. The directions and graphics are concise and the projects are over-the-top appealing if you happen to be a bag lover like me! The Magic Pattern Book: Sew 6 Patterns into 36 Different Styles BY Amy Barickman Not a new title (published in 2014) but one that I make a point of recommending to new sewers who visit my shop. Amy walks you through six basic patterns and then reworks them so that each skill set will provide you with several contemporary projects. Included are 36 downloadable patterns in a full size range all of which are formatted for a home printer. What more could you ask for? Really a great book. FOR KNITTINGThe Book of Haps BY Kate Davies I'm kinda' thrilled that one of the most anticipated titles in knitting this summer is an indie publication. This no doubt, because Kate Davies never disappoints. With a passion for substance and setting Kate continues to share the rich history, traditions and techniques of Scottish knitting in this examination of Shetland Haps (shawls or wraps). From Kate's Blog: Combining textile history with contemporary design, this book explores the story of the hap through five beautifully illustrated essays, and thirteen stunning patterns. contibuters: Jen Arnall-Culliford, Martina Behm, Roslyn Chapman, Kate Davies, Carol Feller, Lucy Hague, Romi Hill, Bristol Ivy, Gudrun Johnston, Hélène Magnússon, Donna Smith, Hazel Tindall, Tom van Deijnen, Veera Välimäki. Highlander Knits: Knitwear Inspired by the Outlander Series BY Interweave Editors Fans of Diana Gabaldon and the hit TV series Outlander are in for a treat with this inspired pattern collection by Interweave press. The book includes 16 very wearable pieces, beautiful format and well defined pattern instruction. Interweave: From Claire's "Rent Collection Shawl" to the "Sassenach Cowl," all your favorite pieces worn by the series' beloved heroine, and then some, are here, waiting to be knit. You'll find each piece relevant to your wardrobe, whether dressing for today or eighteenth century Scotland. Knitting Without Tears BY Elizabeth Zimmermann Unlike the previous two knitting titles mentioned this book is far from new, however I mention it for a few reasons. To begin, this is truly a mainstay for any knitting library. Although it's a pattern book it's also a great read. Zimmermann's writing is both endearing and empowering. She generously provides an understanding of knitting that goes well beyond a step by step formula. I recommend Knitting Without Tears for this summer as it's a small gem full of delightful anecdotes that you can certainly enjoy even without ever picking up your knitting needles. Beginner and expert knitters alike will be charmed by Zimmermann's passion and wisdom throughout. FOR SPINNING AND WEAVINGNext Steps in Weaving: What You Never Knew You Needed to Know BY Pattie Graver I love this book. It's full of obvious "next steps" for the adventurous beginner and is a great fill-in for those who don't have easy access to a weaving instructor. Samplers and projects included are designed to have you work through various weaving concepts so that they are fully understood and will remain solid additions to your skill set. Pattie's writing style is very accessible and is sympathetic to the weaving student. Her instructions are clear and well rounded. This book left me feeling as though I now have access to an extensive weaving workshop at any given time. Respect the Spindle BY Abby Franquemont Certainly not a new title but I have recommended this one in my shop for years and I simply must include it here. Why? Because summer is the season for drop spindling. What could be easier as a quick take-along to satisfy your fibre craving? If you haven't yet given spindle spinning a try this book will walk you through the process from selecting a spindle and fibre to making your first hand spun yarn. Expert spinners will also love this one. Abby is an elegant writer who shares fascinating personal experiences of spindling throughout the world. Grab your kindle, spindle, fibre and beach bag. You're going to enjoy this one! Inventive weaving on a Little Loom BY Syne Mitchell Rigid Heddle looms are perfect for summer weaving and this new title by Syne Mitchell would serve well as a go-to resource for any rigid heddle fan. The book provides a thorough guide to selecting a rigid heddle loom as well as all of the basics. There are however, several inclusions that make this book more powerful than many others on the topic. You'll find introductions to tapestry, inlays, lace, shibori, multiple shaft weaving, as well as calculations, colour theory, finishing techniques and more. Instructions and graphics are concise and several projects are included. I highly recommend this title. For more of Syne Mitchell check out Weavezine as well as her archived poscast Weavecast (no longer in production but still well worth the listen). FOR TOTAL ESCAPEPrincipals To Live By
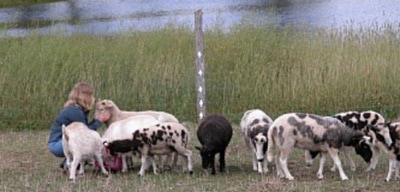
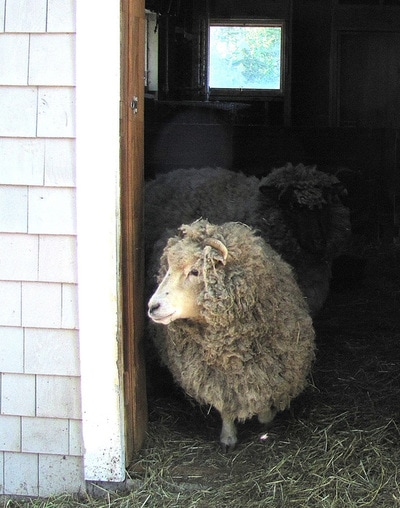
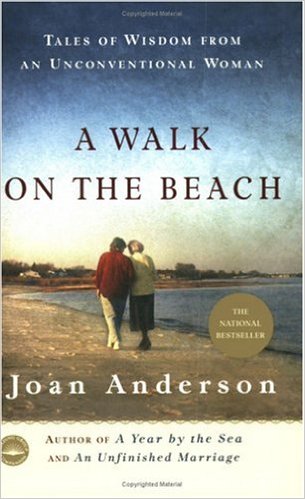
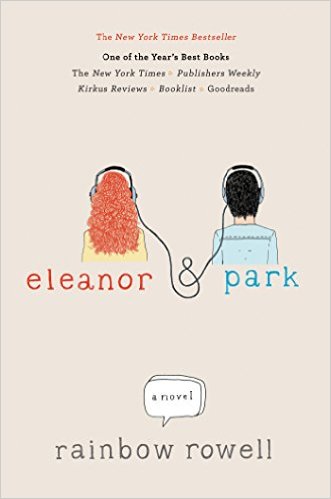
BY David Adams Richards I've not met a novel by this author that I didn't love so I'm thrilled to have this new read for the summer of 2016. I could go on about why I am so deeply affected by the work of Adams Richards but his stories are yours to experience in all of their misfortune and triumph. I will say that his characters are ordinary, perhaps familiar, and he is at times painfully honest. His writing is steeped in sense of place, human fallibility, and circumstance. A Walk on the Beach: Tales of Wisdom from an Unconventional Woman BY Joan Anderson At a completely different pace and in nonfiction, I've chosen this book as a perfect summer read. Following Joan's earlier title A Year by the Sea , A Walk on the Beach is a quick, easy read but not without substance. From Joan Anderson's Website: A Walk on the Beach is the story of my chance encounter with a wise, playful and astonishing woman who helped usher me toward change and self discovery. First glimpsed as a slender figure on a foggy jetty, Joan Erikson was no ordinary woman. The wife and collaborative of Erik Erikson who designed the Eight Stages of Life, Joan Erikson was always eager to pass on her zest for living. Eleanor & Park BY Rainbow Rowell A sweet, sad, beautiful book about love. Though this is not a new title I thought that it must be included on the chance that you missed it. This one is YA so be ready to feel ALL the feels! From Rainbow's website: Bono met his wife in high school, Park says. So did Jerry Lee Lewis, Eleanor answers. I’m not kidding, he says. You should be, she says, we’re 16. What about Romeo and Juliet? Shallow, confused, then dead. I love you, Park says. Wherefore art thou, Eleanor answers. I’m not kidding, he says. You should be. Set over the course of one school year in 1986, this is the story of two star-crossed misfits—smart enough to know that first love almost never lasts, but brave and desperate enough to try. When Eleanor meets Park, you’ll remember your own first love—and just how hard it pulled you under. For the past 20 years I've kept sheep but today I am sheepless. It's difficult to write about the end of my flock but the truth is, this is a happy story. Wait, before I go any further, I still have Angora goats and a lone Angora rabbit. Thank goodness. Though I'm still feeling disoriented when I'm in the barn. That feeling of standing in a room and forgetting what you've come for. When I first started out with sheep I had several years of animal husbandry under my belt. I'd completed my degree in Animal Science. I'd been driving tractors, birthing calves, tossing hay bales. The whole bit. I'd worked in wildlife rehabilitation and with exotic animals as well. I'd proven to myself that I could farm but my real interest was in something a little bit different. I started a flock with the understanding that no animals would be sold nor destroyed as a product. Which leads me to this post after many years of keeping an ever-aging collection of sheep. So maybe what I've been doing all this time is not really farming at all. Call it what you will. There is something very special in knowing a group of animals over what has been, quite literally, a lifetime. Knowing them individually. Knowing their habits, their alliances and their discrepancies. I have watched the colour of their wool, the way that they move about, even the expressions on their faces change over the years. In the end I couldn't really have asked for better. I had wondered what to expect. Their decline was gradual, stoic and graceful. As arthritis set into their joints and when comfort and quality declined we intervened. Along with the amazing empathy and kindness of our provincial agricultural vets decisions were made that, however qualified, are never easy. But maybe the best way for me to say all that needs to be said is to add this note; something that I wrote five years ago, in October of 2011... My sheep are getting old. They are contented. They are trusting. They've never been threatened, cold, wet or hungry. They have never been sorted through and selected to be sold or to be marketed. They have never been separated from one another or from their young. They have come and, for years, they have stayed. A comfortable little group. Not conventional, I know, but it fits me and I think it fits them as well.  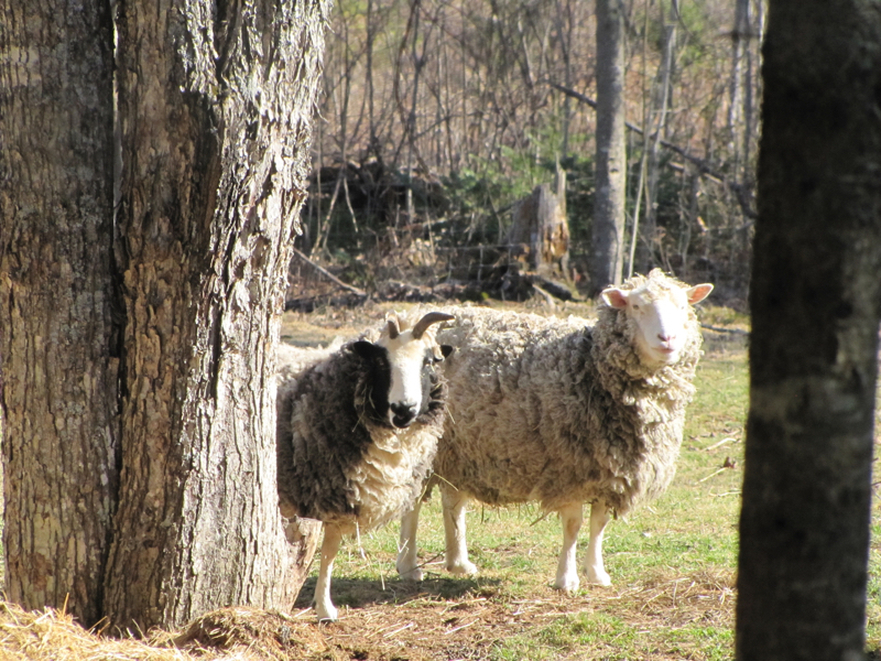 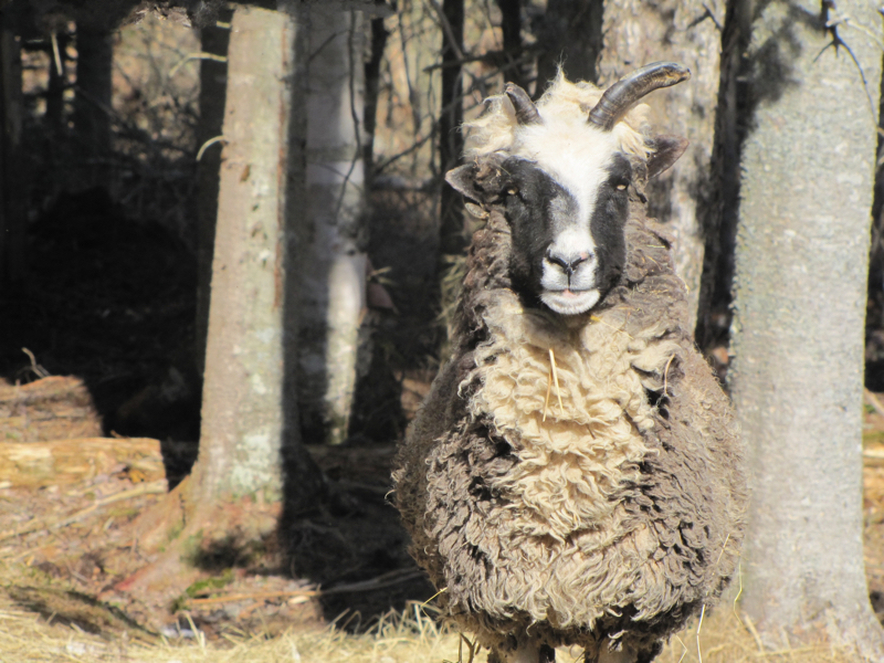 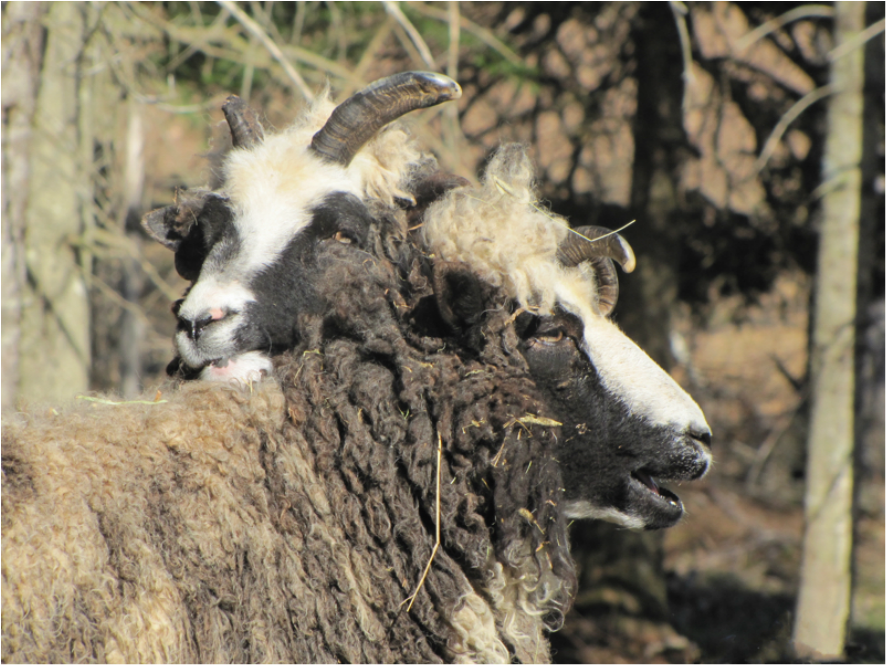 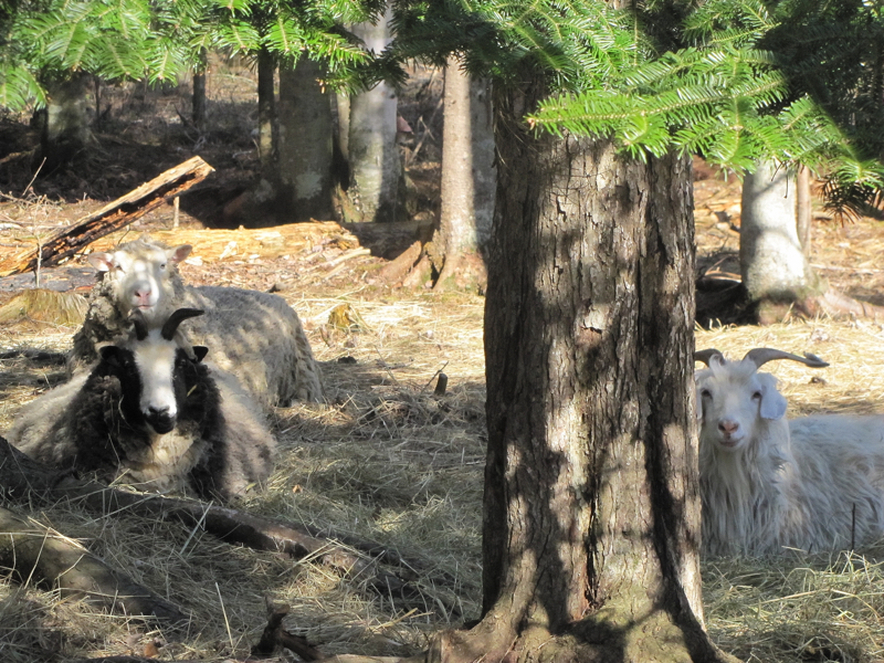 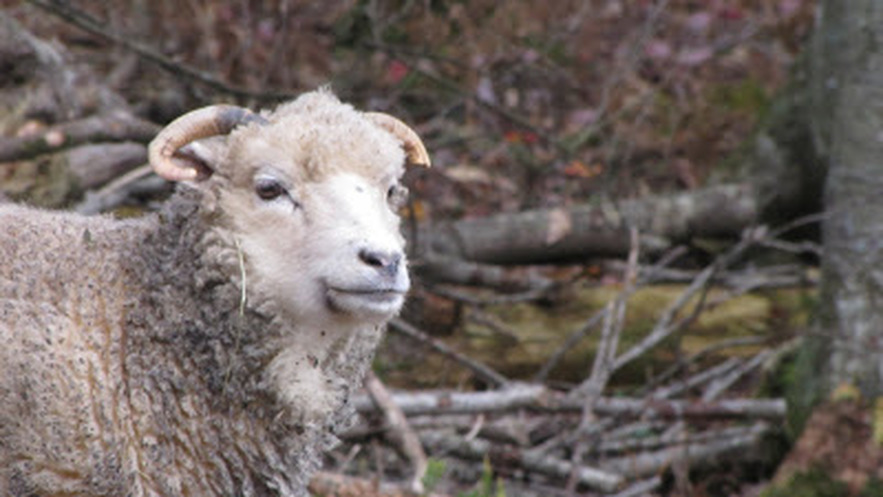 Confession. I am a weekend weaver. For me weaving needs to be a leisurely exercise that is relatively simple and a whole lot of fun. Enter the Ashford Rigid heddle loom. While powerful pieces of equipment Ashford's rigid heddle looms are straightforward, compact and lovely to look at. Add a large selection of RHL models ranging from 10-48", (including those which will fold into a great- looking padded carry bag), 6 wide eye reed sizes as well as an incredible vari-dent reed, and the (weaving) world is your oyster ! Here's a look at just how manageable weaving really can be ... If you're interested in an Ashford rigid heddle loom of your own check out our online shop. I'm happy to help if you have any questions. 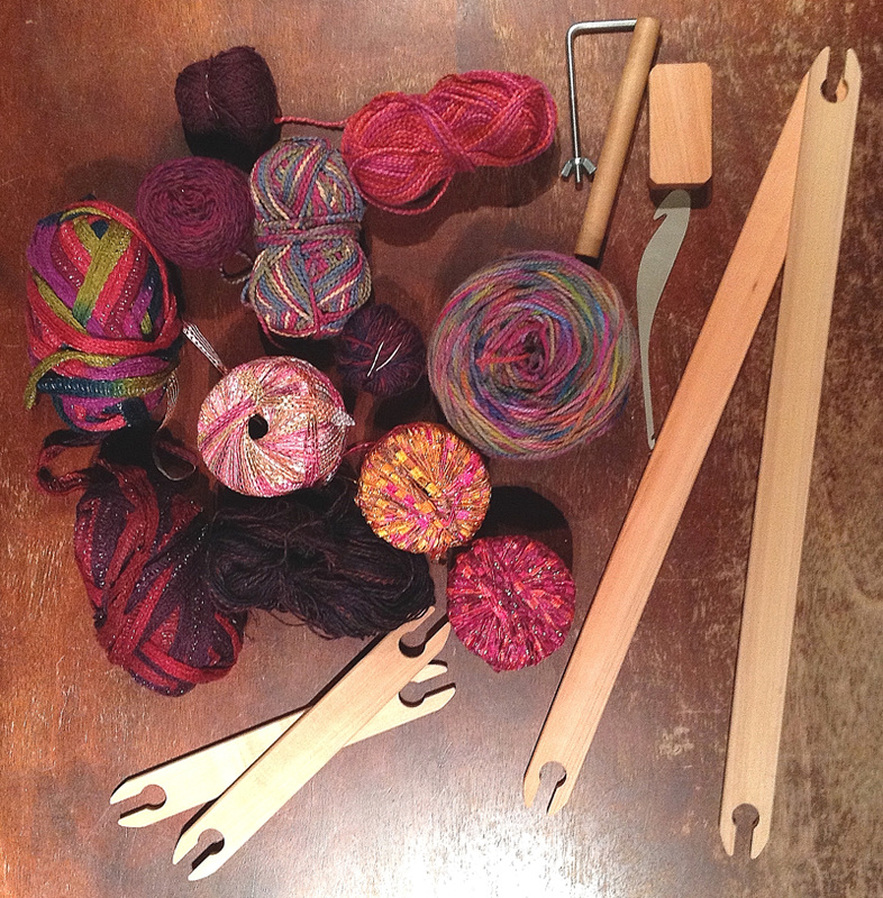 Weaving is a fantastic way to play with novelty and leftover yarns. I've picked out some happy colours, a variety of textures, gathered my stick shuttles and a warping clamp. Ready to go! 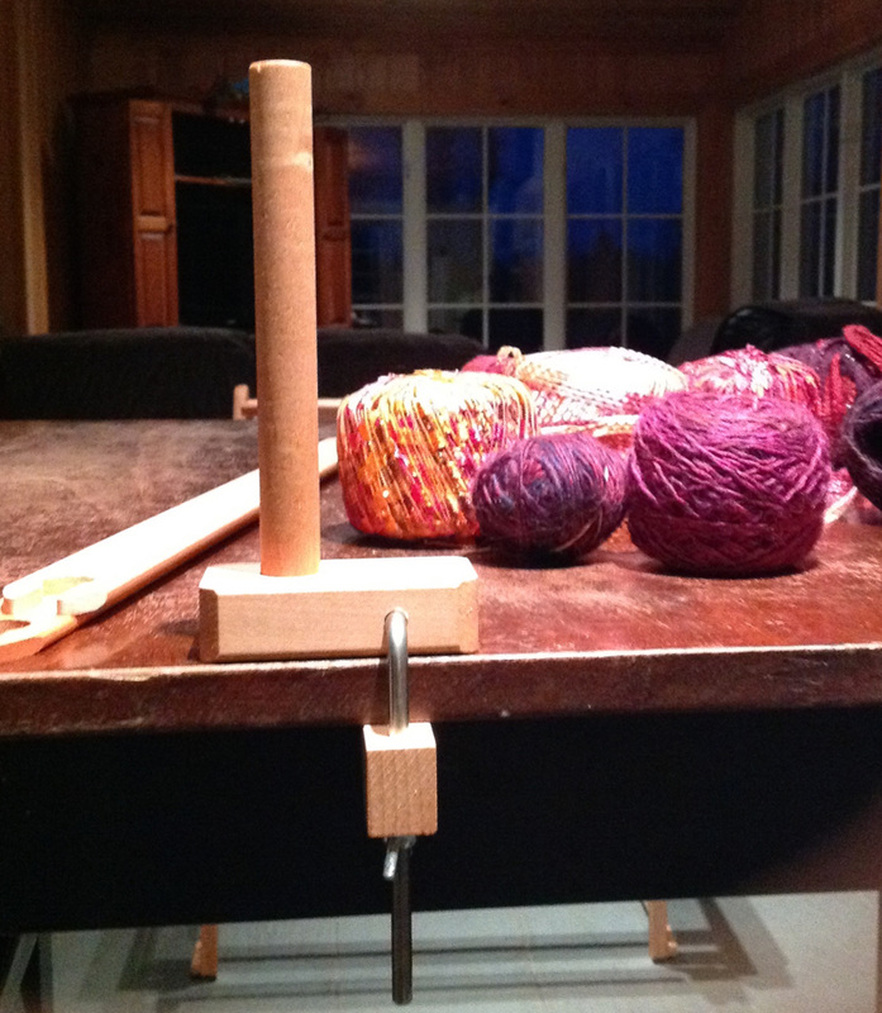 The warping peg is set up across from my loom. I've separated the two (loom and peg) by the length of cloth that I want to make plus some extra to accommodate yarn along this length being stretched, tied and so on. 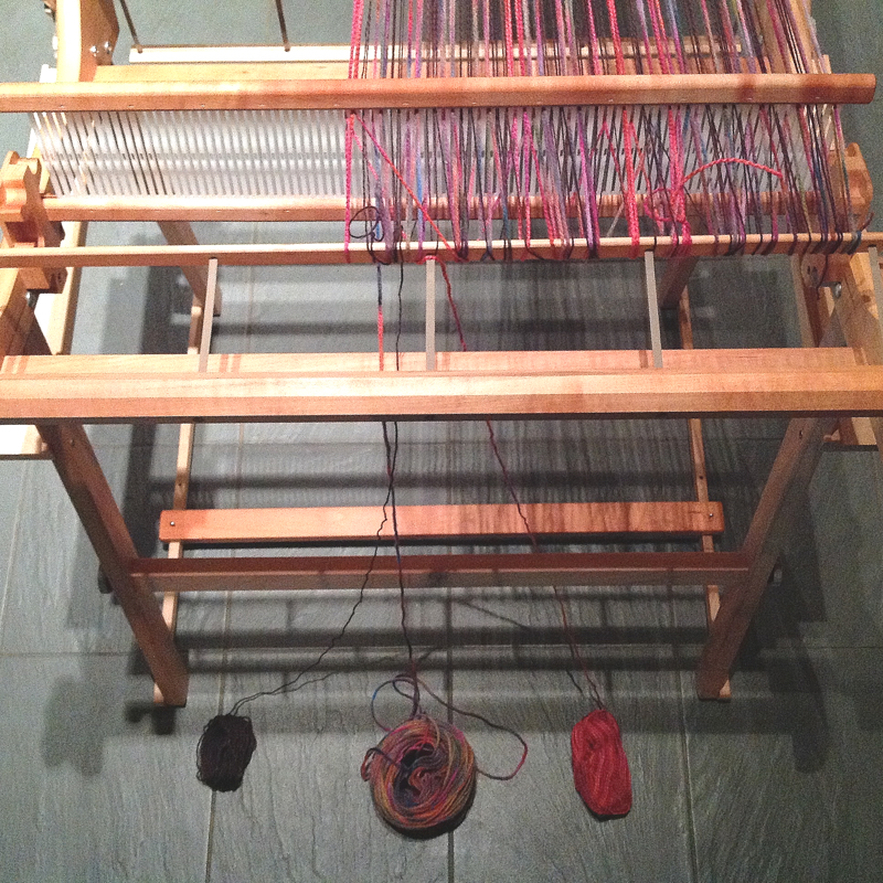 My Warp yarns are tied to a warp stick on the back beam of the loom . 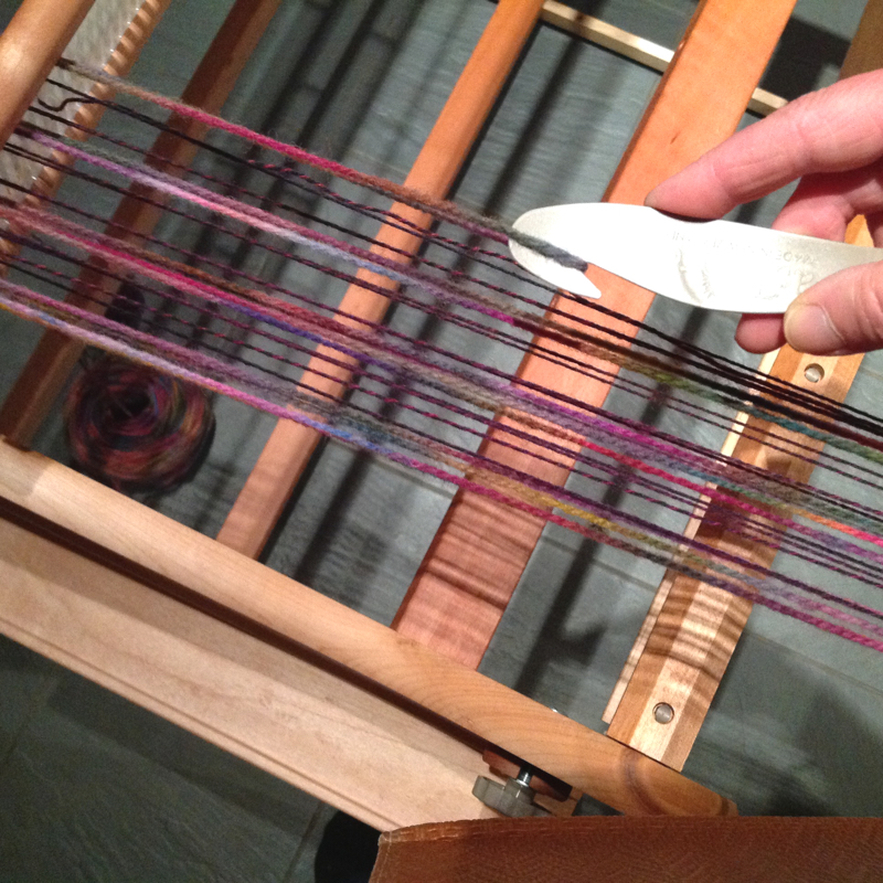 In this method of direct warping yarns are attached to the back beam, pulled through reed slots, carried across the room and looped over that warping peg that I've clamped onto a table. 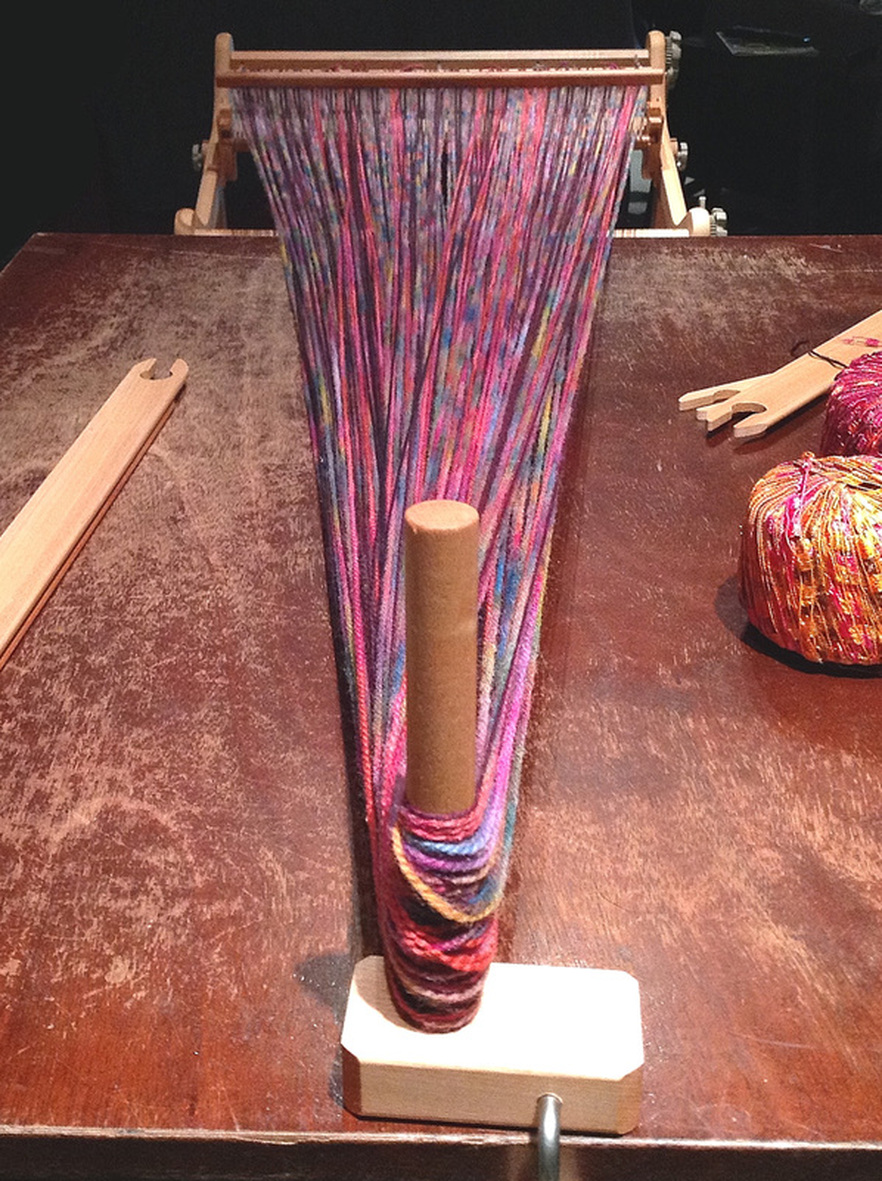 And here we are with the full width of the loom being warped.  Now all of those warp threads can be bundled up and lifted off of the warping peg. The loops can be cut at this point. Note: it's easier to cut these warp loops before taking them off the warping peg!  Having a helper makes this next step much easier, though one person can get the job done. Standing in front of the loom, hold the warp under tension. A heavy pile of books can do this for you if need be! 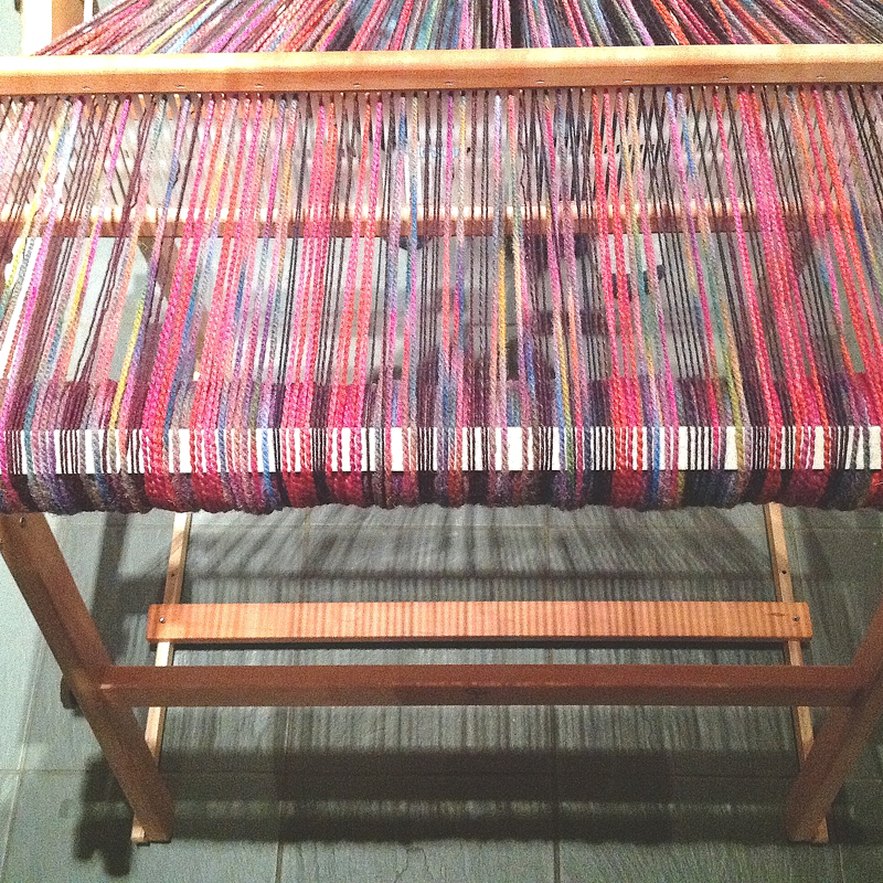 From the back of the loom, the back beam (or roller) is rotated to wind on the tensioned warp threads. Paper, cardboard or plastic "spacers" (the white slat seen here) are wound along with the warp to keep layers of warp threads separate as they wrap around the back beam. 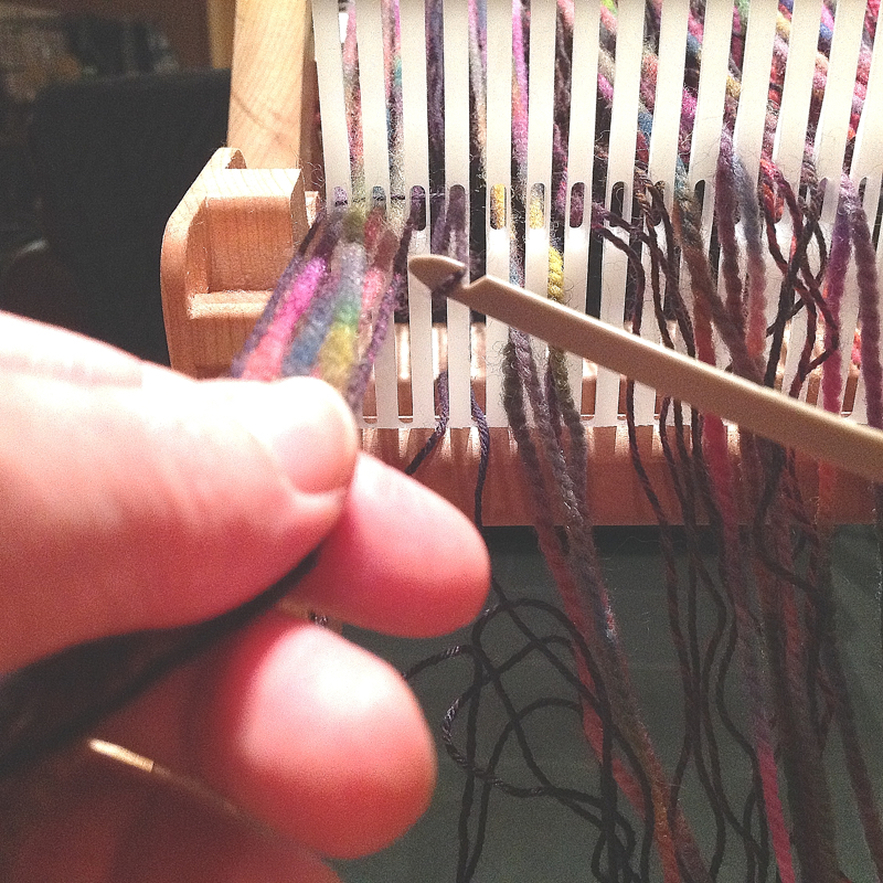 Because I carried a LOOP of yarn through each reed slot and over to the warping peg, I now have two strands of yarn in each slot. Here, they are separated so that one strand remains in each slot and one strand is passed through each of the smaller "eye' openings on the reed. 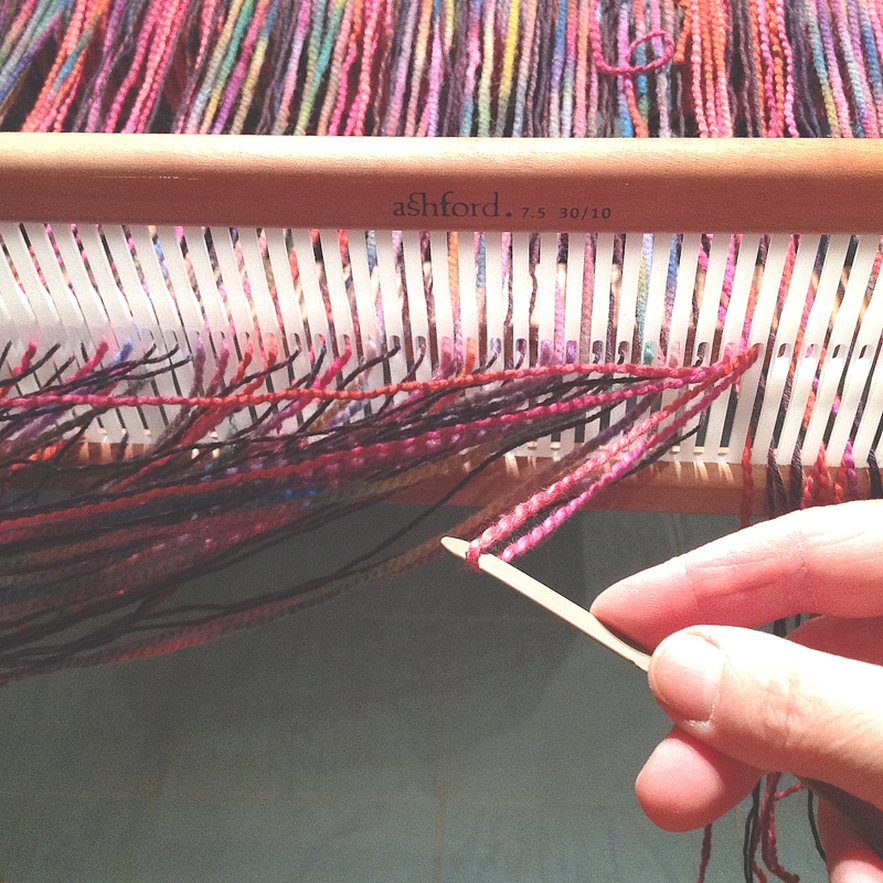 I've continued to thread a slot and an eye, a slot and an eye ... along the length of the reed and I'm almost finished warping! 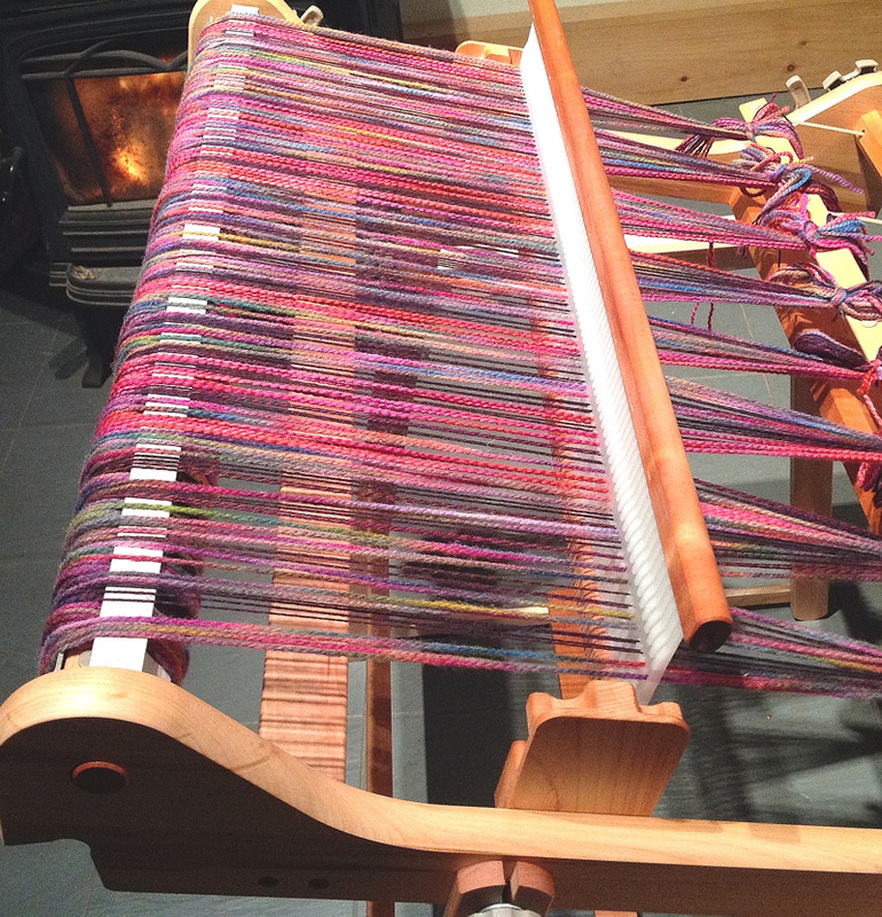 Each warp strand is tied to the loom's front beam and now I'm ready to weave! 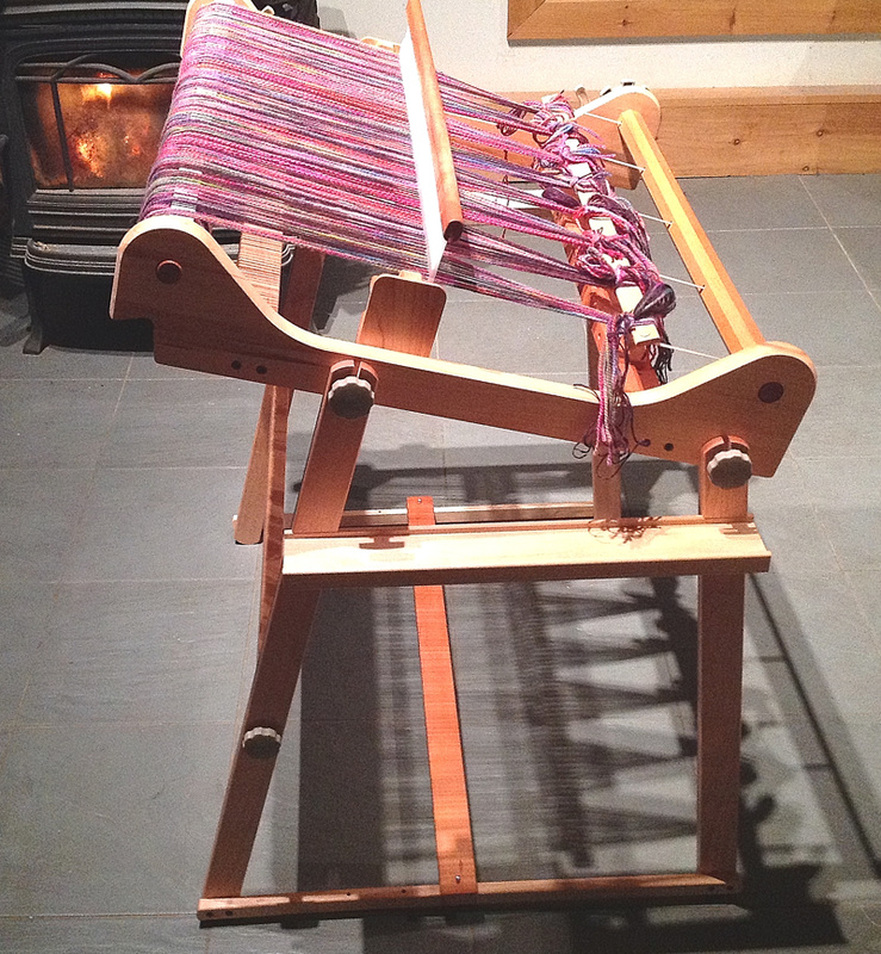 I'm working on a 24" Ashford rigid heddle loom with stand. This is a fantastic size for weaving lengths of cloth to sew, scarves, shawls or double width throws. I love the convenience the this compact little loom affords. 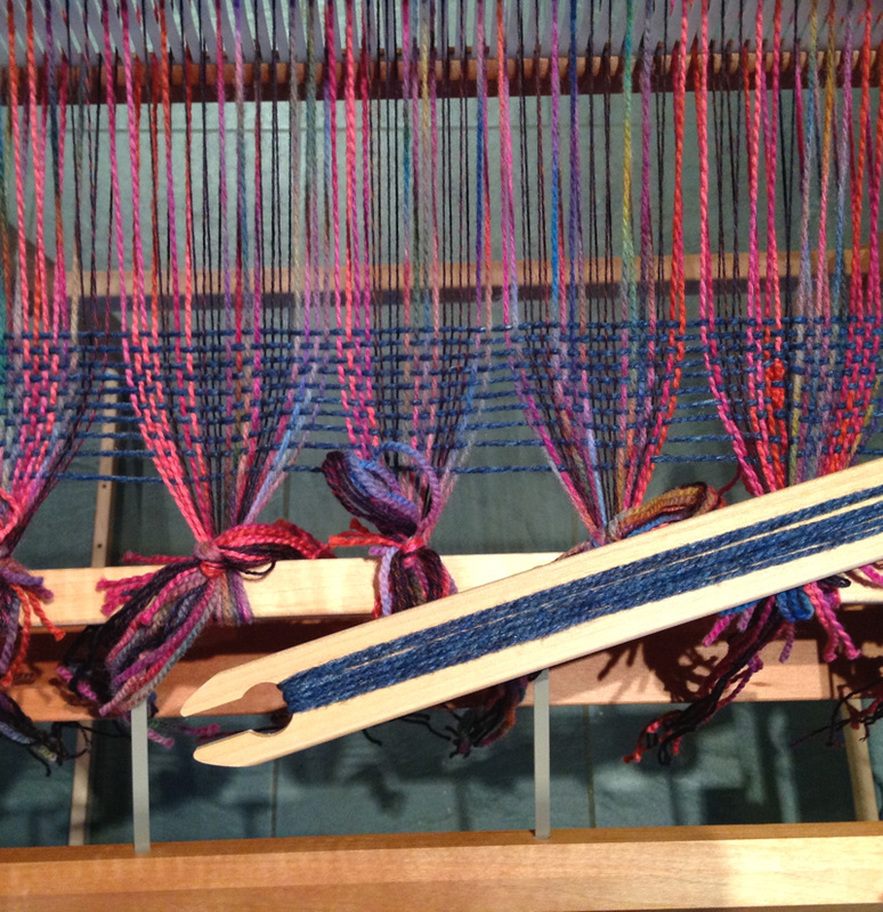 The first of my weaving involves lessening the gaps between those warp threads. I've done this by loading up a flat stick shuttle with a "waste yarn" and passing it back and forth so that the warp is spread. 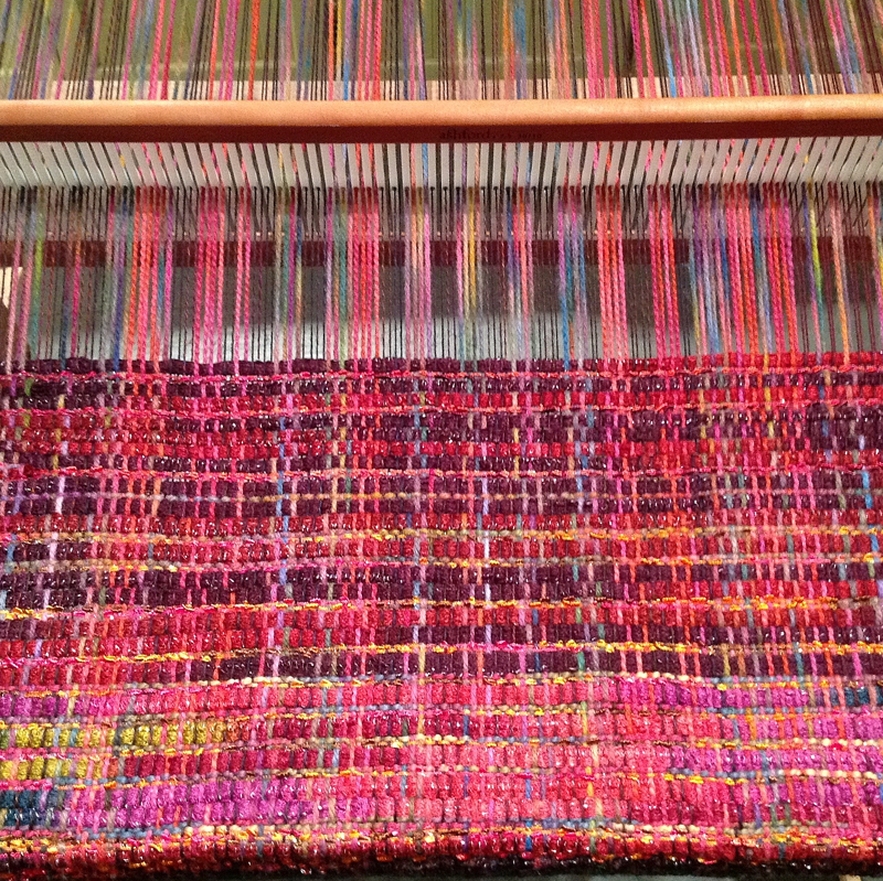 By lifting the looms reed up and pushing the reed down "sheds" or spaces are created through which the shuttle passes back and forth. Each pass lays down another strand of horizontal or warp thread, building the cloth one step at a time. It's this rhythmic, back and forth motion that's more satisfying to me than the cloth itself. Though I do love cloth! 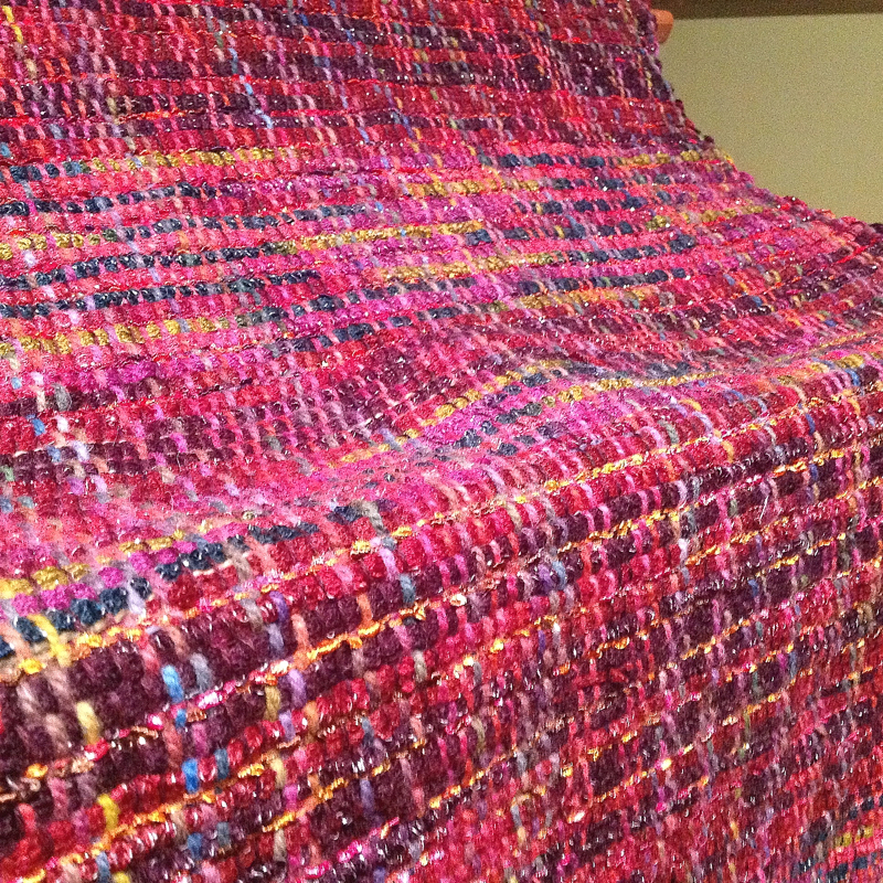 And there you have it. A small snippet from my weekend weaving chronicles. Perhaps weaving is something that you'd like to try? I hope that you've discovered just how doable it can be!
|
WELCOME
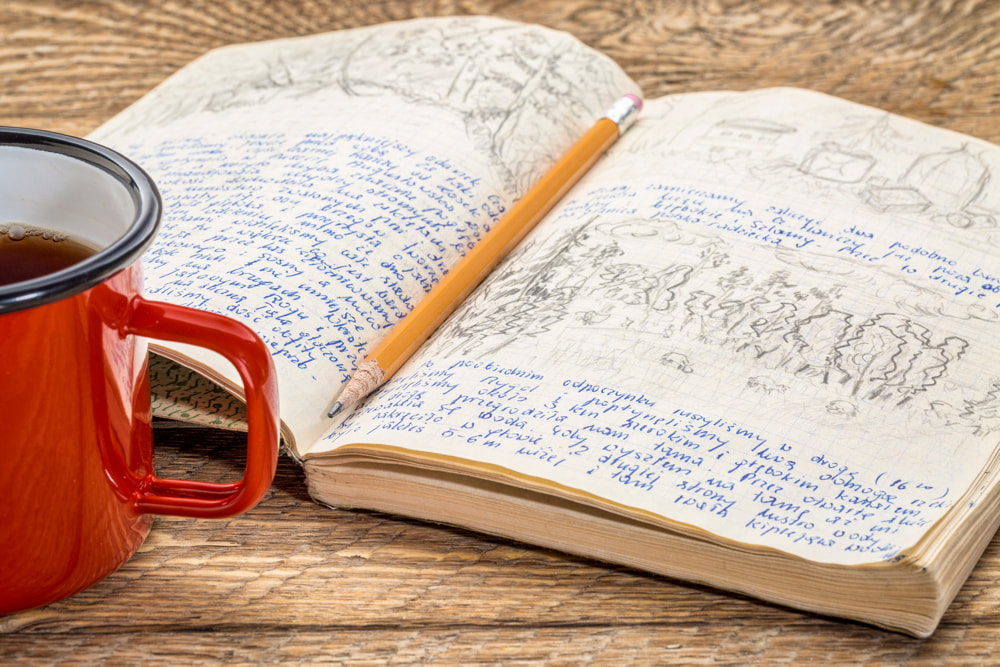
Everyday I try to find a little something that makes life interesting. A good book, a wagging dog, a cool breeze, tea with a friend. Here are my field notes about making, discovering, and enjoying a simple, slow, handmade life. Thanks so much for visiting. I appreciate your spending time with me. xo Heidi 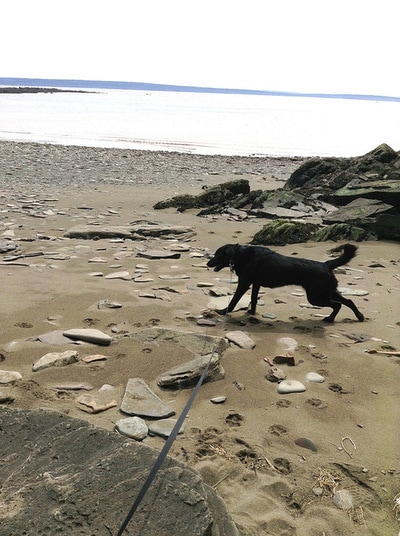


STITCHER, MAKER, DREAMER, BOOK REVIEWS summer 2016 Archives
July 2020
|


|

|

|

|
The content of this site is original and protected under copyright.
All images and text © Heidi Wulfraat WoolWorks Studio
2021 - onwards, all rights reserved.
All images and text © Heidi Wulfraat WoolWorks Studio
2021 - onwards, all rights reserved.